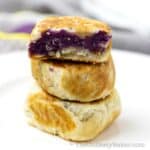
Ube Hopia
Ube hopia is a Filipino treat made of flaky pastry filled with ube or purple yam. You don’t need an oven to make them and they’re easier to make than you think!
Servings: 24 pieces
Calories: 187kcal
Ingredients
First Dough (Flour)
- 2 cups all purpose flour + 2 tbsp
- ½ tsp salt
- ½ cup oil canola or vegetable
- ½ cup water room temperature
Second Dough (Butter)
- 1½ cups all purpose flour
- ½ cup granulated sugar
- ½ cup unsalted butter softened
Filling
- 21 oz ube jam room temperature
Instructions
First Dough (Flour)
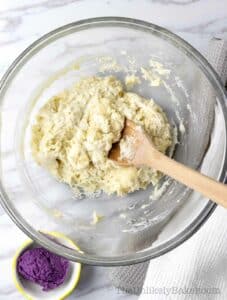
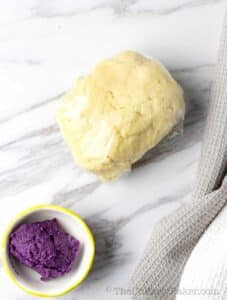
- In a large bowl, combine all ingredients and mix until incorporated. I use a wooden spoon to start, then my hands to finish combining the mixture. Be careful not to over-mix. We’re not looking for a smooth mixture. As soon as the ingredients are blended and come together in a ball, stop mixing.2 cups all purpose flour, ½ tsp salt, ½ cup oil, ½ cup water
- Wrap the dough with plastic wrap and chill in the fridge.
Second Dough (Butter)
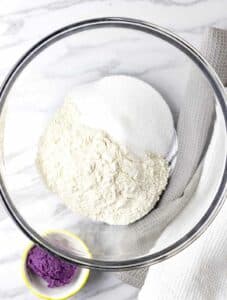
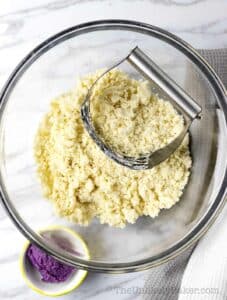
- In another bowl, combine flour and sugar.1½ cups all purpose flour, ½ cup granulated sugar
- Add butter and cut into the flour using a pastry cutter or fork. Once incorporated, finish combining with your hands until it comes together in a ball. Again, we’re not looking for a perfectly smooth mixture here. Careful not to over-mix.½ cup unsalted butter
- Wrap the dough with plastic wrap and chill in the fridge.
Filling
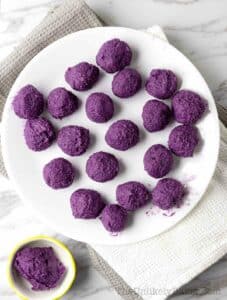
- Scoop your ube filling and roll into 24 balls. For evenly sized filling, weigh each ball and make them the same weight. I usually go for 25 g each.21 oz ube jam
Making the Pastry
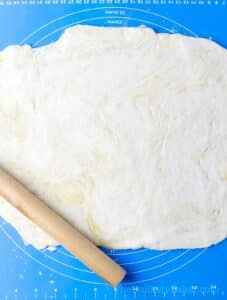
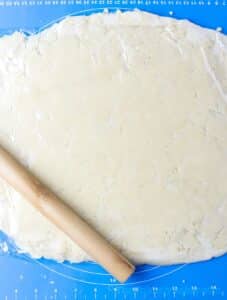
- Place first dough on a lightly floured surface and roll into a rectangle about ½ inch thick.
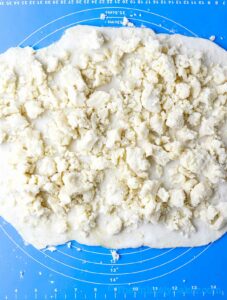
- Crumble the second dough on top of the first dough until the first dough is completely covered.
- Place plastic wrap on top and roll the second dough to flatten and smoothen it.
- Remove plastic wrap, fold your dough lengthwise (left and right) so the edges meet in the middle, then crosswise (up then down).
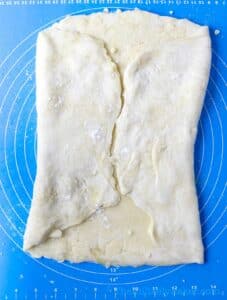
- Roll, flatten then fold again. Repeat this step one more time (for a total of 3 times). This is what gives hopia dough those flaky layers.
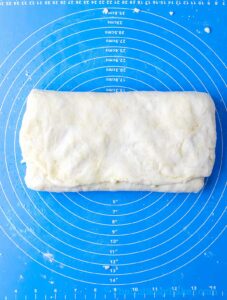
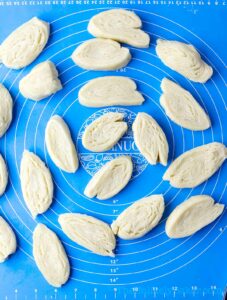
- Once done, roll the dough into a log and slice into 24 pieces. For evenly sized hopia, weigh the dough and divide by 24. The result should be the weight of each piece of dough.
Assembly
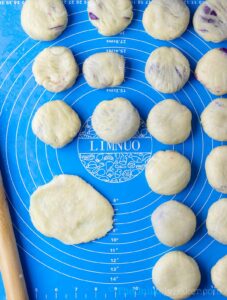
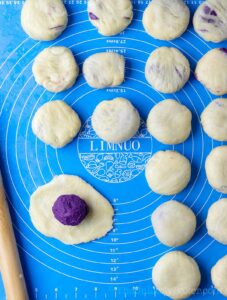
- Carefully roll and flatten each piece of dough into a 2-3 inch diameter circle. Handle gently because the dough will be soft and fragile.
- Place ube filling.
- Wrap the dough around and pinch the edges to seal.
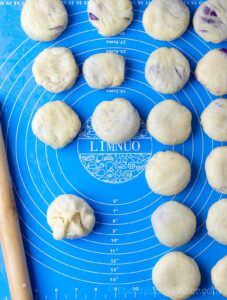
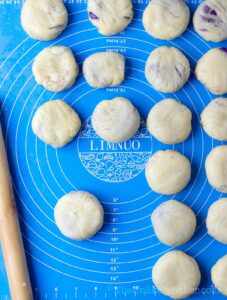
- Roll and shape into a ball, then flatten slightly into a hopia shape. Repeat until you’ve used all your dough and filling.
Cooking
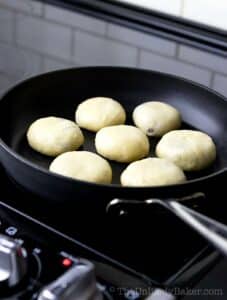
- Using a non-stick pan on medium heat, place hopia on the pan allowing space around each one. Cook until golden brown.
- Flip and cook the other side for another 2-3 minutes.
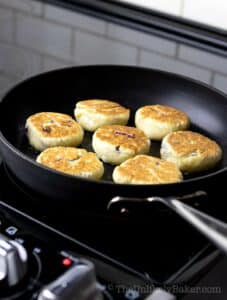
- Once both sides are cooked, flip the hopia again to cook the sides.

- Remove from heat, allow to cool, and serve.
Video
Notes
- If your first dough is too wet, add flour a little at a time until it becomes manageable.
- We want the hopia dough to be flaky so be careful not to over-work it. I don’t recommend using an electric mixer in this recipe.
- For the ube filling, I always use my homemade ube halaya. You can also buy a jar from the store; what’s important is to use ube jam that you enjoy eating on its own.
- I find that it doesn't matter what size pan you use to cook the hopia. What matters is that you don’t crowd the pan when cooking.
- I keep hopia on the counter for up to 2 days. After that I store it in a covered container in the fridge.
- See post for more tips, FAQs and step-by-step photos.
Nutrition
Calories: 187kcal | Carbohydrates: 25g | Protein: 2g | Fat: 9g | Saturated Fat: 3g | Polyunsaturated Fat: 2g | Monounsaturated Fat: 4g | Trans Fat: 0.2g | Cholesterol: 10mg | Sodium: 52mg | Potassium: 223mg | Fiber: 2g | Sugar: 4g | Vitamin A: 152IU | Vitamin C: 4mg | Calcium: 8mg | Iron: 1mg