
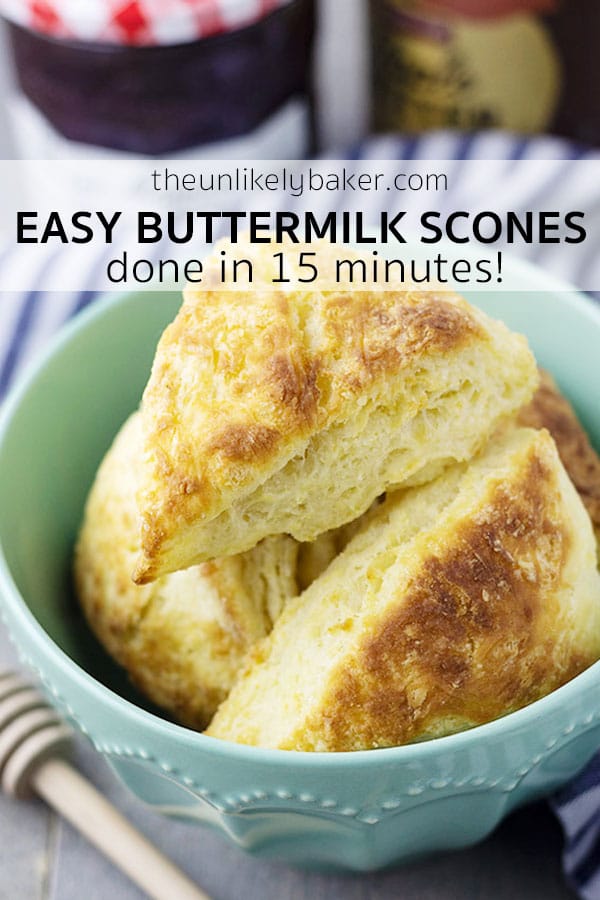
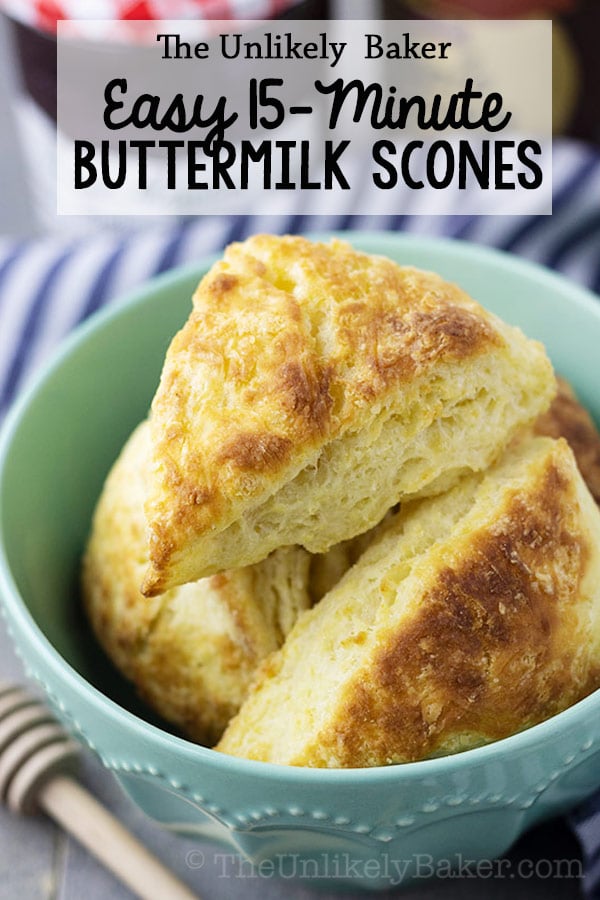
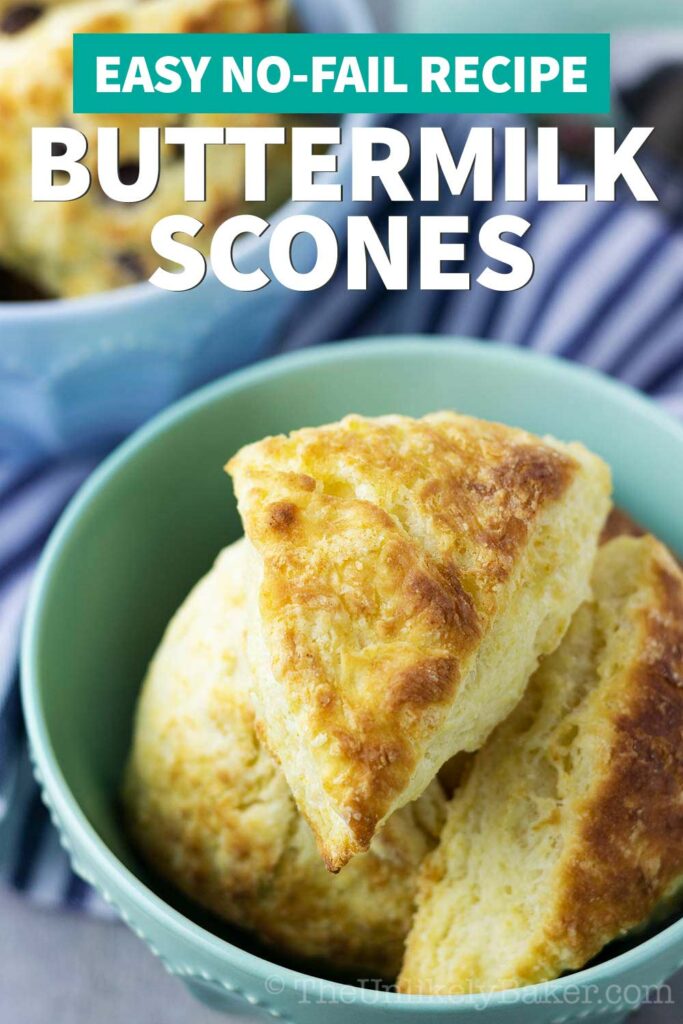
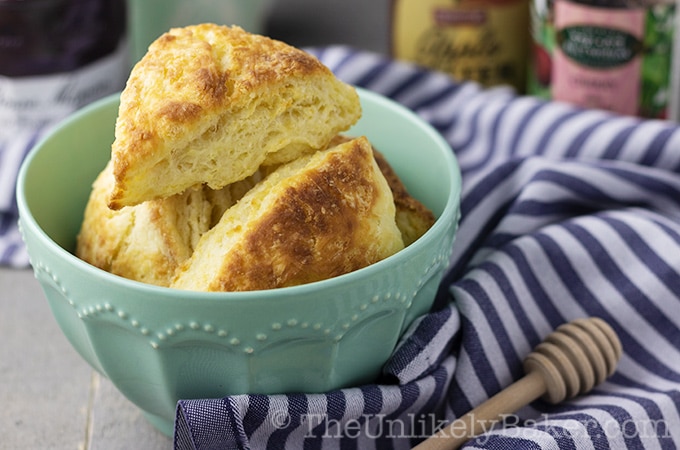
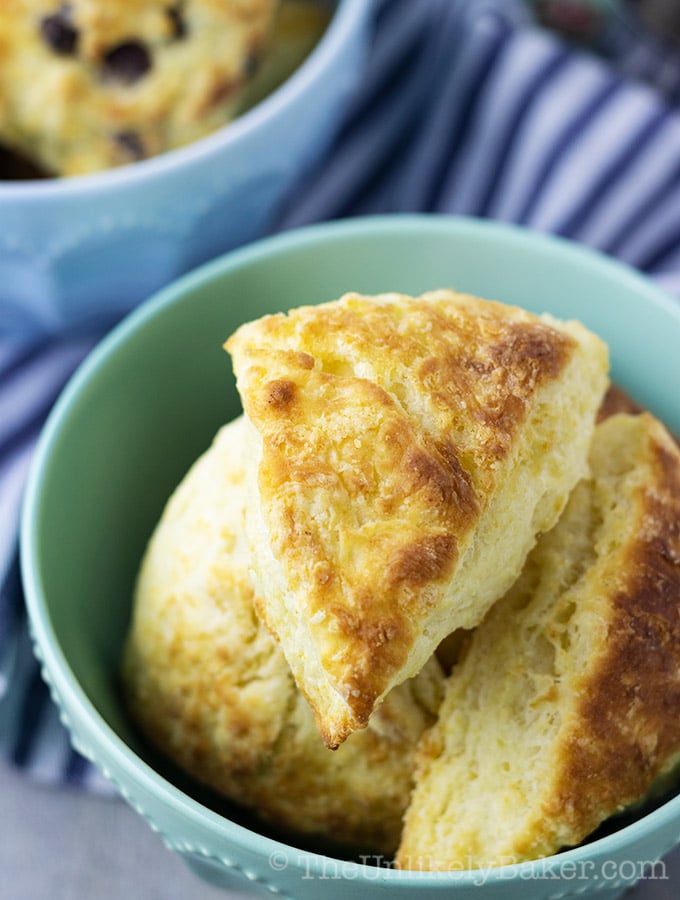
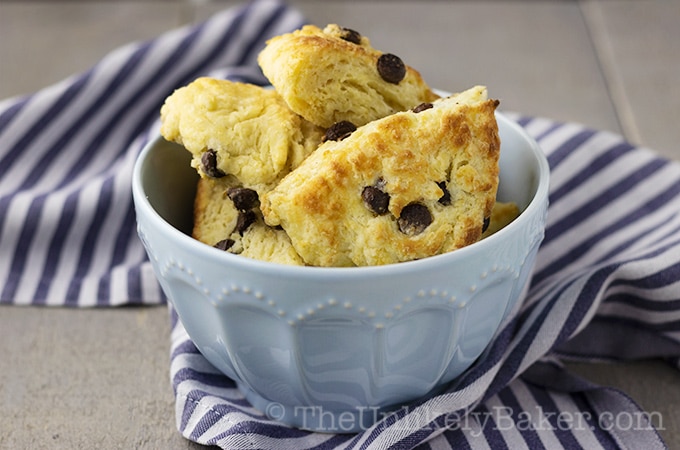
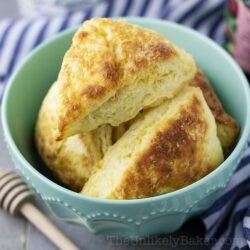
These light, flaky and easy-to-make classic buttermilk scones are perfect with jam, lemon curd or just eaten plain with butter.
(Love scones? Try these Quick & Easy Lemon Buttermilk Scones for something a little lemony!)
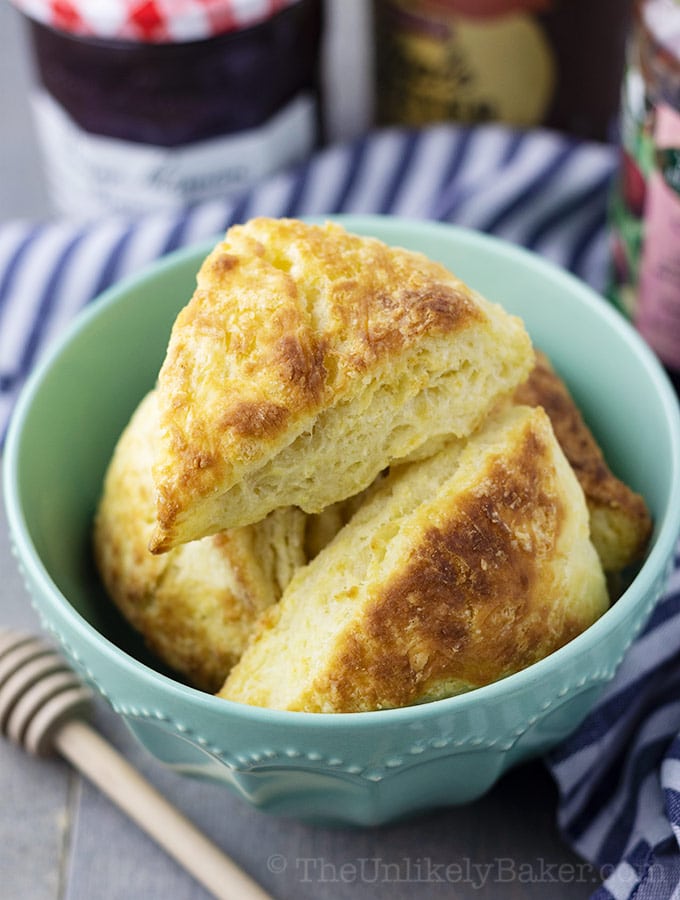
These classic buttermilk scones are a reader favourite. And for good reason! They are quick and easy to make (no special equipment required), delicious (plain or with your favourite jam) and the perfect base for all your scone experiments.
Afternoon Tea Amateurs

I’ve been on a Scone Mission since that one summer we spent at Gravenhurst where we had afternoon tea for the first time. But I’m getting ahead of my story.
There’s this dainty little tea shop by the docks. The outside was painted a pretty blue and it had a very nice view of the lake.
We were hesitant to go in though because it was the middle of summer (who wants to drink tea when it’s 40C/104F out?) and what do you wear to afternoon tea anyway?
We imagined the Queen having afternoon tea but what about us her lowly subjects? We were full-on tourist mode too – shirt, shorts, Birkenstocks.
We went in nonetheless (we were hungry, hunger makes you do things) with no expectations and hoping that they won’t be snooty to us afternoon tea amateurs.
The Scone Mission begins
We were instant fans the moment we stepped in (the A/C was full blast, to start). The staff was warm and friendly, the place bright and smelled of freshly baked bread, and the food delightful.
The scones I especially loved so the moment we got back home my mission started. I’ve tried many different recipes and while they were all okay, this one is the best.
Quick and Easy Classic Buttermilk Scones
First of all, these classic buttermilk scones are so easy to make. You don’t even need an electric mixer. In fact, it’s better if you mix everything by hand so you avoid over-mixing the dough.
To cut the butter into the dough I just use my trusty pastry cutter and blender. If you don’t have one, just use two forks or knives. See here for more tips.
Second, they’re quick to bake – 12-15 minutes in the oven and you’re done. They’re ready for you faster than you can say buttermilk!
Speaking of buttermilk – they’re a great way to use up that extra buttermilk sitting in the fridge (and there’s always extra buttermilk sitting in the fridge).
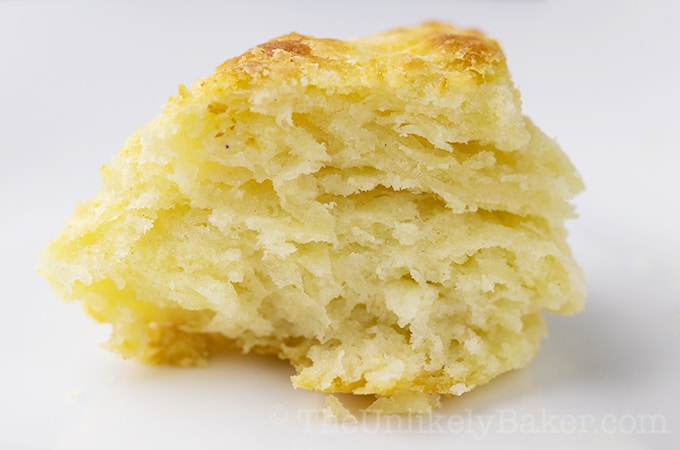
Last but not least, these scones are light and flaky fresh from the oven. They are so good!
We eat them plain, with butter, with our favourite jam, with my homemade lemon curd, mango curd or my rhubarb compote.
And making this fills your kitchen with that lovely freshly baked bread smell that’s hard to beat.
Related: 22 Delicious Ways to Use Leftover Buttermilk
The Secret to Extra Flaky Scones
I have made these scones so many times I’ve lost count and have stuck to my original recipe ever since. Except for one tiny, but magic, change.
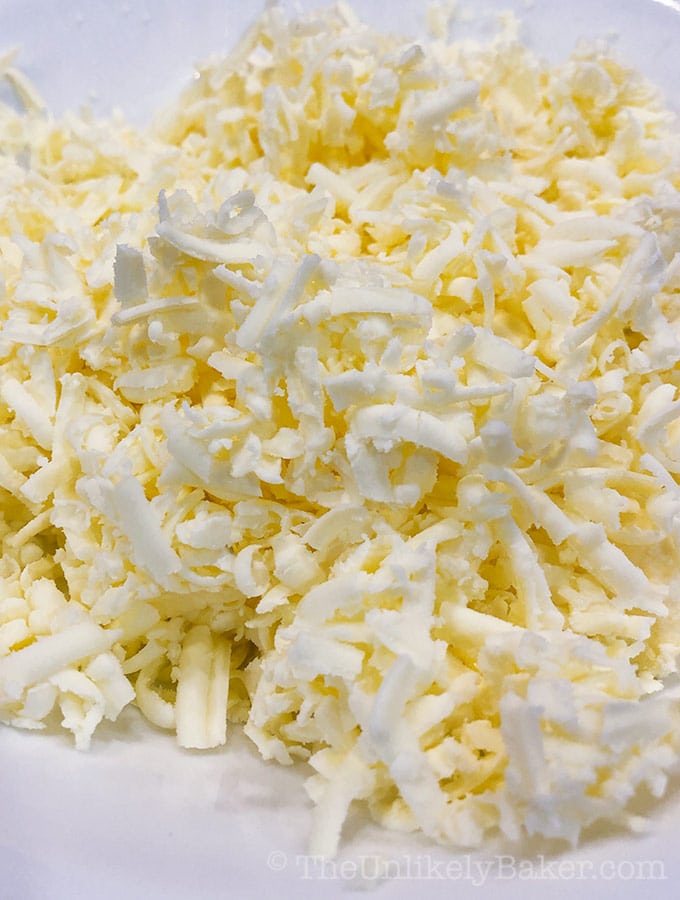
Instead of cold and cubed butter, I started using frozen grated butter.
What you do is freeze the butter at least half an hour before. Then grate it (I use a boxed cheese grater). Put the grated butter back in the freezer while you prep everything else.
This tiny change results to flakier scones and while grating the butter is admittedly a little extra work, perfectly flaky scones are worth it (I recommend these kind of gloves, saved my hand from the grater so many times!).
How to Freeze Scones
Another wonderful thing about this recipe is that the scones freeze beautifully.
This batch makes 16 small scones (about the size of a standard dinner roll) so whatever we don’t finish, we freeze (just put in a Ziploc bag and straight into the freezer). No need to thaw when you want to have one either.
Just pop it in the microwave for about 30 seconds and it’s done. It’s going to be more cakey than flaky at this point but still good.
They stay fresh for about two weeks frozen. Can’t be sure if they’re good longer than that because at this point we’ve already eaten every last one!
Related: Banana Buttermilk Pancakes with Candied Walnuts
How to Make Perfect Buttermilk Scones
And just when you think you couldn’t love these scones more – these classic buttermilk scones are also a great base for your other favourite ingredients so you can make a perfect batch of scones just just the way you like them. All you need to do is add ½ to ¾ cup of mix-ins to the dough before you knead it.
So far I’ve added dried cranberries, dried blueberries and chocolate chips.
Just make sure to adjust the sugar content – I usually put a little less sugar when I make these variations so they don’t end up being too sweet.
So go ahead. Make your own scones and have afternoon tea at home anytime. Doesn’t even have to be in the afternoon. Doesn’t even have to involve tea. Just eat the scones whenever and however way you like. No judgements.
Mother’s Day is slowly creeping up on us too and this is an awesome addition to your brunch (or, yes, afternoon tea) spread.
Happy baking!
Did you make these classic buttermilk scones? Tell me about it in the comments section below. I’d love to hear all about it.
Classic Buttermilk Scones
Ingredients
- 3 cups all-purpose flour
- ⅓ cup granulated sugar
- 1 tsp salt
- 2 ½ tsp baking powder
- ½ tsp baking soda
- ¾ cup unsalted butter frozen and grated (see post)
- 1 cup buttermilk
Instructions
- Preheat oven to 400F. Lightly grease baking pan (I use 1 large cookie sheet, you may need to use 2 depending on how big your pan is) and set aside.
- In a large bowl, combine 3 cups flour, ⅓ cup sugar, 1 teaspoon salt, 2 ½ teaspoons baking powder and ½ teaspoon baking soda.
- Add the ¾ cup butter and cut with a pastry cutter or a fork until the mixture looks coarse (you should see pieces of butter/flour “balls” about the size of chickpeas).
- Make a well in the middle and add 1 cup buttermilk. Mix until just combined. Don’t over mix. Now is the time to add chocolate chips or other goodies, if using.
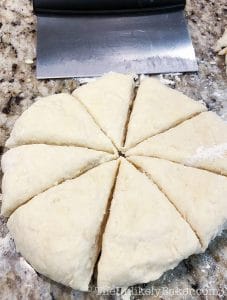
- Transfer the dough to a floured surface and divide into 2 equal parts. Lightly knead each into ¾ inch thick, 6-inch diameter rounds. Cut each round into 8 wedges and place on your prepared baking pans. Space them out evenly, about 2 inches apart.

- Bake for 12-15 minutes or until lightly browned. Each oven is different and they brown pretty quickly so watch the oven (don’t leave!).
- Take out of the oven and serve warm.
Video
Nutrition
Nutritional information are estimates only.
Leave a Reply