
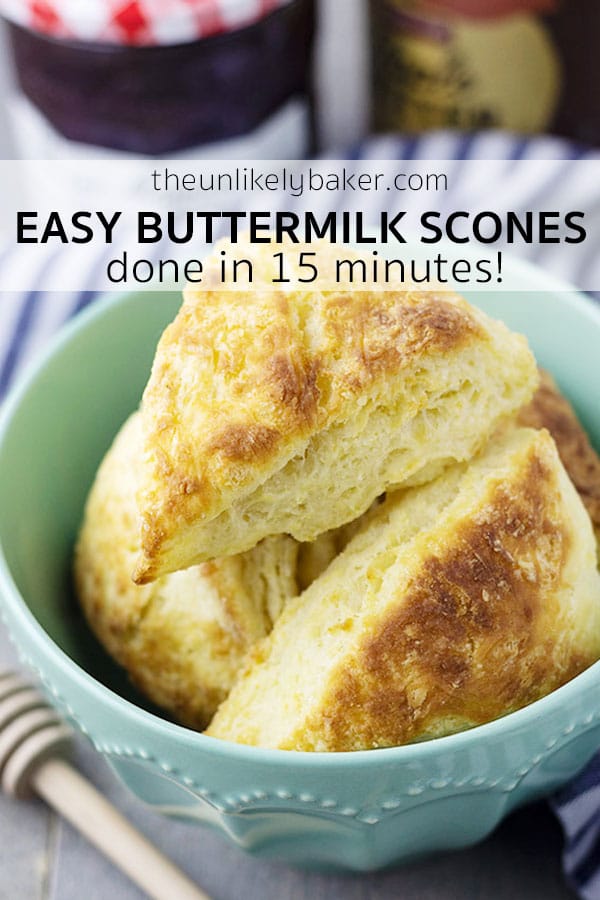
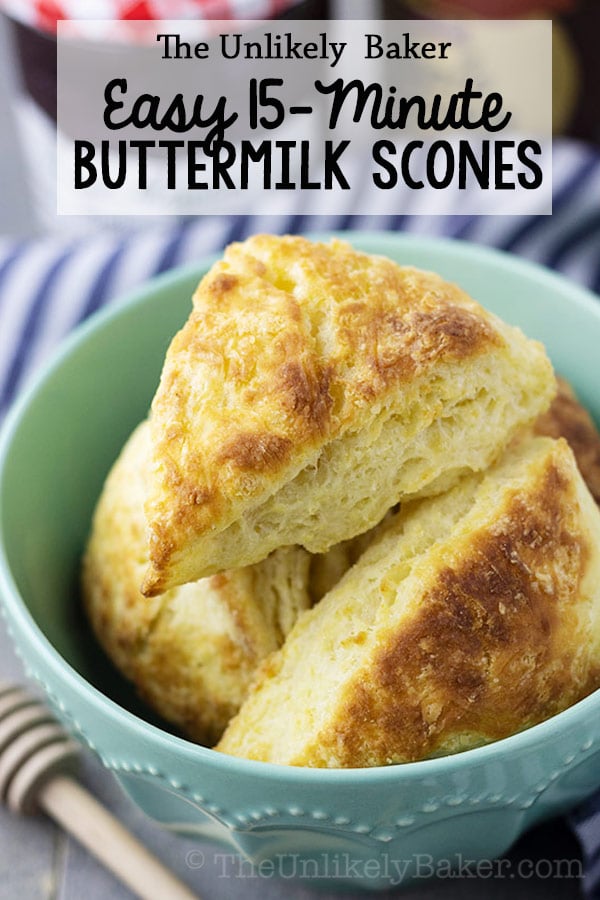
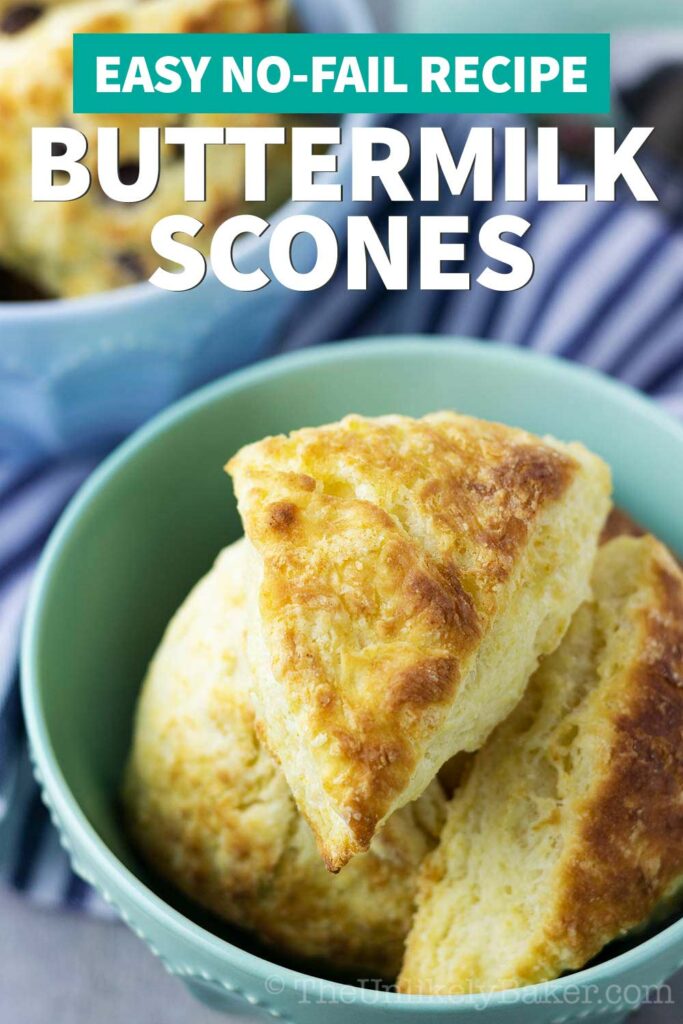
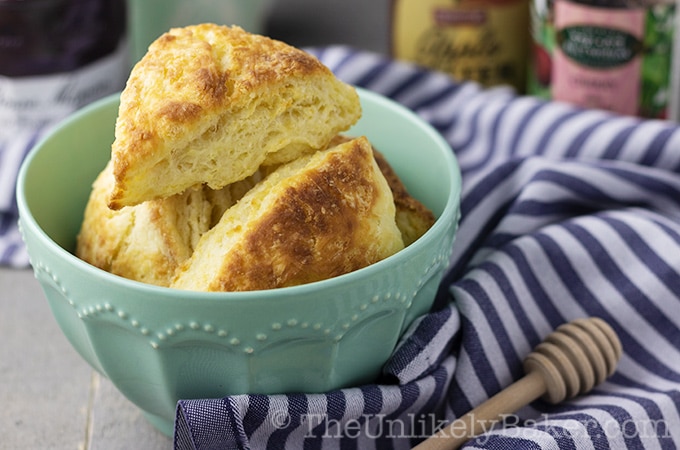
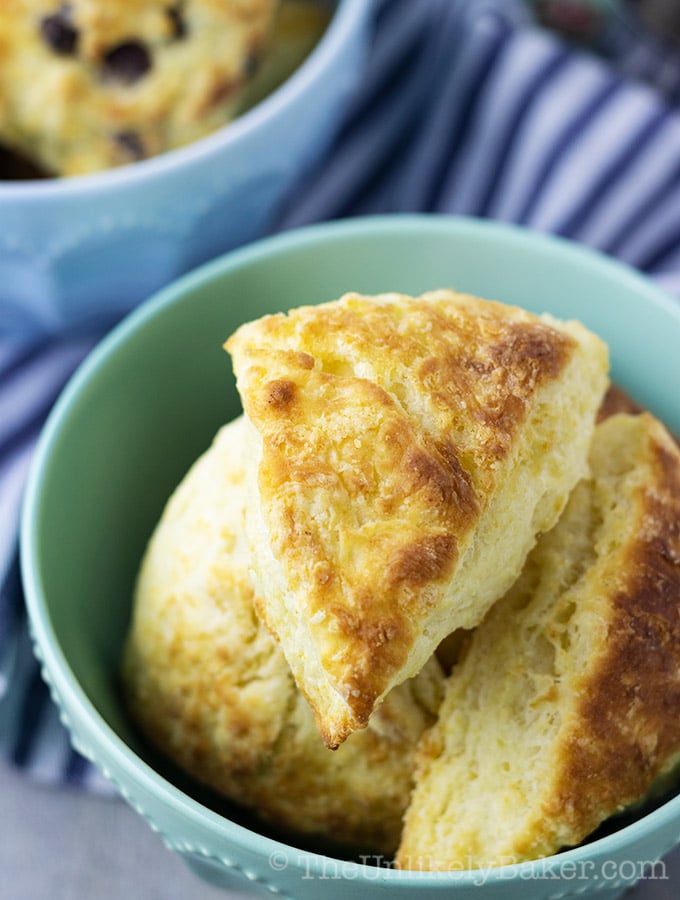
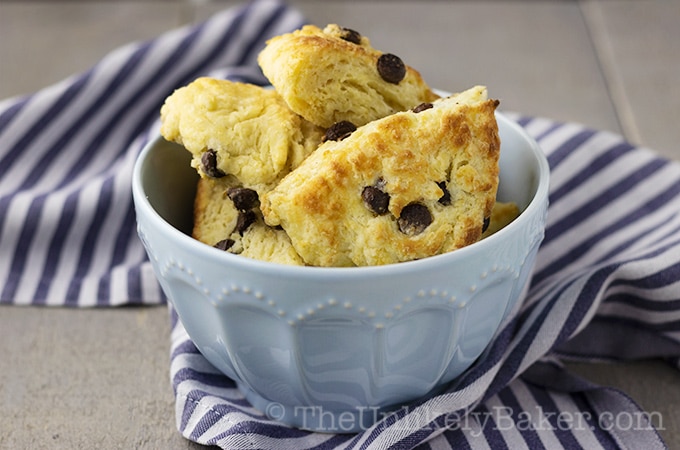
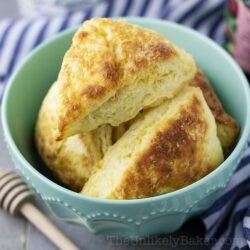
These light, flaky and easy-to-make classic buttermilk scones are perfect with jam, lemon curd or just eaten plain with butter.
(Love scones? Try these Quick & Easy Lemon Buttermilk Scones for something a little lemony!)
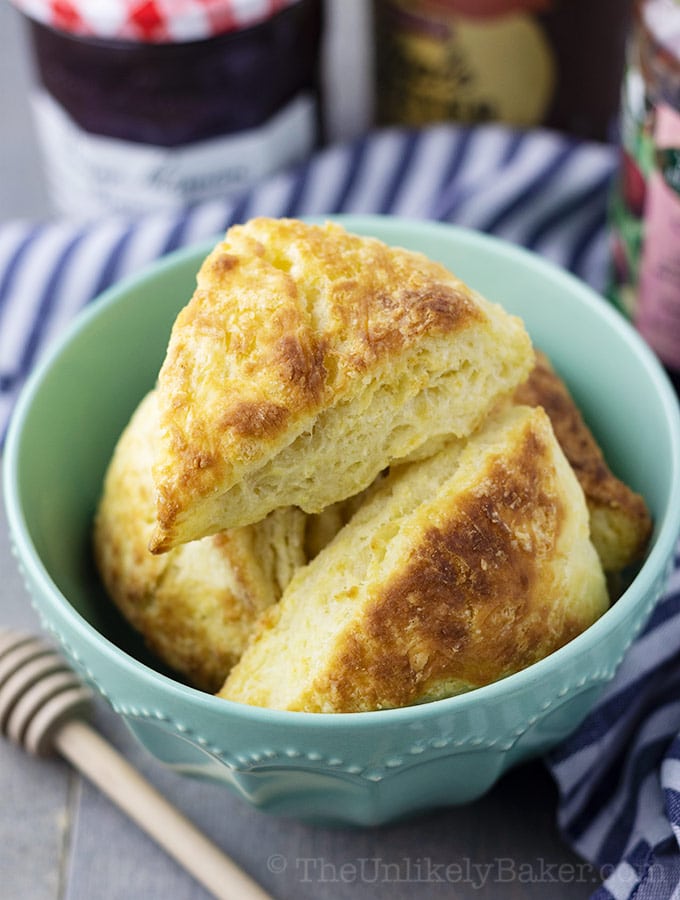
These classic buttermilk scones are a reader favourite. And for good reason! They are quick and easy to make (no special equipment required), delicious (plain or with your favourite jam) and the perfect base for all your scone experiments.
Afternoon Tea Amateurs

I’ve been on a Scone Mission since that one summer we spent at Gravenhurst where we had afternoon tea for the first time. But I’m getting ahead of my story.
There’s this dainty little tea shop by the docks. The outside was painted a pretty blue and it had a very nice view of the lake.
We were hesitant to go in though because it was the middle of summer (who wants to drink tea when it’s 40C/104F out?) and what do you wear to afternoon tea anyway?
We imagined the Queen having afternoon tea but what about us her lowly subjects? We were full-on tourist mode too – shirt, shorts, Birkenstocks.
We went in nonetheless (we were hungry, hunger makes you do things) with no expectations and hoping that they won’t be snooty to us afternoon tea amateurs.
The Scone Mission begins
We were instant fans the moment we stepped in (the A/C was full blast, to start). The staff was warm and friendly, the place bright and smelled of freshly baked bread, and the food delightful.
The scones I especially loved so the moment we got back home my mission started. I’ve tried many different recipes and while they were all okay, this one is the best.
Quick and Easy Classic Buttermilk Scones
First of all, these classic buttermilk scones are so easy to make. You don’t even need an electric mixer. In fact, it’s better if you mix everything by hand so you avoid over-mixing the dough.
To cut the butter into the dough I just use my trusty pastry cutter and blender. If you don’t have one, just use two forks or knives. See here for more tips.
Second, they’re quick to bake – 12-15 minutes in the oven and you’re done. They’re ready for you faster than you can say buttermilk!
Speaking of buttermilk – they’re a great way to use up that extra buttermilk sitting in the fridge (and there’s always extra buttermilk sitting in the fridge).
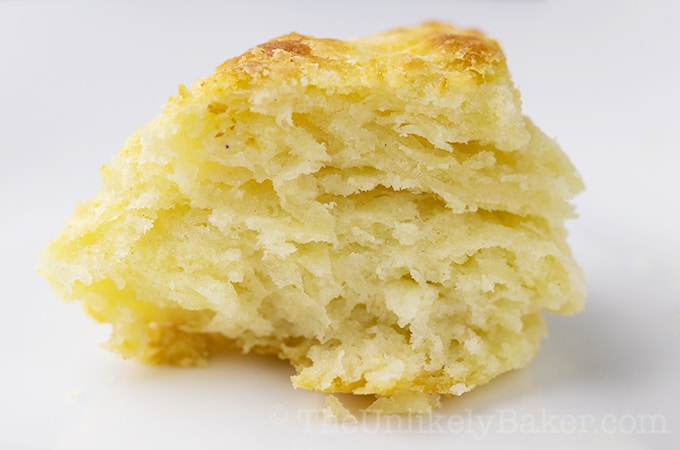
Last but not least, these scones are light and flaky fresh from the oven. They are so good!
We eat them plain, with butter, with our favourite jam, with my homemade lemon curd, mango curd or my rhubarb compote.
And making this fills your kitchen with that lovely freshly baked bread smell that’s hard to beat.
Related: 22 Delicious Ways to Use Leftover Buttermilk
The Secret to Extra Flaky Scones
I have made these scones so many times I’ve lost count and have stuck to my original recipe ever since. Except for one tiny, but magic, change.
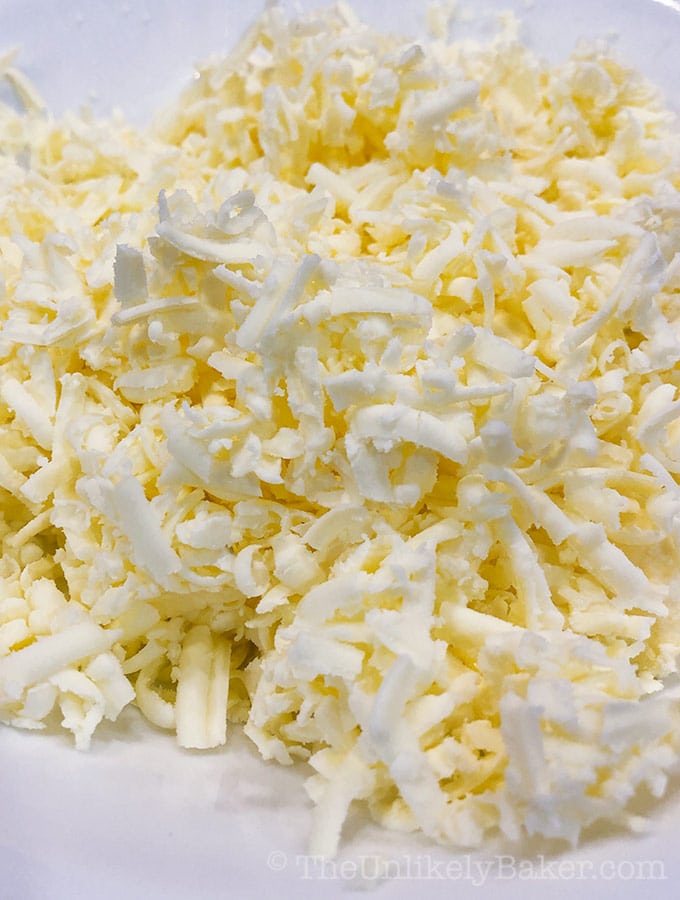
Instead of cold and cubed butter, I started using frozen grated butter.
What you do is freeze the butter at least half an hour before. Then grate it (I use a boxed cheese grater). Put the grated butter back in the freezer while you prep everything else.
This tiny change results to flakier scones and while grating the butter is admittedly a little extra work, perfectly flaky scones are worth it (I recommend these kind of gloves, saved my hand from the grater so many times!).
How to Freeze Scones
Another wonderful thing about this recipe is that the scones freeze beautifully.
This batch makes 16 small scones (about the size of a standard dinner roll) so whatever we don’t finish, we freeze (just put in a Ziploc bag and straight into the freezer). No need to thaw when you want to have one either.
Just pop it in the microwave for about 30 seconds and it’s done. It’s going to be more cakey than flaky at this point but still good.
They stay fresh for about two weeks frozen. Can’t be sure if they’re good longer than that because at this point we’ve already eaten every last one!
Related: Banana Buttermilk Pancakes with Candied Walnuts
How to Make Perfect Buttermilk Scones
And just when you think you couldn’t love these scones more – these classic buttermilk scones are also a great base for your other favourite ingredients so you can make a perfect batch of scones just just the way you like them. All you need to do is add ½ to ¾ cup of mix-ins to the dough before you knead it.
So far I’ve added dried cranberries, dried blueberries and chocolate chips.
Just make sure to adjust the sugar content – I usually put a little less sugar when I make these variations so they don’t end up being too sweet.
So go ahead. Make your own scones and have afternoon tea at home anytime. Doesn’t even have to be in the afternoon. Doesn’t even have to involve tea. Just eat the scones whenever and however way you like. No judgements.
Mother’s Day is slowly creeping up on us too and this is an awesome addition to your brunch (or, yes, afternoon tea) spread.
Happy baking!
Did you make these classic buttermilk scones? Tell me about it in the comments section below. I’d love to hear all about it.
Classic Buttermilk Scones
Ingredients
- 3 cups all-purpose flour
- ⅓ cup granulated sugar
- 1 tsp salt
- 2 ½ tsp baking powder
- ½ tsp baking soda
- ¾ cup unsalted butter frozen and grated (see post)
- 1 cup buttermilk
Instructions
- Preheat oven to 400F. Lightly grease baking pan (I use 1 large cookie sheet, you may need to use 2 depending on how big your pan is) and set aside.
- In a large bowl, combine 3 cups flour, ⅓ cup sugar, 1 teaspoon salt, 2 ½ teaspoons baking powder and ½ teaspoon baking soda.
- Add the ¾ cup butter and cut with a pastry cutter or a fork until the mixture looks coarse (you should see pieces of butter/flour “balls” about the size of chickpeas).
- Make a well in the middle and add 1 cup buttermilk. Mix until just combined. Don’t over mix. Now is the time to add chocolate chips or other goodies, if using.
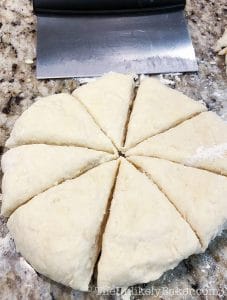
- Transfer the dough to a floured surface and divide into 2 equal parts. Lightly knead each into ¾ inch thick, 6-inch diameter rounds. Cut each round into 8 wedges and place on your prepared baking pans. Space them out evenly, about 2 inches apart.

- Bake for 12-15 minutes or until lightly browned. Each oven is different and they brown pretty quickly so watch the oven (don’t leave!).
- Take out of the oven and serve warm.
Video
Nutrition
Nutritional information are estimates only.
Tiffany
Love this recipe and have made it many times. A local bakery is famous for theirs and charges $5 for one scone. This recipe rivals theirs, and friends and family are happy to have heavier wallets! Anyhoooo- I use the butter grating method but grate very cold refrigerated butter onto a sheet pan with parchment and then freeze. Grates much faster with less chance of slippage and permanent scarring.You can do extra and store in a freezer bag for next time, too. Also put scones in the fridge for a half hour prior to baking. Have to up the baking time a bit, but cold is the key! So easy to be creative with all kinds of mix ins, flavorings, zests, etc. I do sub a little of the buttermilk with -fill in the blank- juice when doing fruit versions. Doesn’t seem to change the texture and enhances flavor.
Jolina
That’s awesome Tiffany! And thank you for sharing your tips! 🙂
Nora
This was so good that I ate two in a row before anyone else even got home. It’s a bummer they won’t try them fresh: they’re devine!
Jolina
LOL that happens to me all the time! Glad you like them Nora 🙂
Stephanie
Can you add blueberries or other fruit to them? If so, do you need to make any changes to the recipe?
Jolina
Hi Stephanie, yes you can. And no, you don’t need to change anything. A lot of bakers shared their tips and variations in the comments, definitely worth a look 🙂 Happy baking!
Phyllis Corella
Best scones I ever made and best I ever tasted. Stuck strictly to the recipe. I might add that I culture my own buttermilk. Way better than store bought. This will be my go to recipe for scones. thanks for sharing.
Jolina
That’s great Phyllis!
Jody
I followed the recipe exactly as written. I added some raisins. A pool of butter formed on the pan during baking. The texture of the cooked scones wasnt that appealing. I’ve made many scones in my day and this isnt one I’ll make again.
Jolina
Hi Jody, maybe the butter wasn’t cold enough when you added it in? In any case, thanks for trying the recipe! This is a reader favorite so I encourage you to read through the comments for some tips and tricks other bakers have shared.
Kay Jay
Made these yesterday – they were perfect! It was my first time making scones and I loved using this recipe. Can’t wait to add toppings next time. Thank you for such a great recipe!
Jolina
You’re most welcome Kay Jay! Happy baking 🙂
Nan
Love these scones!!!
Pam
Just made these this morning! I added a cup of mini chocolate chips. I did need to add just a touch more buttermilk and bake them a couple of minutes longer, but my oven has a mind of its own so I always have to adjust time. I ended up forming two disks and cut each one into 8 wedges. Before popping them in the oven, I brushed each with buttermilk and sprinkled with crystal sugar. They were delish. I loved the texture. The directions were very clear. I buy buttermilk regularly and I love having another recipe to use it in! Thank you!
Jolina
Those sound delicious Pam! 🙂
Anna
If I were to use a round cutter for these, about how big should the cutter be? I have some lovely fluted cutters that I’ve been dying to use.
Jolina
Hi Anna, I use round cookie cutters in my lemon buttermilk scones recipe.They’re 2 to 3-inches in diameter. Enjoy!
Ro
I just pulled a batch from the oven and they look beautiful. I used homemade Kefir instead of buttermilk. I can’t wait for my family to top these with homemade clotted cream and black currant jam. I did make them round like I had in the UK. These are so much better than the scones you buy in the US bakeries and coffee shops.
Jolina
Hi Ro, it is, isn’t it? 🙂 Enjoy! And thanks for sharing that kefir works too.
Anitra
The recipe states “Don’t over mix”. I had to knead to get the dry mixed in. I think they turned out good but wonder if I hadn’t kneaded would they be better and how to accomplish that?
Ideas?
Pridelha
Used the same ingredients and measurements and they turned out divine. Thought I would need more buttermilk as per the comments but 1 cup was perfect. It’s become my new go to scone recipe. Thank you for the great recipe.
Jolina
That’s awesome Pridelha! Happy baking 🙂
Julie Lavery
The best scones recipe I’ve tried. I add a cup of grated cheese to mine, sometimes a cup of dried cranberries and then drizzle with white choc. Love them, a keeper for sure
Jolina
Hi Julie, that sounds like the perfect holiday scone 🙂
EJ
Had to add a touch more buttermilk
But it works!
Jolina
Glad you liked them EJ!
Essexgirl
Yes, me too, and they took a few minutes longer to bake but tasted great!
BP
Very nice. I bought buttermilk by mistake (meant do be custard, haha)
Anyway, used metric for accuracy. Needed to add much more liquid to get right
consistency. Frozen butter used. Towards end, added grated tasty cheese to
half the mixture. Delicious
Jolina
Glad you liked them!
Julie Lavery
Best recipe ever! I’ve used cheese, cranberries, choc chips, raisins and more. Like making different varieties, the cranberry ones I drizzle white choc, everyone loves them. Thanks for sharing. Oh, I add 3/4 cup of what I’m adding.
Jolina
The cranberry ones sound perfect for the holidays! Thanks for sharing your tips Julie 🙂
Mary
I made these tonight. I added lemon zest, lemon juice, and frozen blueberries. Once cooled I drizzled glaze on them, made with powdered sugar and lemon juice. Heavenly!! I’ve been looking for a go to scone recipe that I can count on. This is it!!
Jolina
Yay! Glad you found your go-to recipe, Mary 🙂
Jean Davis
Nice scone recipe. Added froze red currants from my garden and a touch of cinnamon.
Le-Anne Weatherbee
These were a success! I took your previous comments to heart and added ginger, cloves and raisins, then sprinkled vanilla sugar on them when they came out of the oven. Sooo great!
Jolina
Glad you liked them Le-Anne!
Jade
Made these for the 1st – altered for high altitude (6900’) – added extra 1 heaping tablespoon of flour, ~1-2 extra tablespoons of buttermilk as quite a bit of dry mixture wasn’t sticking to dough, used cheese grater method for frozen butter and grated directly into bowl, cut recipe in half (there were only 2 of us) and added 1/2 cup chopped walnuts and 1 tablespoon of real maple syrup in with buttermilk. I could have added more! Delicious! Thanks for great recipe!