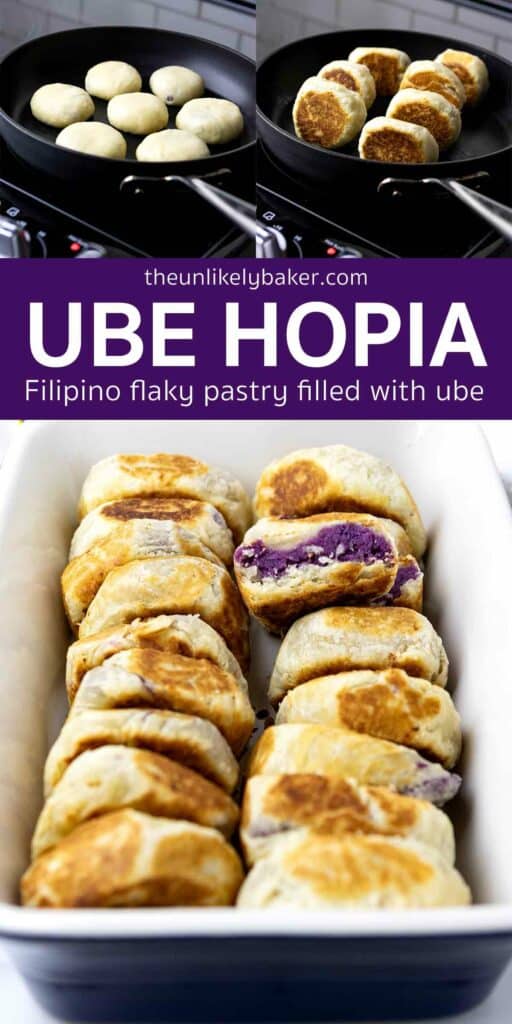
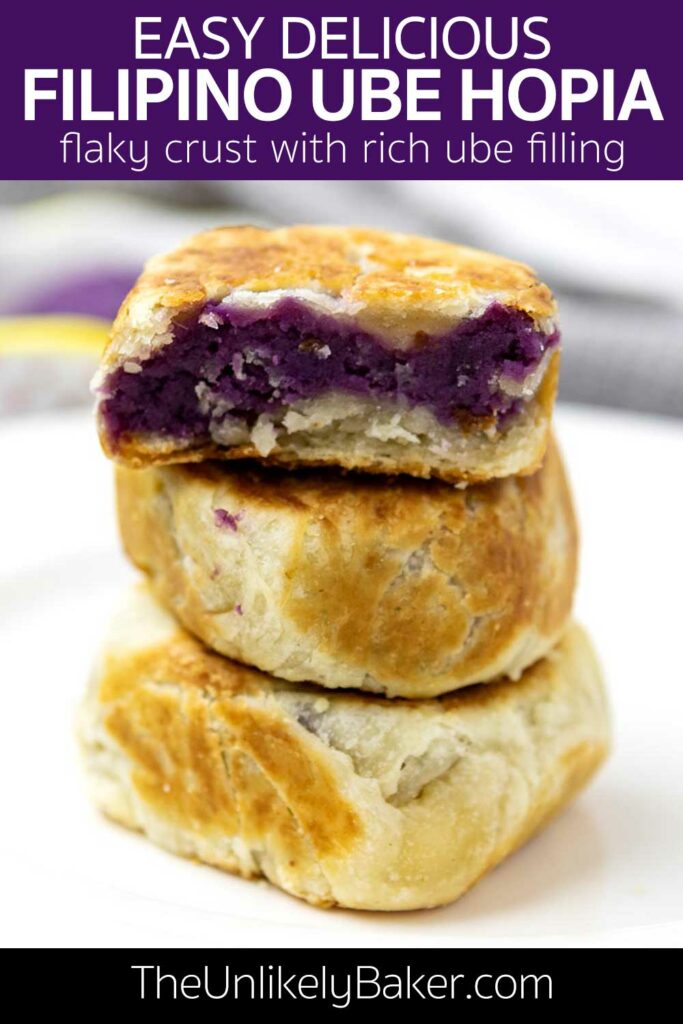
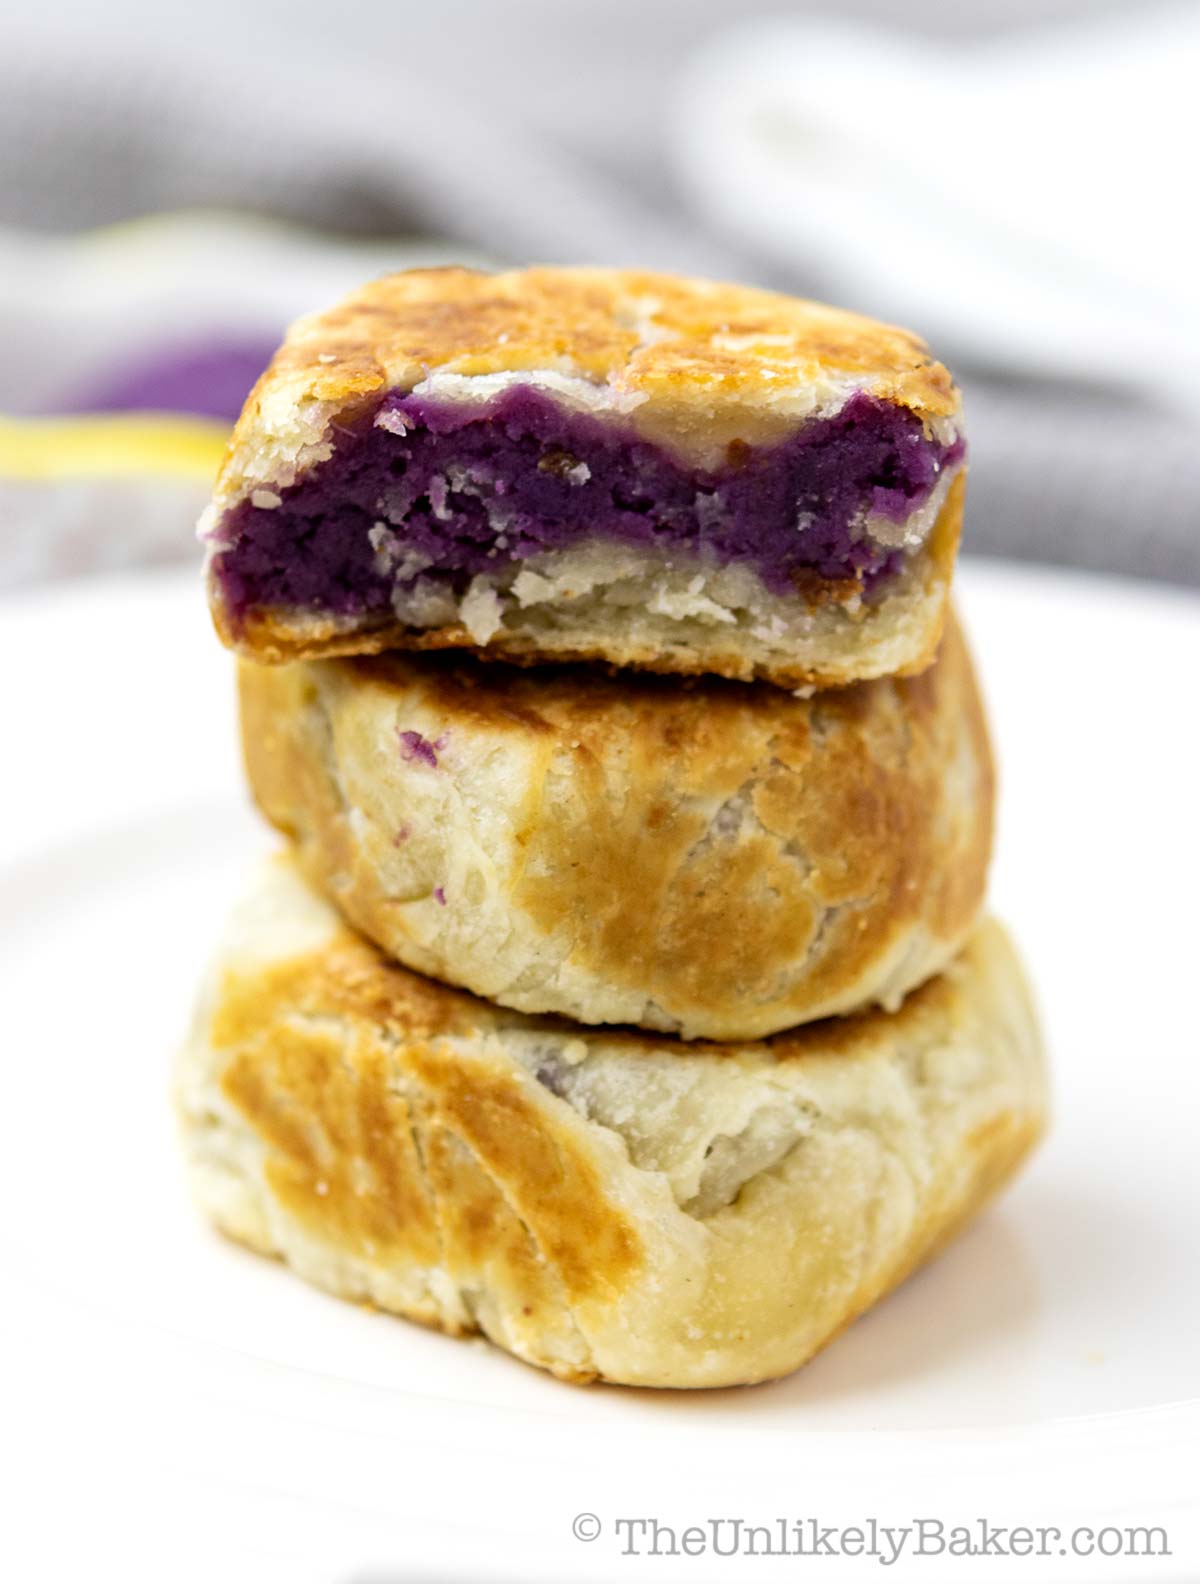
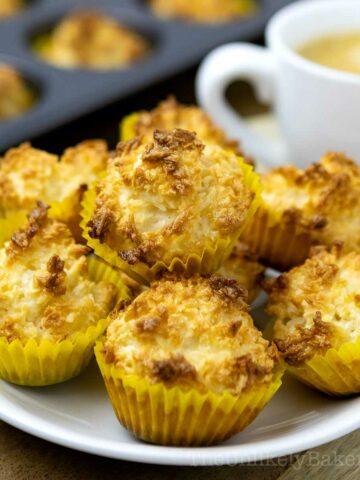
Ube hopia is a Filipino treat made of flaky pastry filled with ube or purple yam. You don’t need an oven to make them and they’re easier to make than you think! Plus, homemade hopia is so much more delicious than what you can get in stores. Check out the recipe with lots of tips and FAQs for perfect hopiang ube every time.
(Craving for more Filipino delicacies? Check out this list of must-try Filipino bread recipes and learn how to make your panaderia favorites at home).
Hopia is a popular Filipino snack or merienda.
It’s a kind of pastry that’s usually filled with mung bean paste (hopia monggo) or winter melon (kundol) and pork fat (hopia baboy), though you can buy so many different flavors now, even ones filled with Nutella and pineapple.
True to character, the hopia recipe I have for you today is for hopiang ube, or hopia filled with ube or purple yam.
Let’s get to it.
Why you’ll love making them

Frankly, never in my wildest dreams did I ever think I would be making hopia one day.
It always seemed to be one of those things that’s easier to buy from Goldilocks or Eng Bee Tin.
However, ube hopia is not widely available where I am and the ones I can find are not that great. So here we are and I’m thrilled that I know how to make them now.
And they’re so much easier to make than you think! I hope you love making this hopia ube recipe too.
- Simple and easy. There are many steps but each one is easy and simple to follow. I break them down into small manageable parts to make prepping a breeze.
- No need to bake. While other recipes bake hopia, mine does not. We’ll cook hopia on a stovetop.
- Freezes well. You can make a big batch today, freeze, then thaw when the craving hits.
- Delicious. Perfectly flaky pastry, delicious ube filling, so good! Perfect for merienda, potluck, with coffee, or place them in a nice box and give them out to family and friends.
How to make
To achieve that flaky pastry that hopia is known for, you’ll need to prepare two kinds of dough. Don’t worry, making each one is simple and straightforward.
Ingredient notes
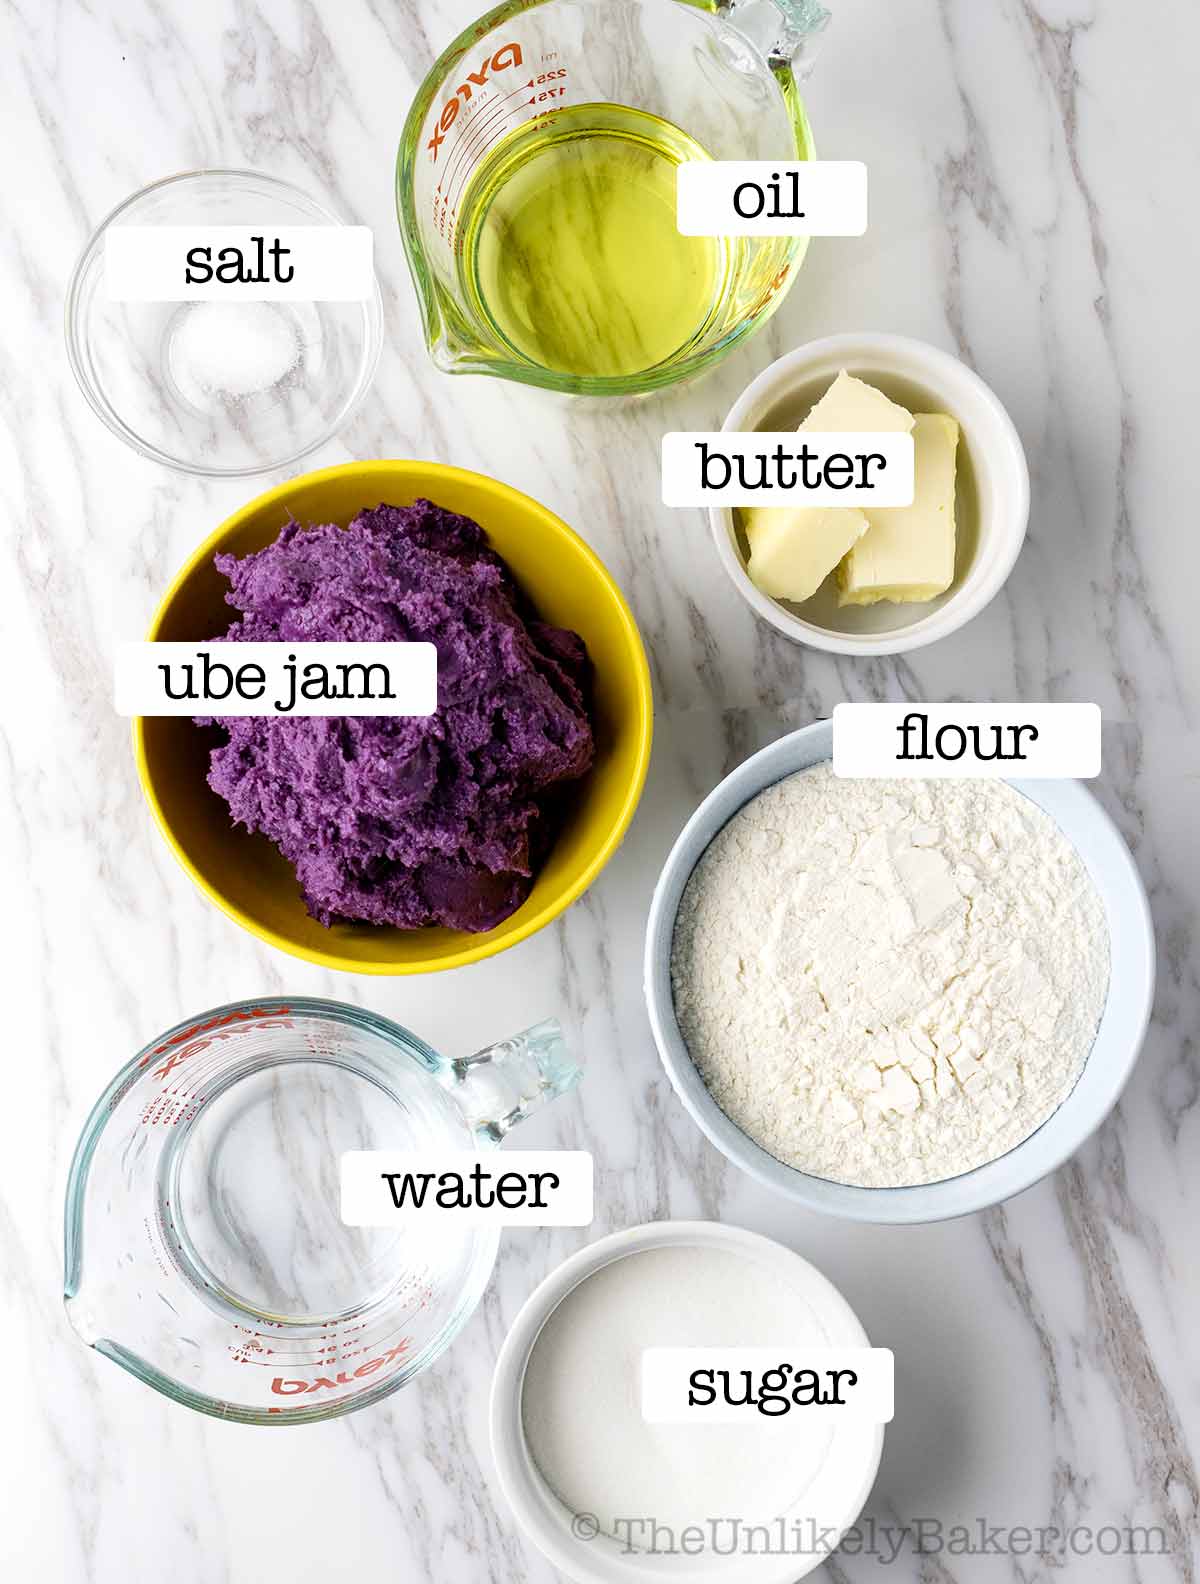
You’ll need pantry staples like all purpose flour, salt and sugar. Important things to note:
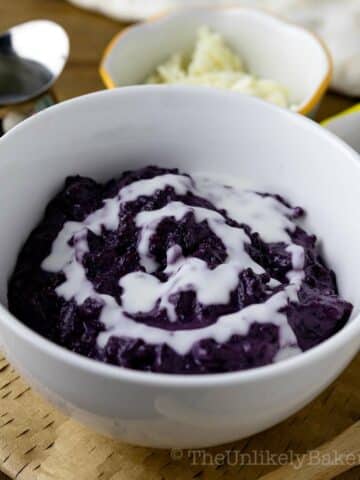
- Ube filling — the filling we use here is ube jam or ube halaya. I make my own but you can also use your favorite store brand. What’s important is that you use ube you enjoy eating on its own.
- Oil — it’s best to use a bland, flavorless oil. I usually use canola oil because that’s what we use for cooking. Vegetable oil will work too.
- Butter — you may notice that other recipes use vegetable shortening or lard but I’m not a big fan. We use unsalted butter here.
Tools
We don’t use a mixer in this recipe because we don’t want to overwork the dough.
We start mixing with a wooden spoon then use our hands to finish combining the ingredients.
The following are my favorite tools when making ube hopia:
- Pastry cutter — to cut the butter into the flour. You can also use 2 forks.
- Cookie scoop — to scoop evenly sized ube filling into each pastry.
- Pastry mat — I’ve had this pastry mat for years and it still looks and feels new! It sticks to the surface and makes for easy cleanup.
- Small rolling pin — I used to use an 18-inch French rolling pin but find that a smaller rolling pin is easier to use, especially when flattening each piece of dough.
Step-by-step photos
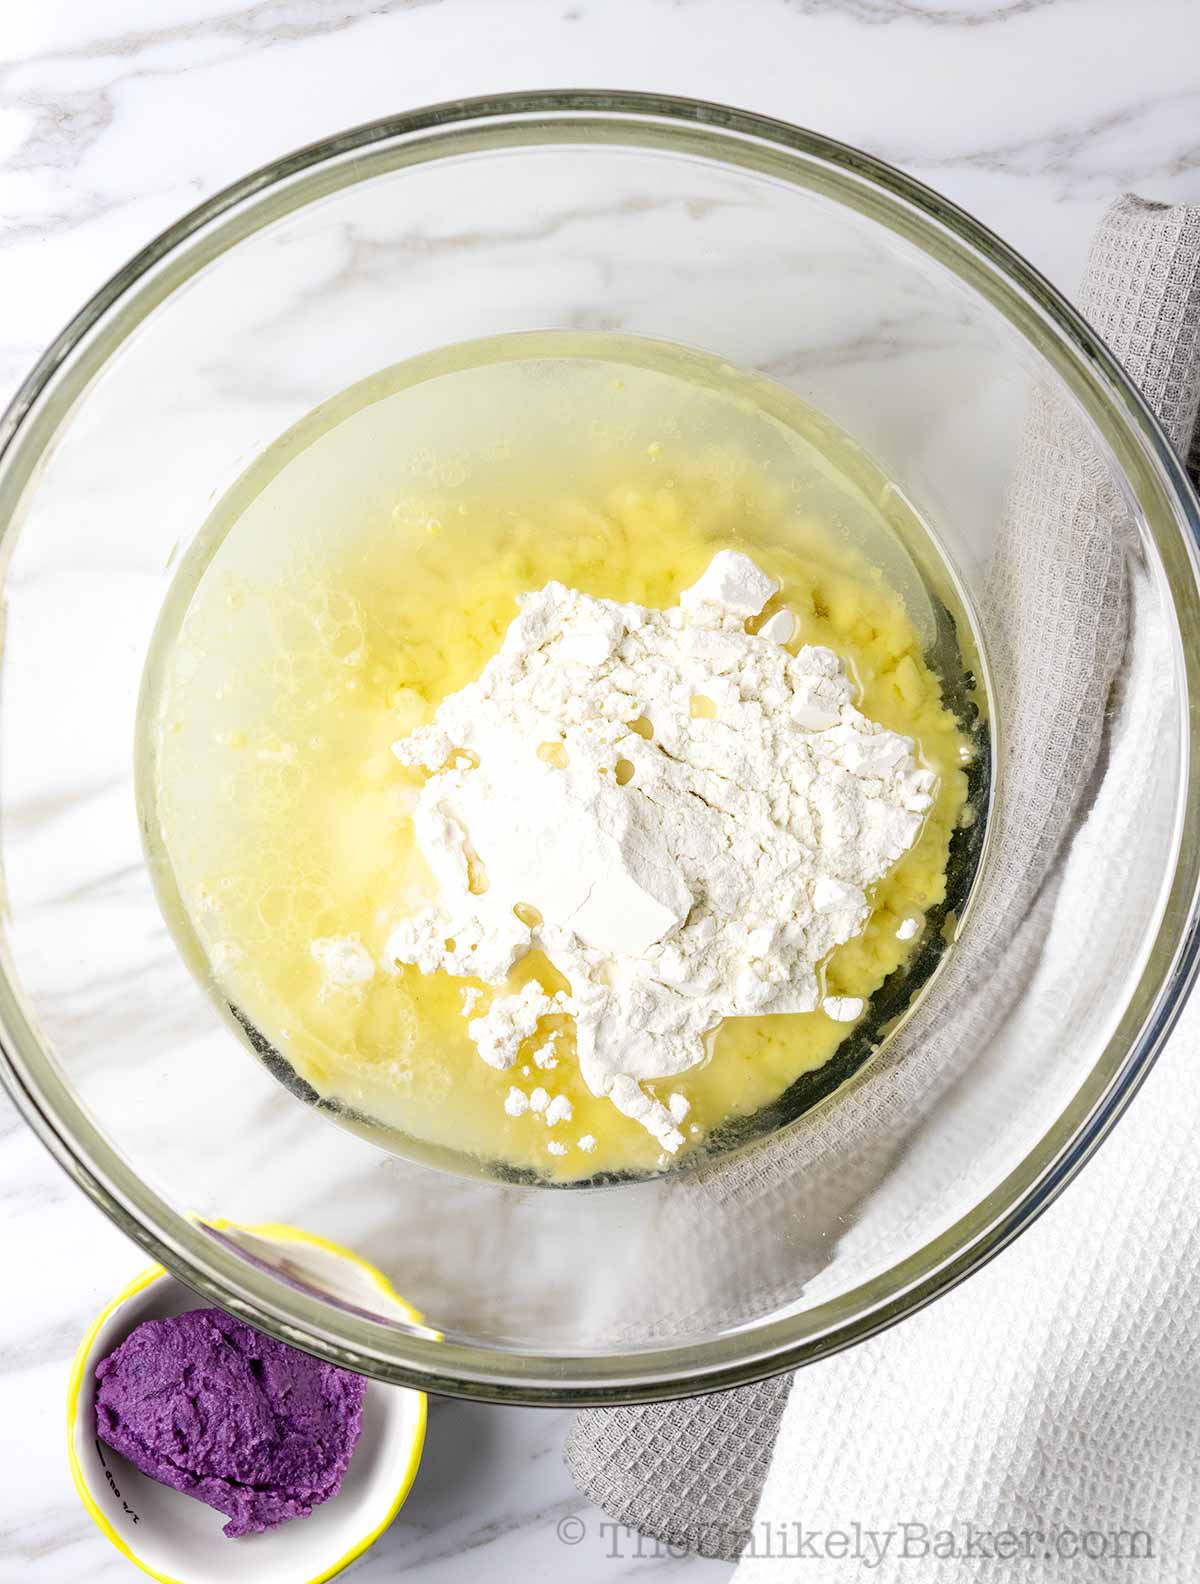
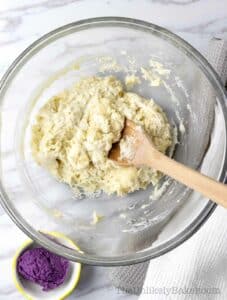
In a large bowl, combine flour, salt, oil and water.
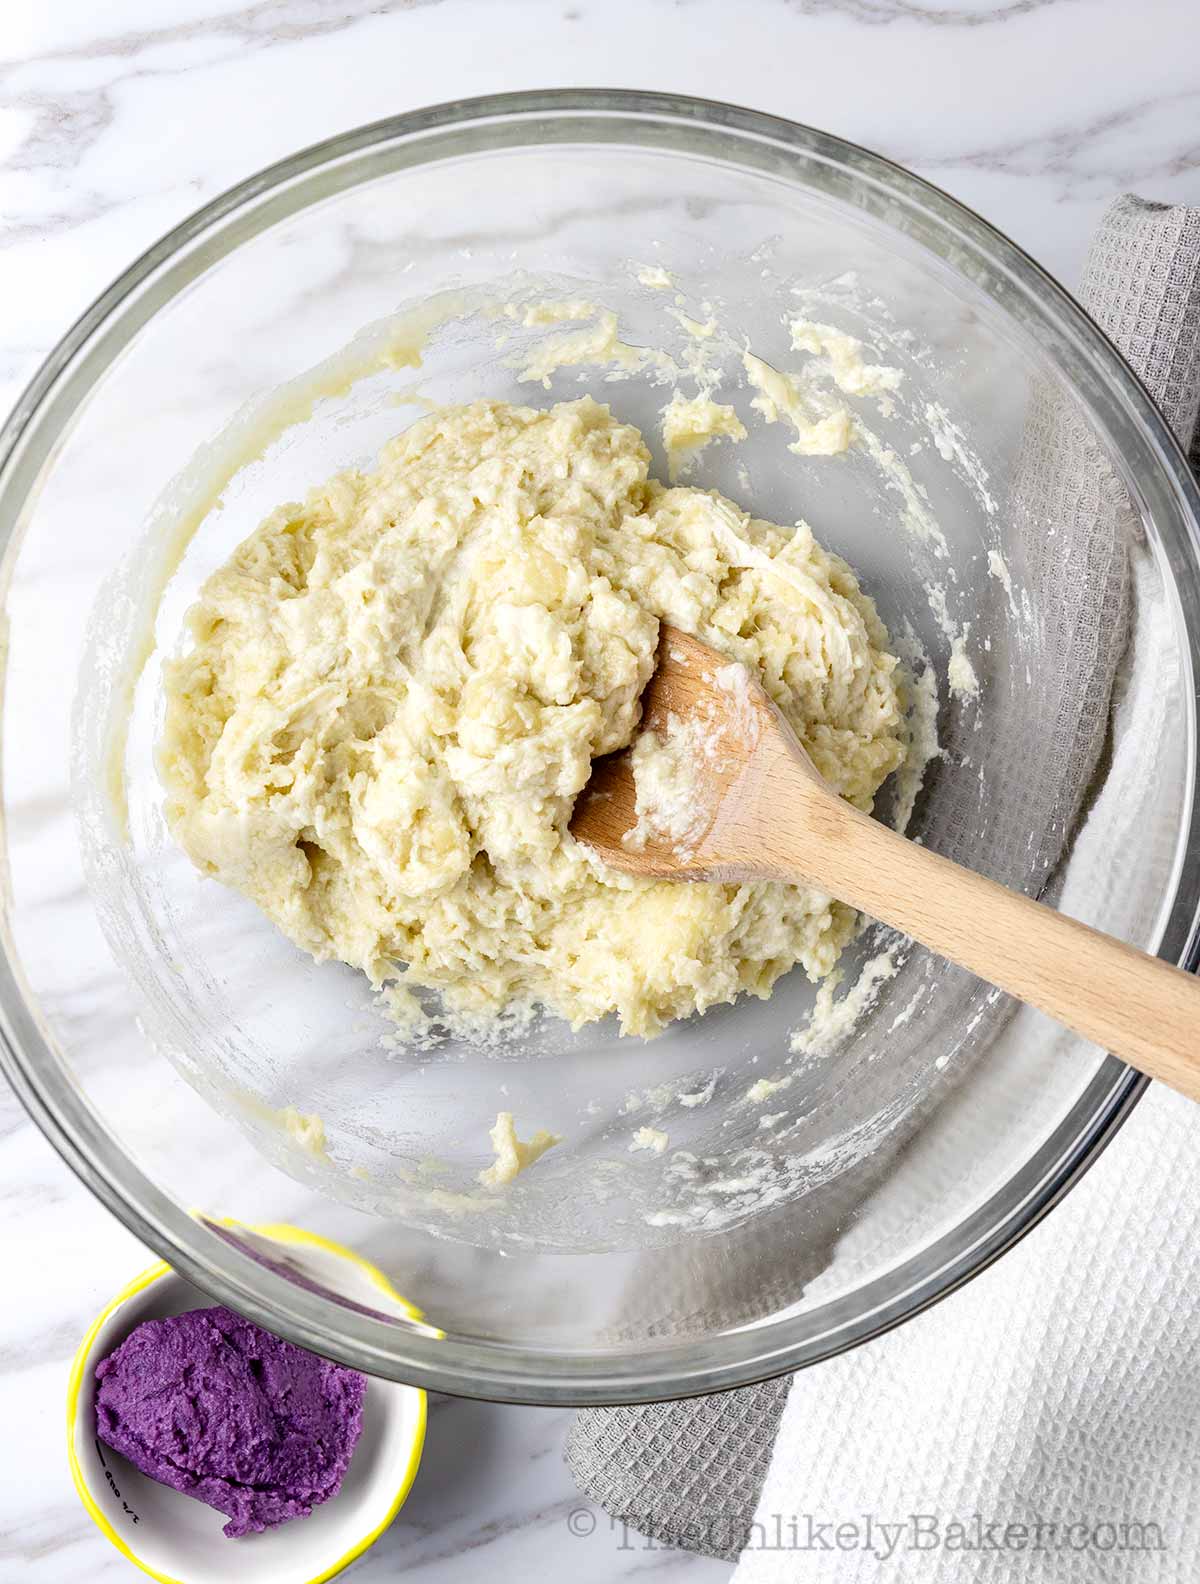
Mix until combined.
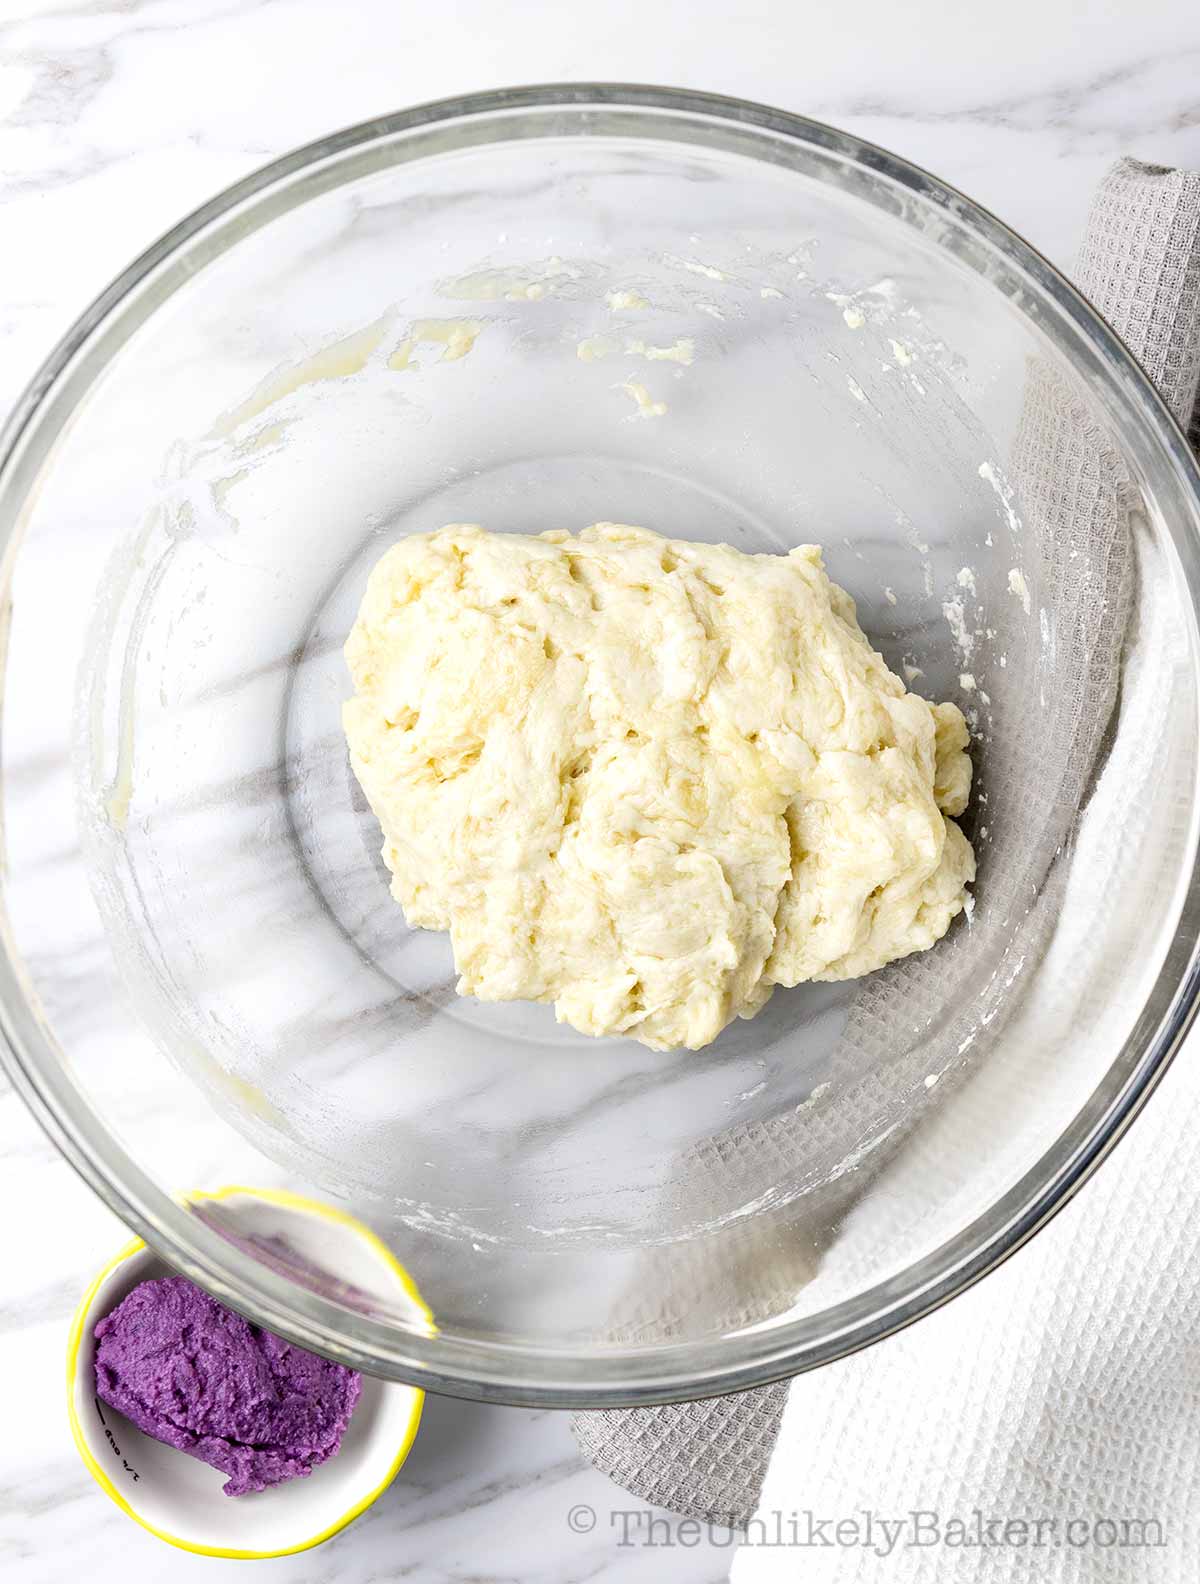
I use a wooden spoon to incorporate, then my hands to finish combining the mixture. Be careful not to over-mix. We’re not looking for a smooth mixture. As long as the ingredients are blended, you can stop.

Wrap the dough with plastic wrap and chill in the fridge.
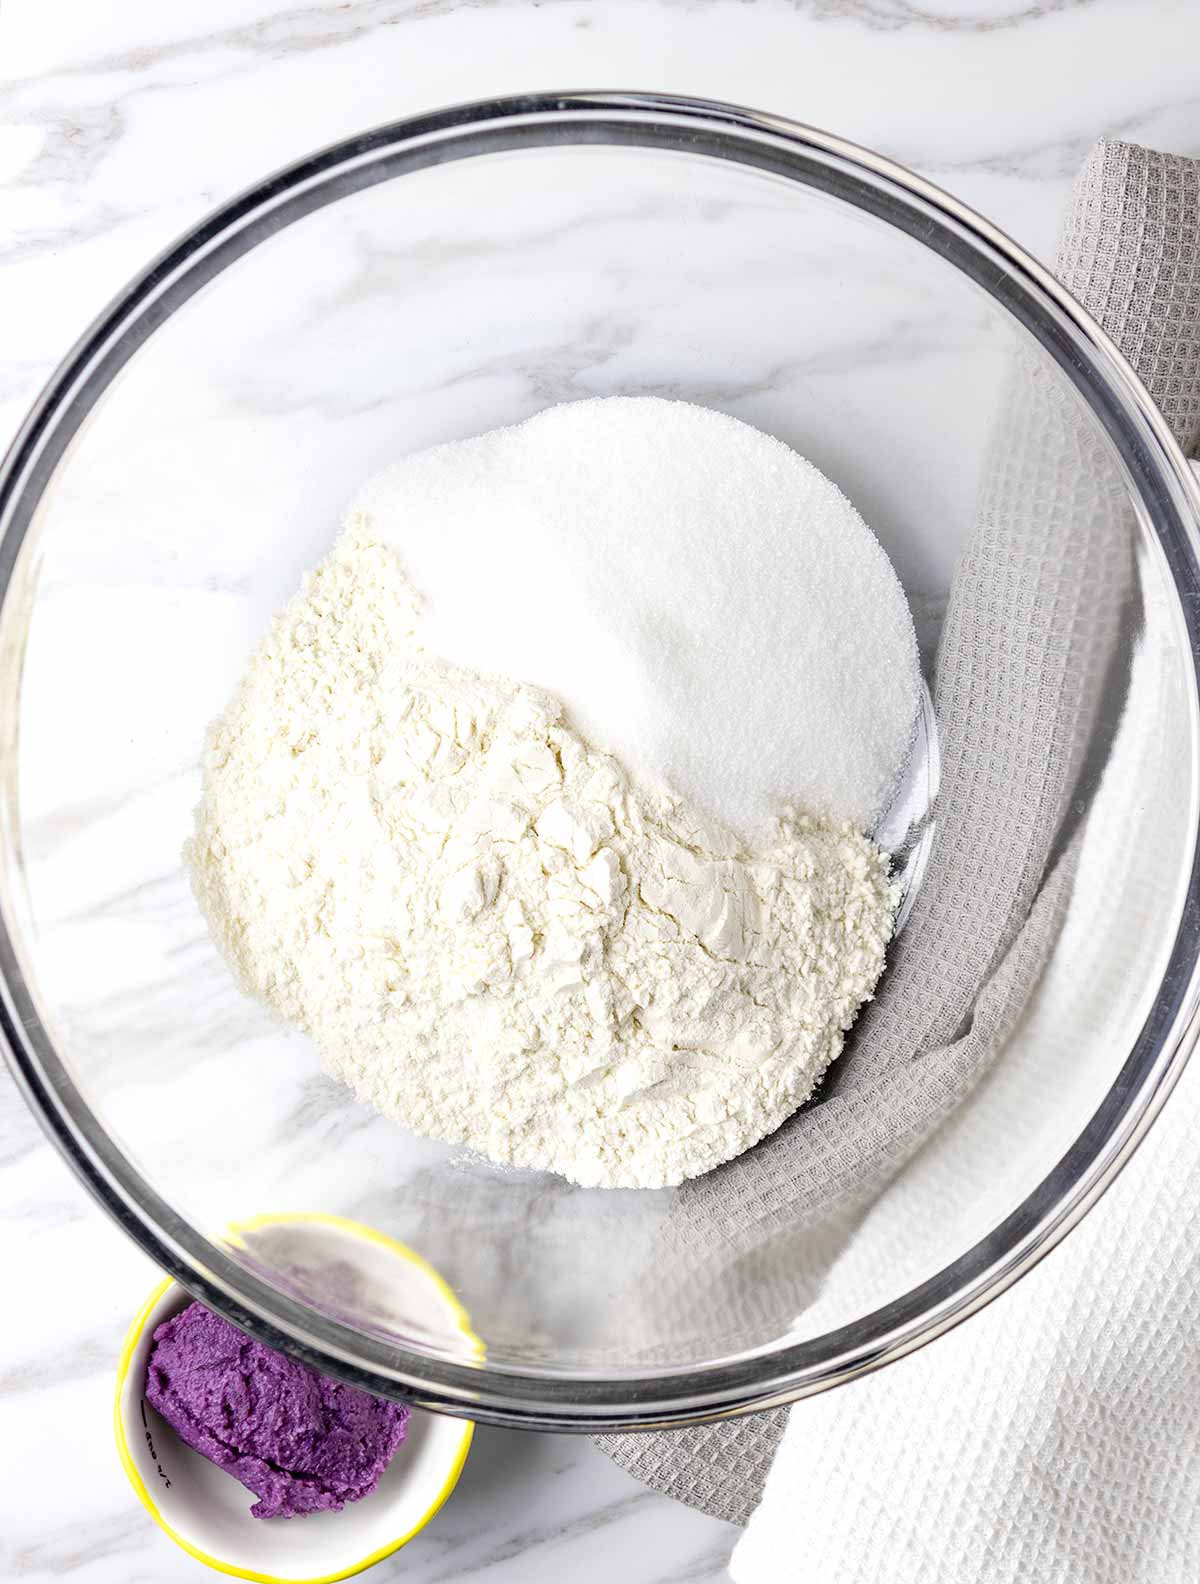
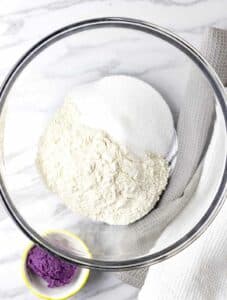
In another bowl, combine flour and sugar.
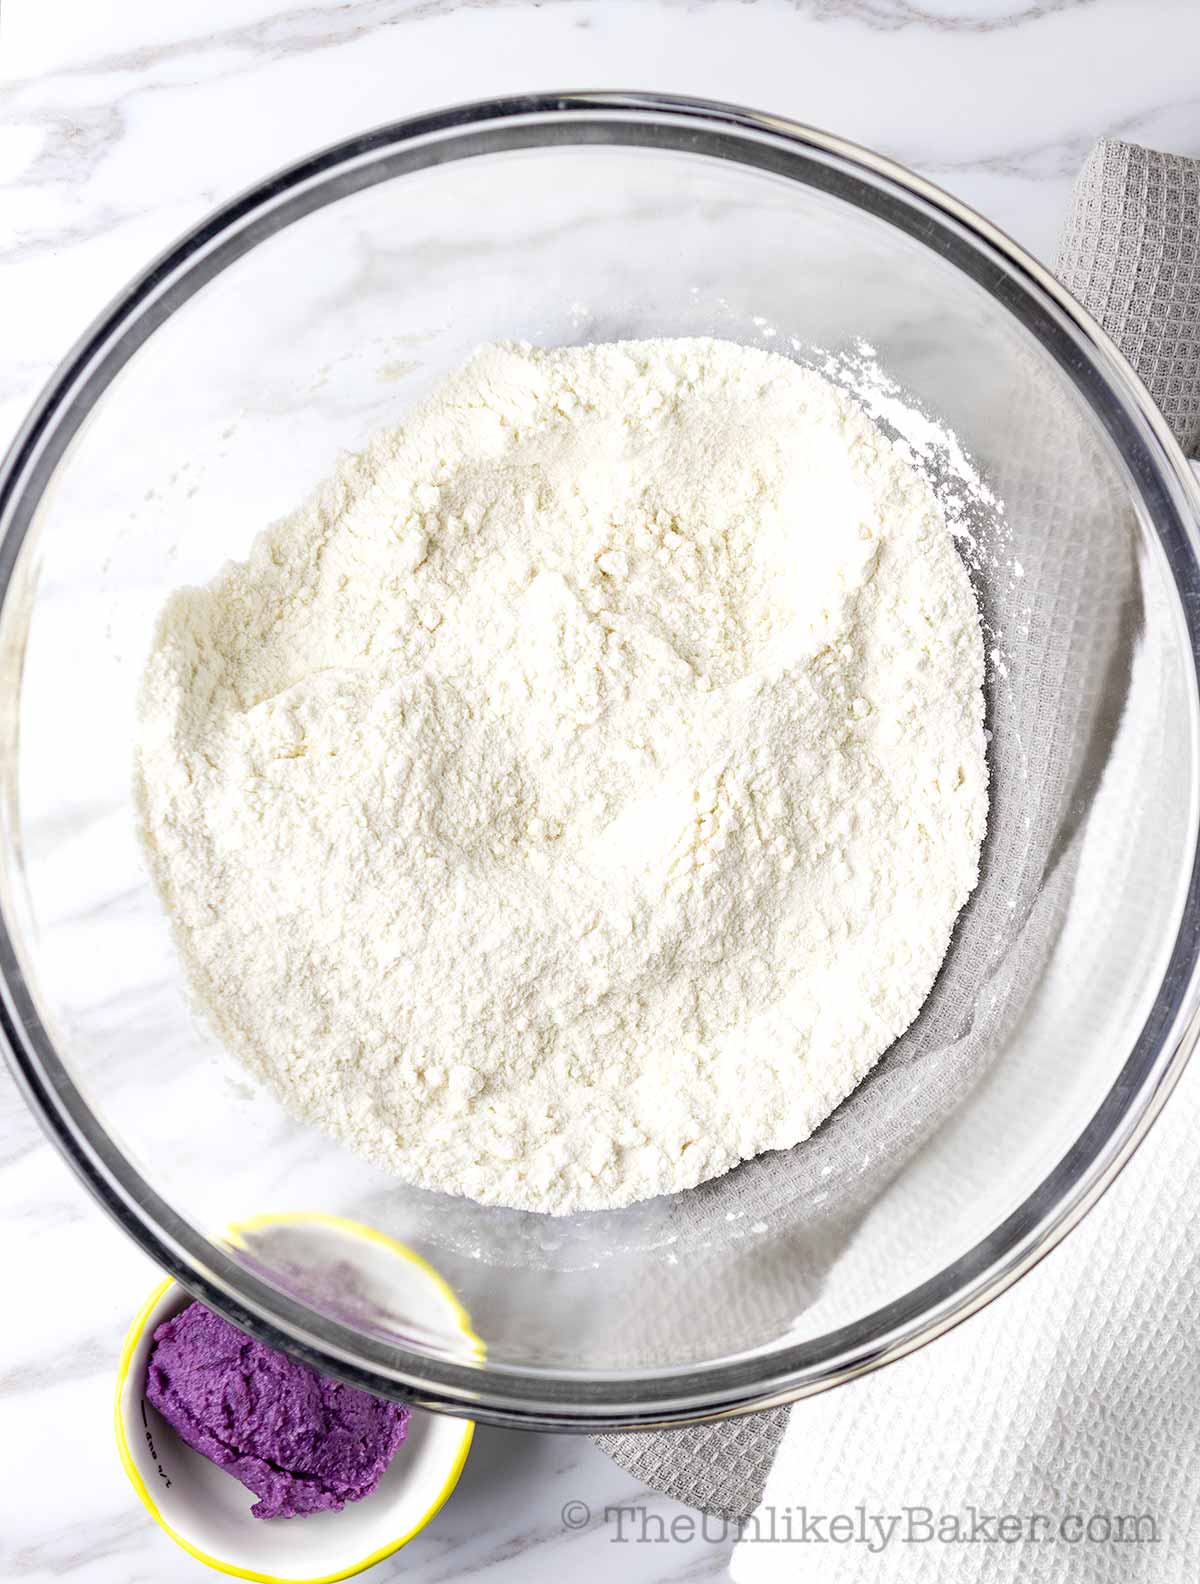
Stir until incorporated.
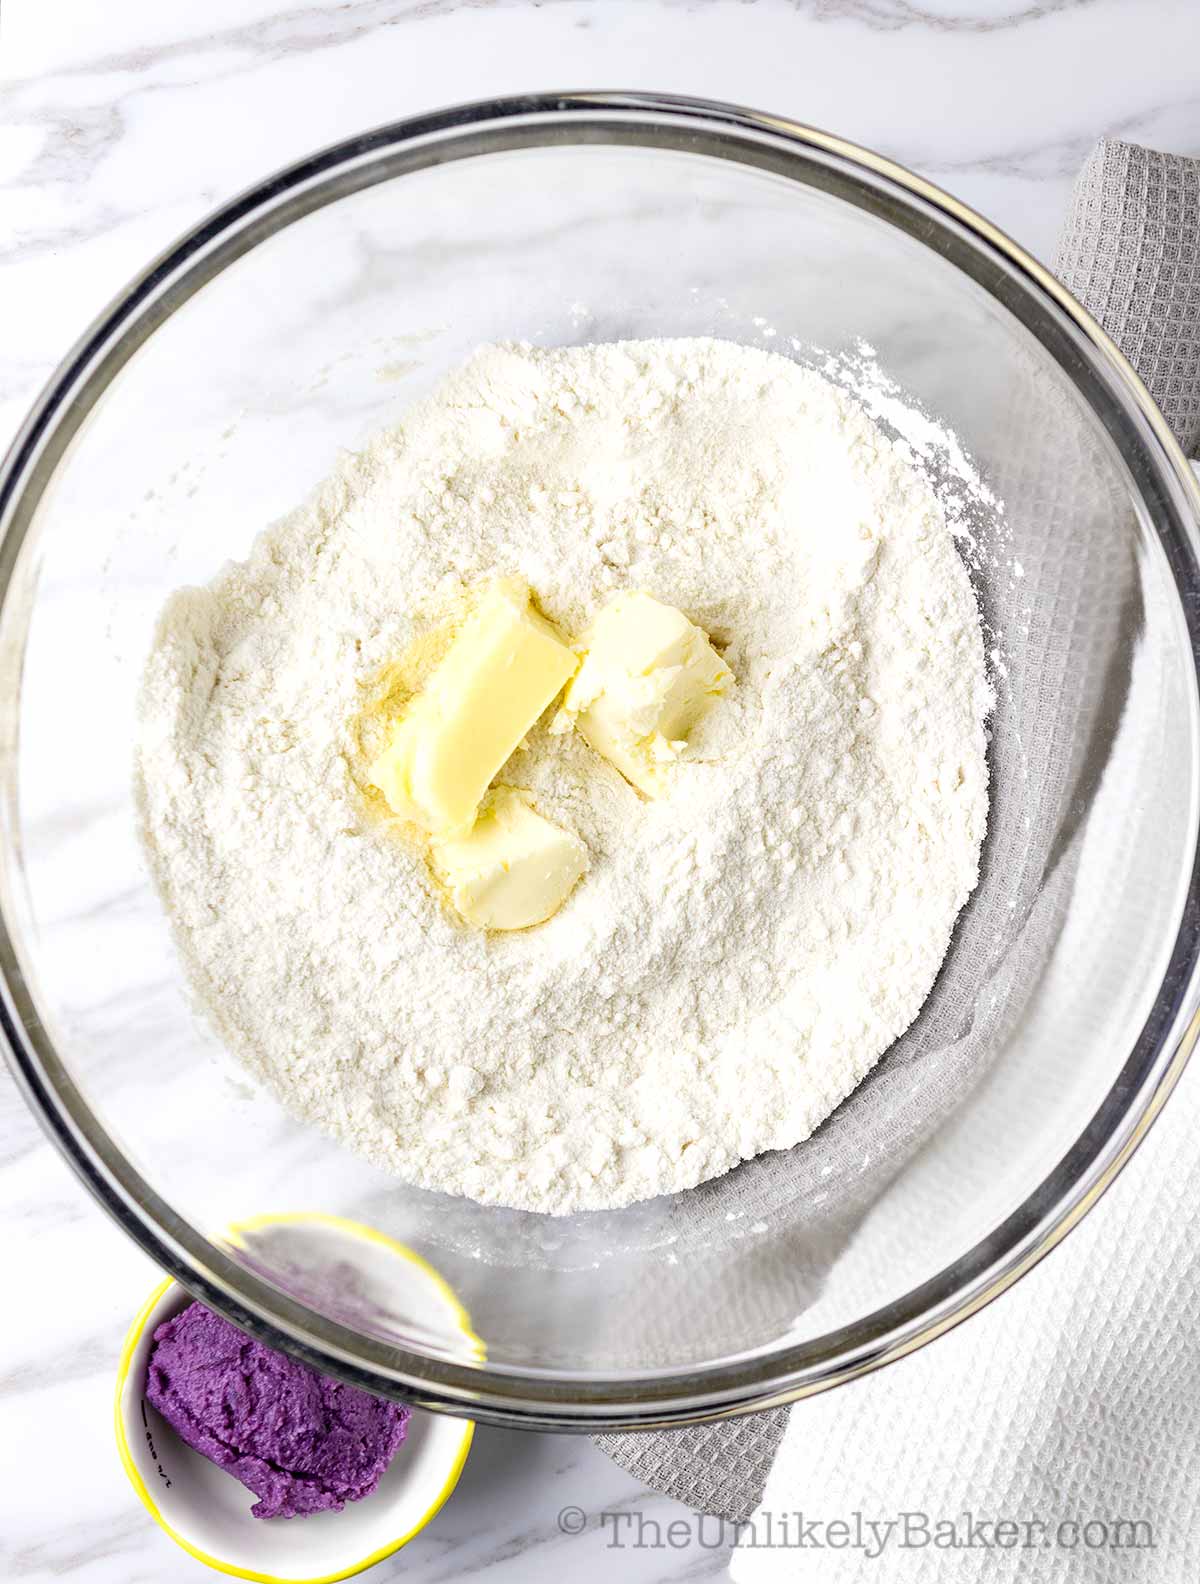
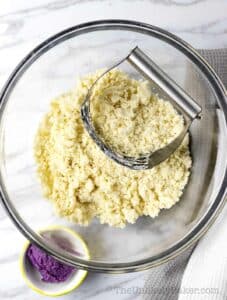
Add butter.
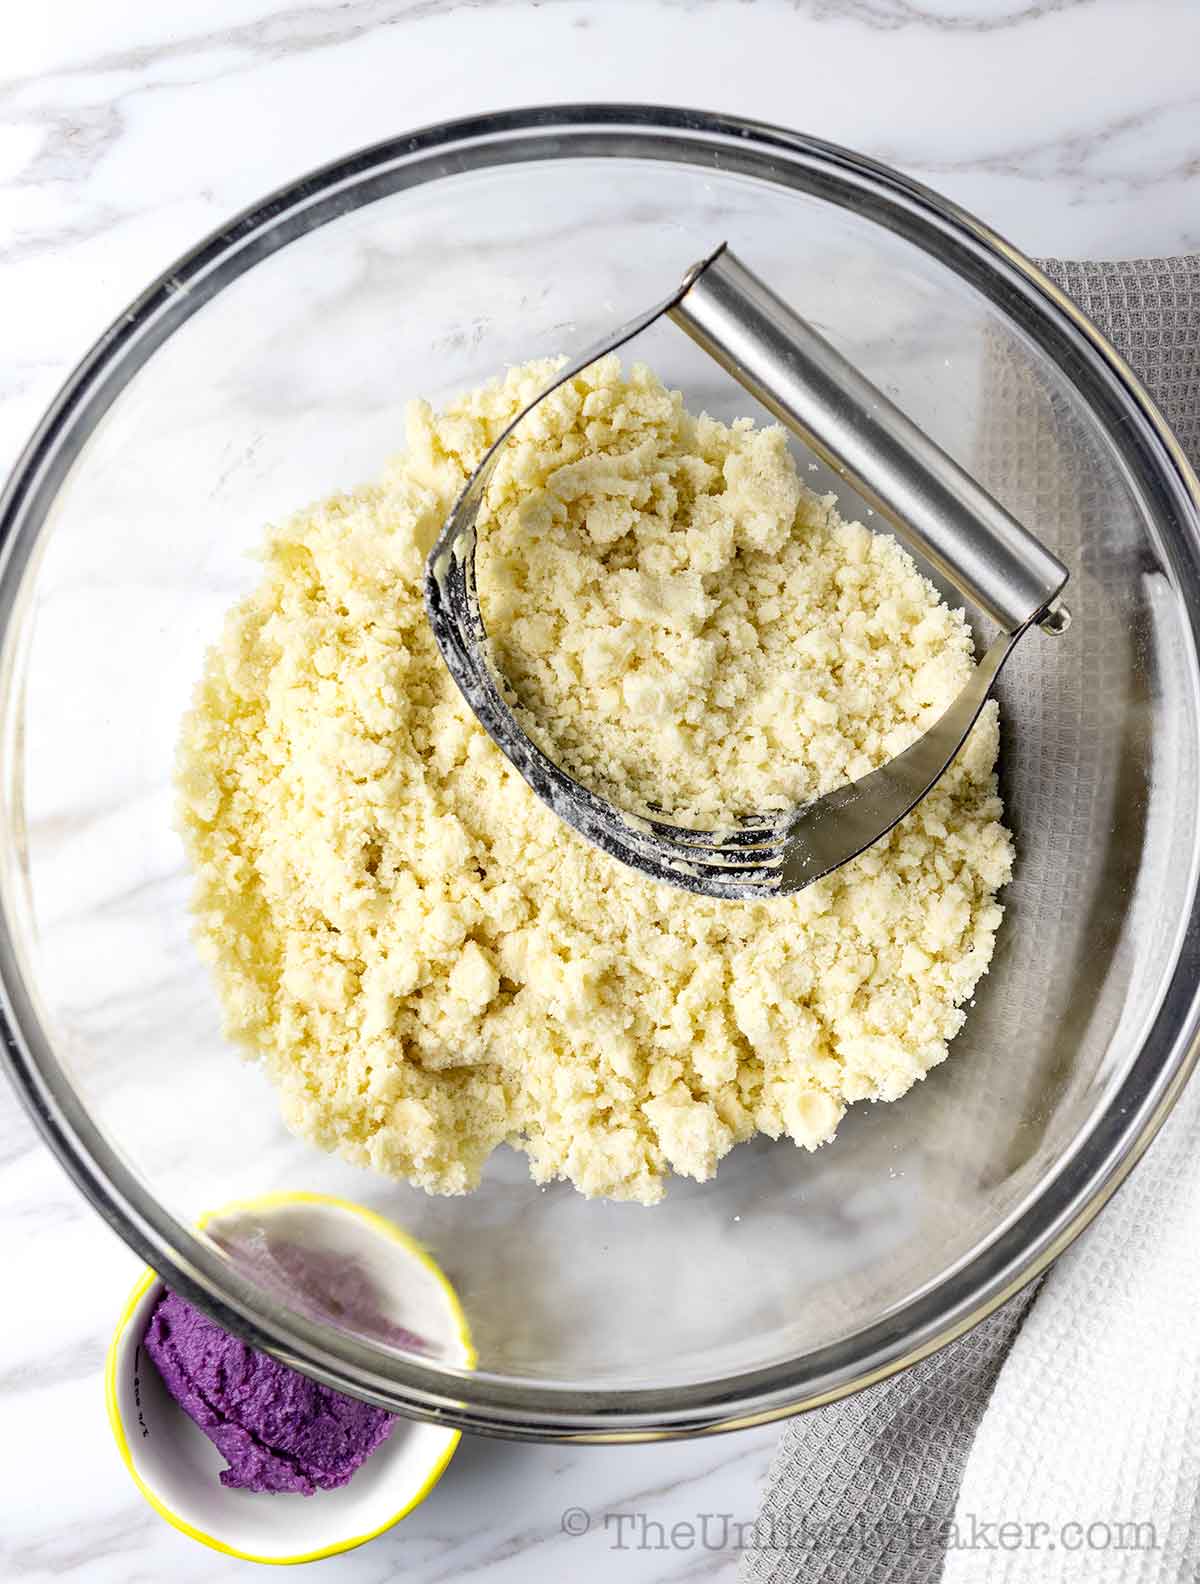
Cut into the flour using a pastry cutter or fork.
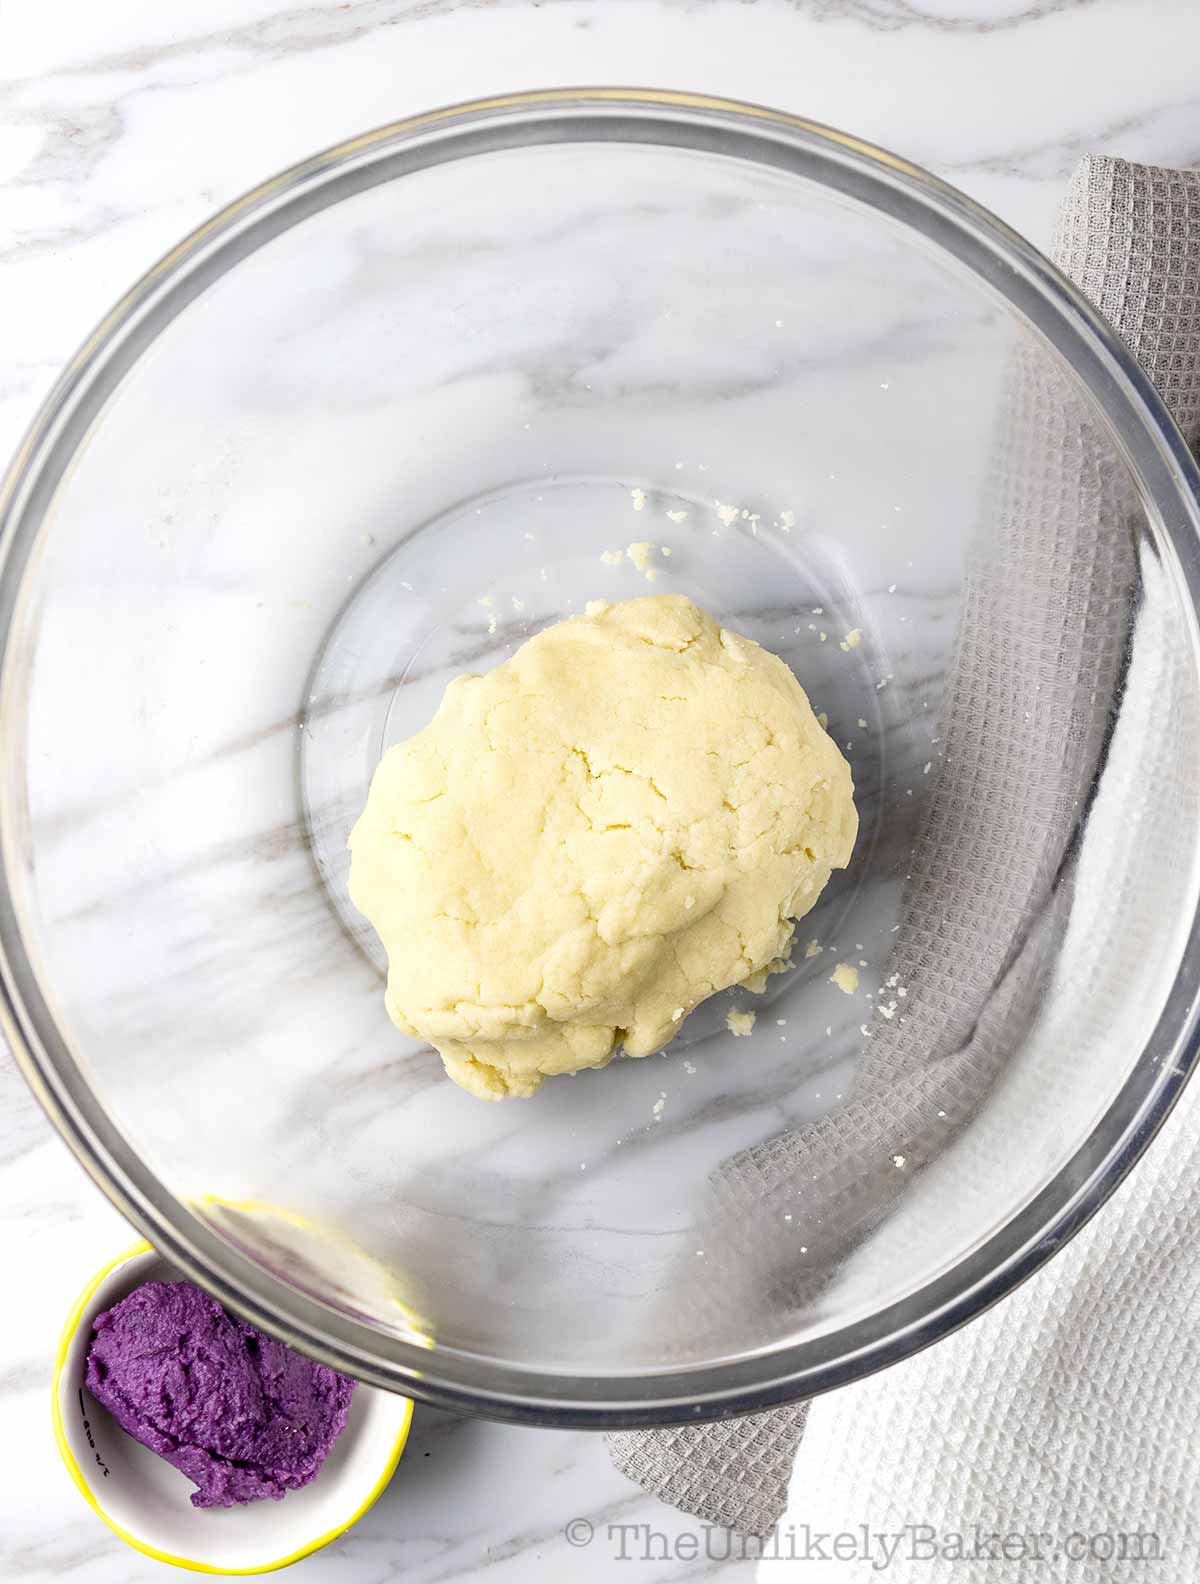
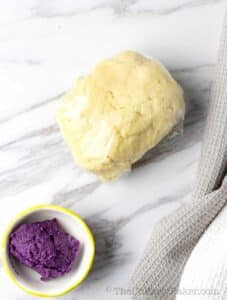
Once incorporated, finish combining with your hands until it comes together in a ball. Again, we’re not looking for a perfectly smooth mixture here. Careful not to over-mix.

Wrap the dough with plastic wrap and chill in the fridge.
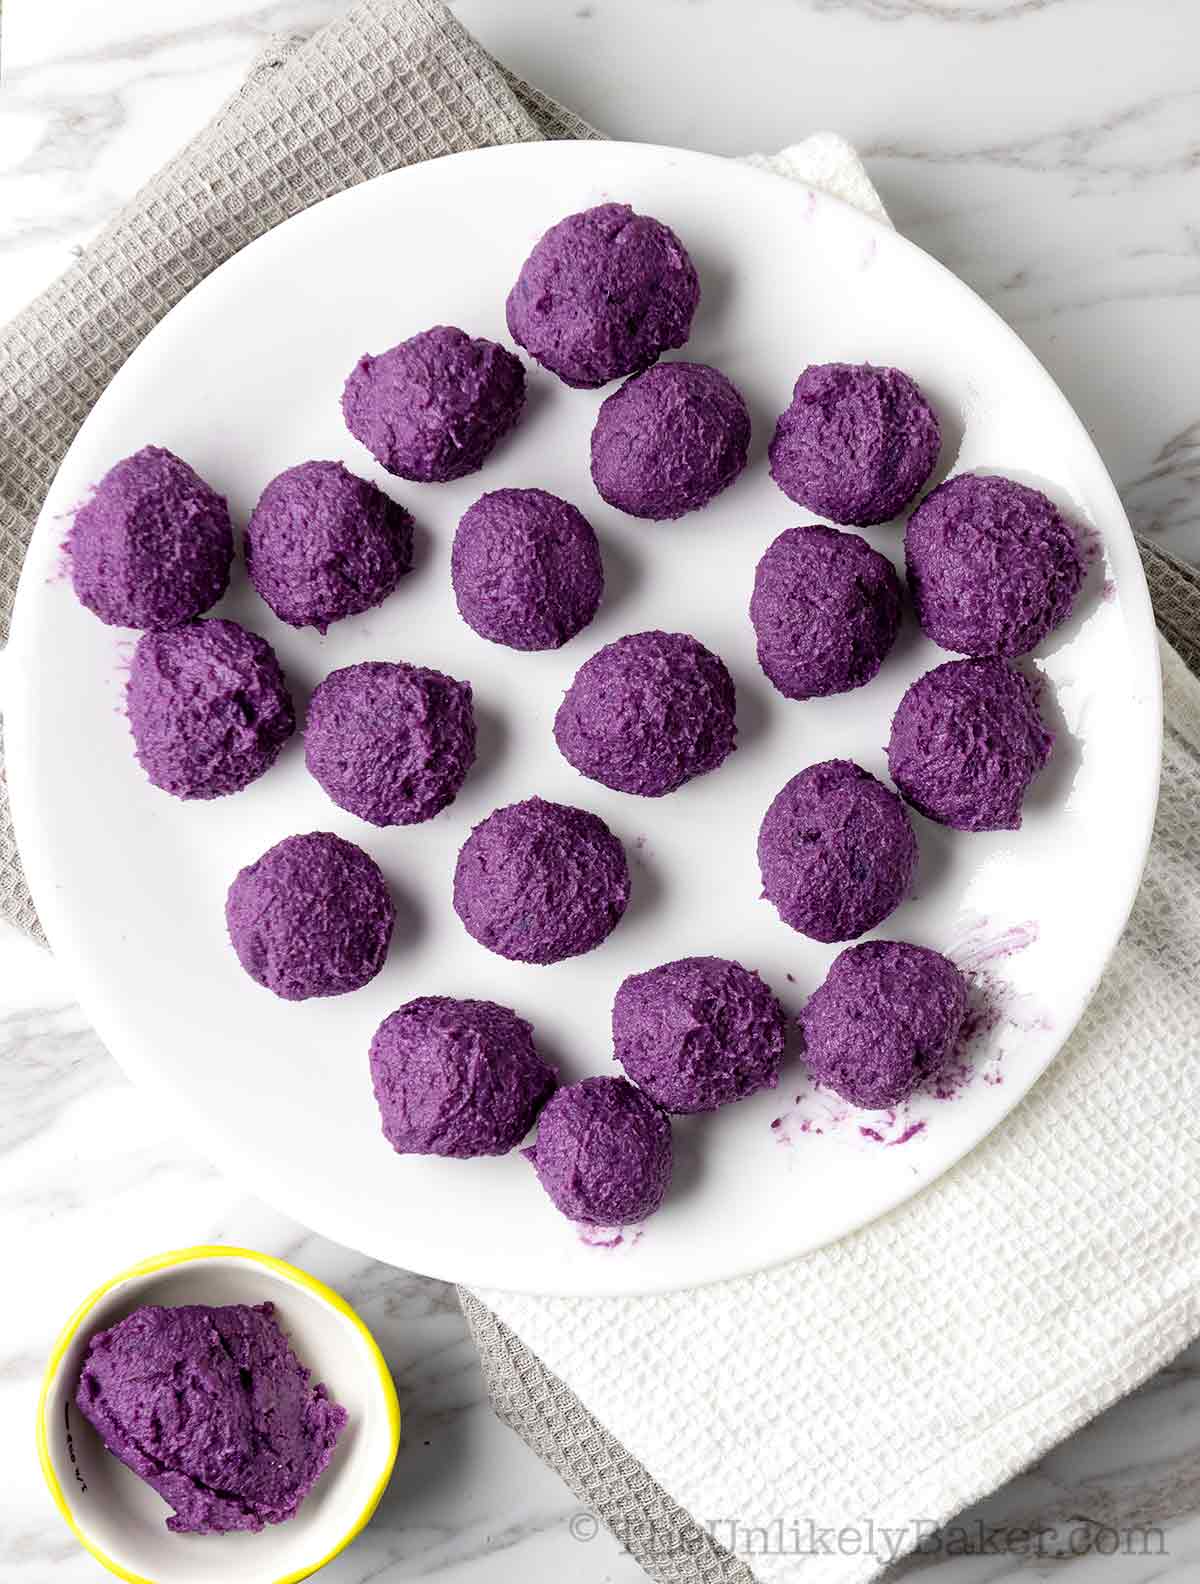
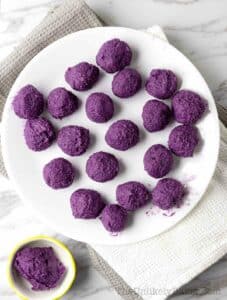
Scoop your ube filling and roll into 24 balls. For evenly sized filling, weigh each ball and make them the same weight. I usually go for 25 g each.
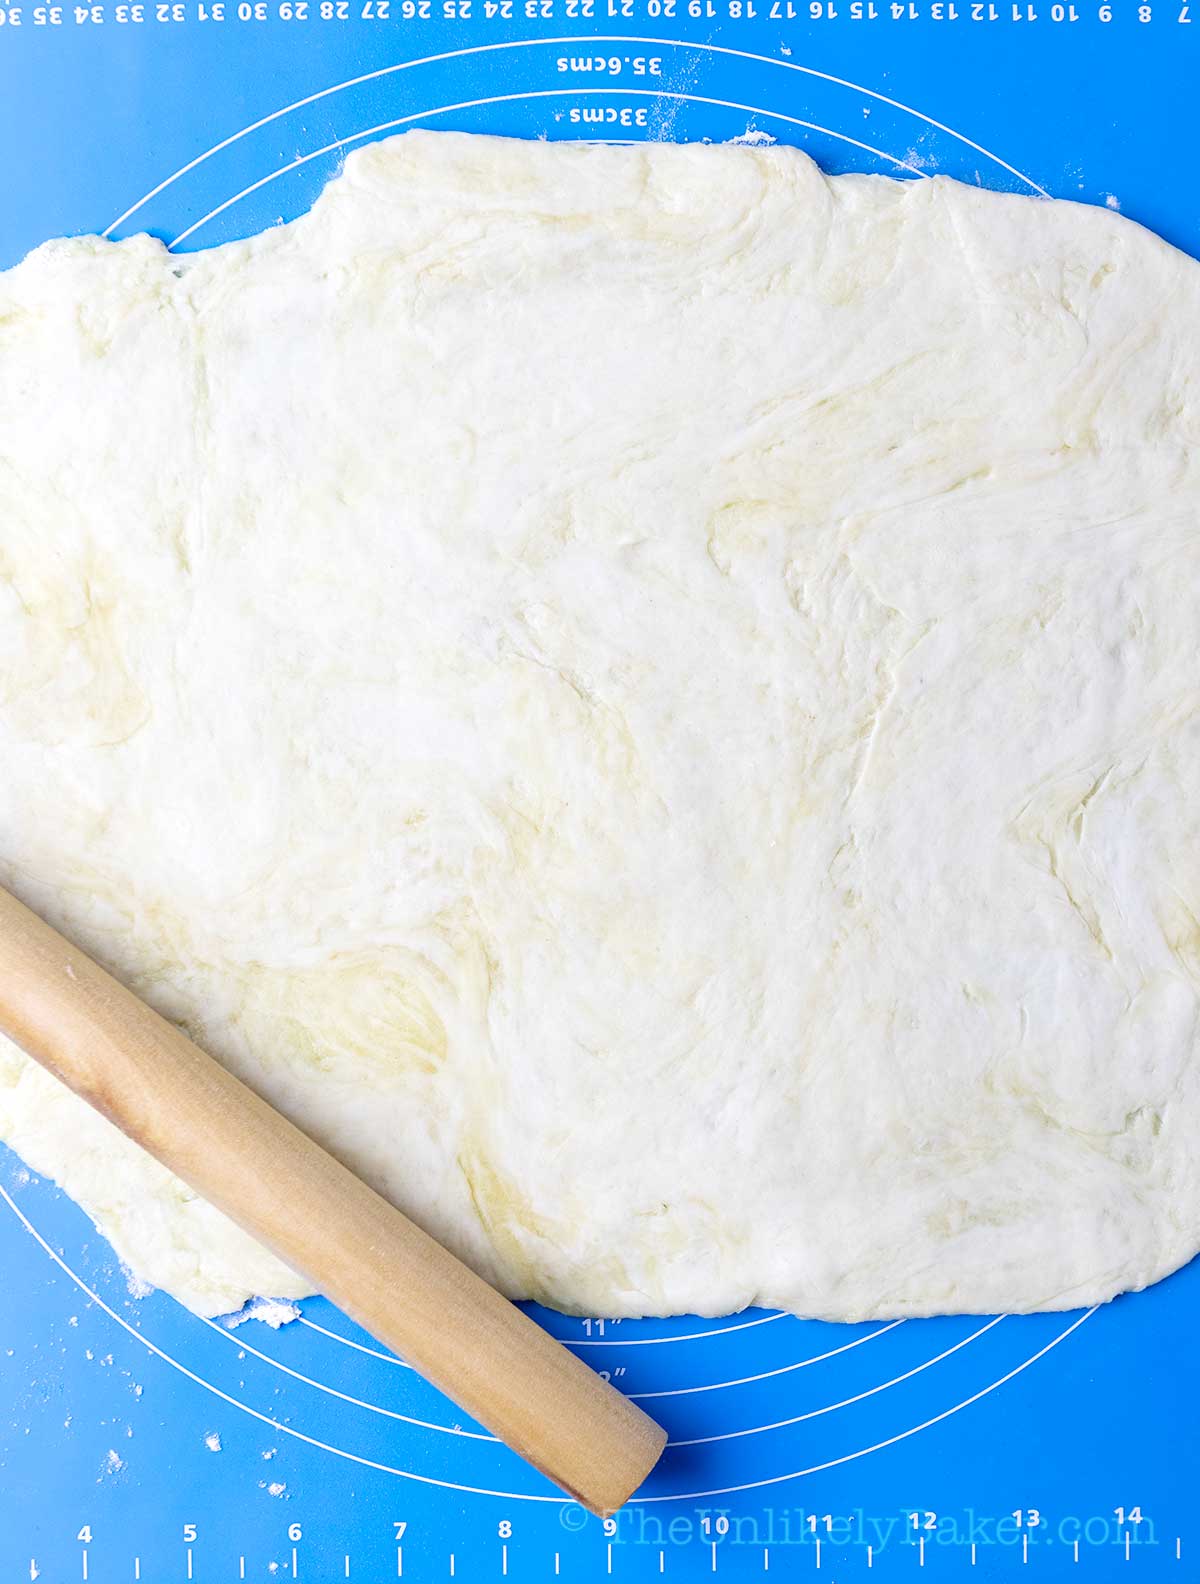
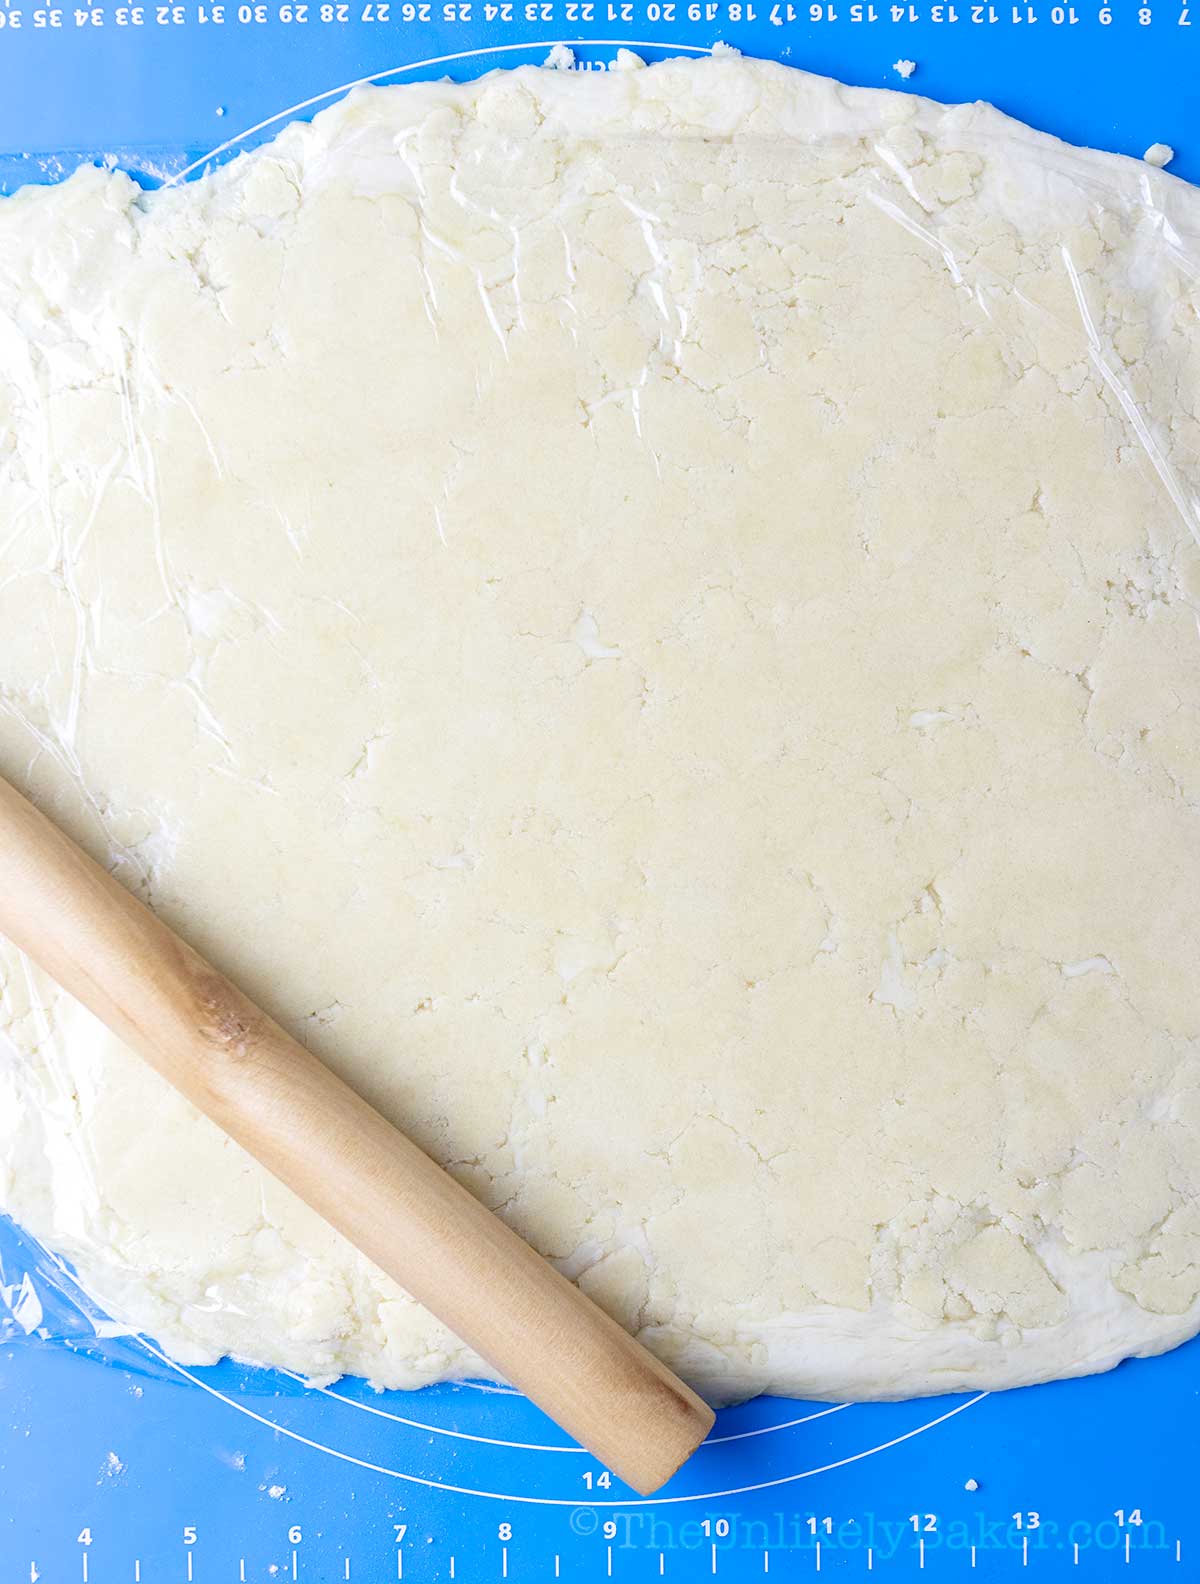
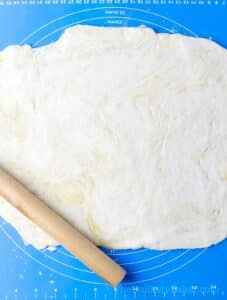
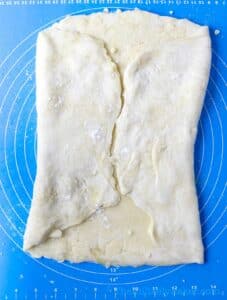
Place first dough on a lightly floured surface and roll into a rectangle about ½ inch thick.
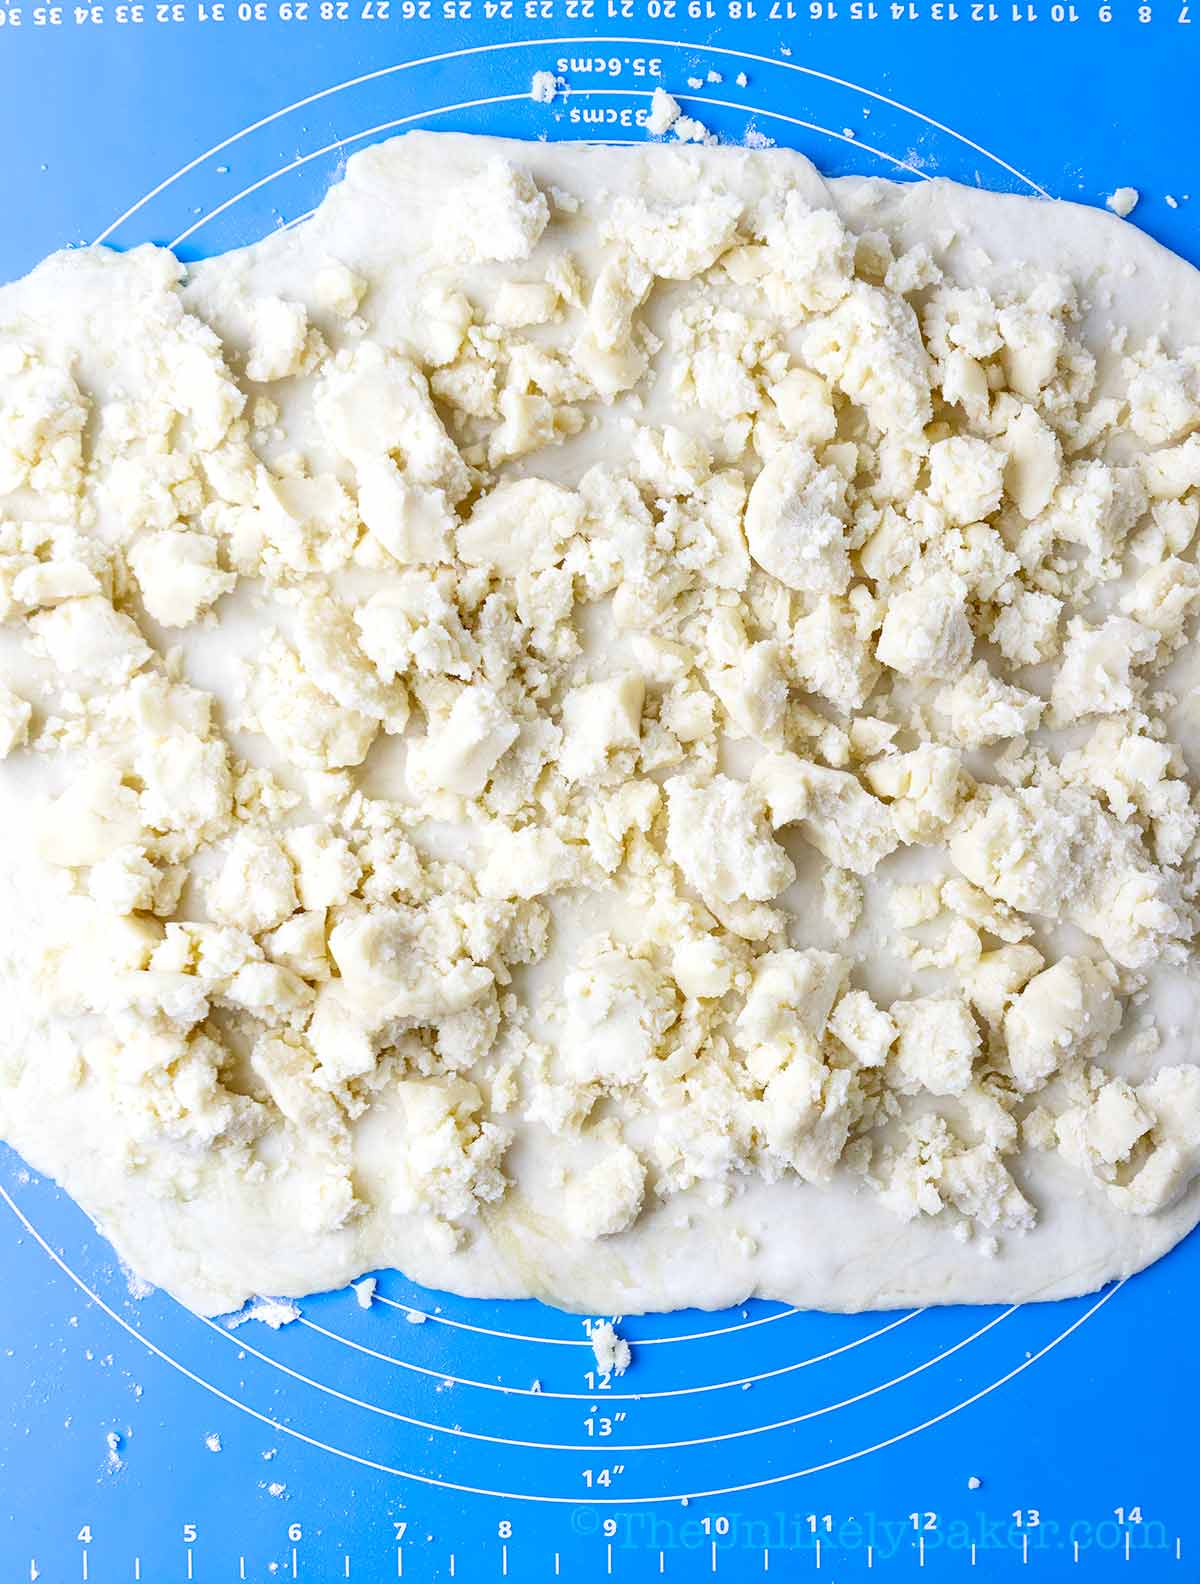
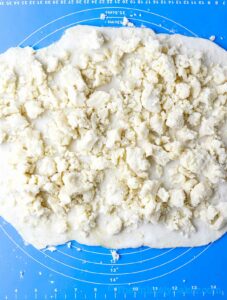
Crumble the second dough on top of the first dough until the first dough is completely covered.
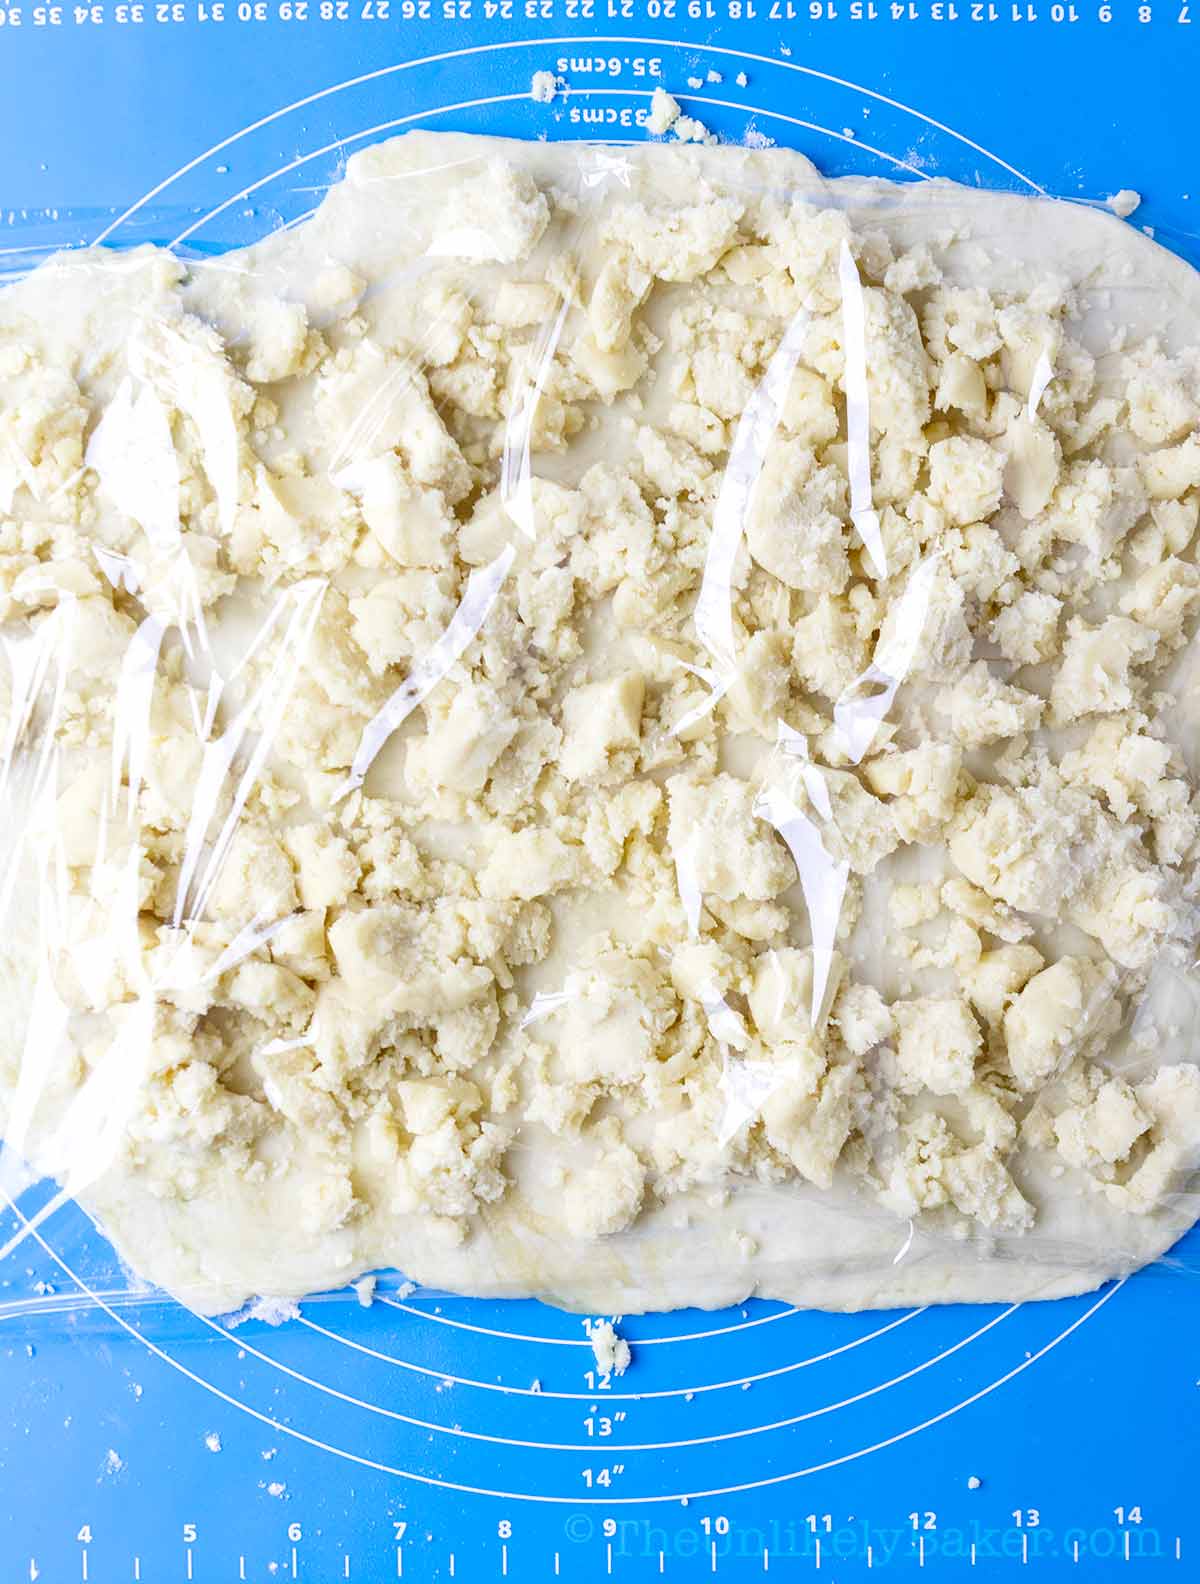
Place a plastic wrap on top.
Then roll the second dough to flatten and smoothen it.

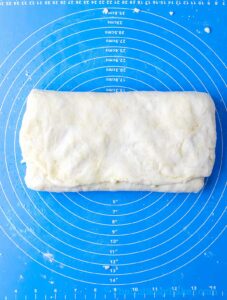
Remove plastic wrap, fold your dough lengthwise (left and right) so the edges meet in the middle…
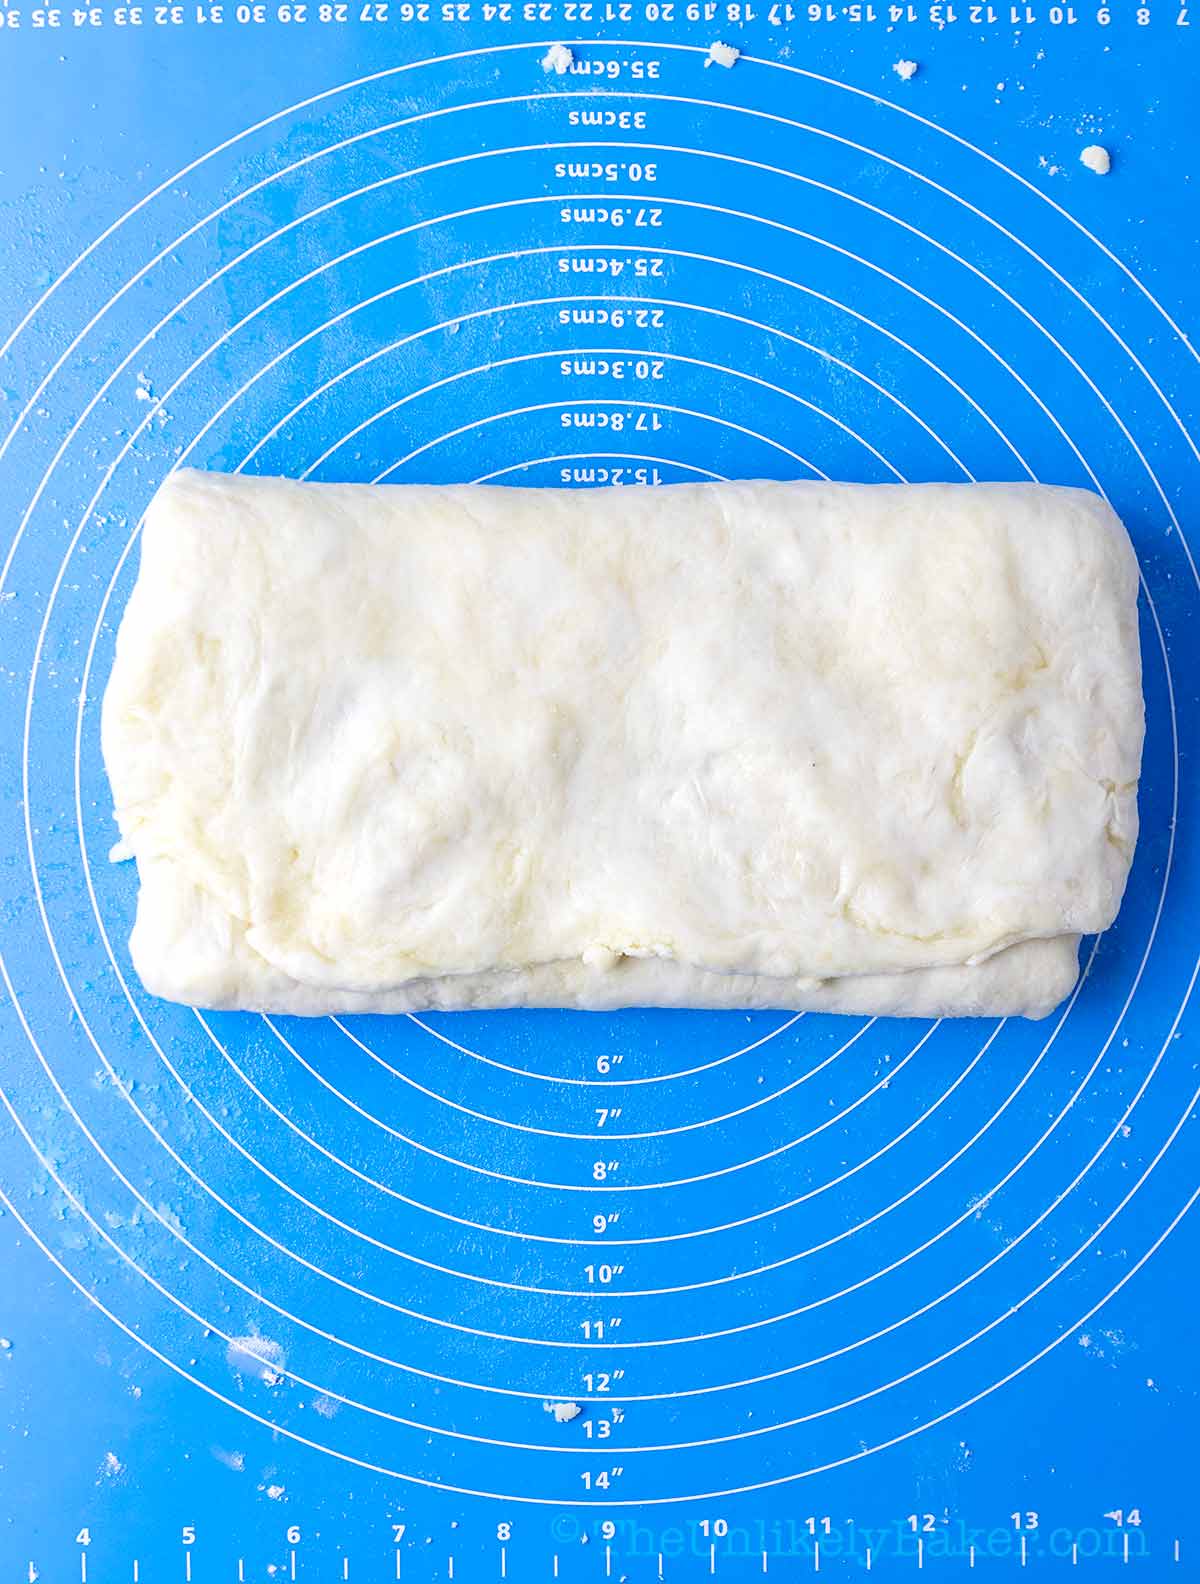
…then crosswise (up then down).
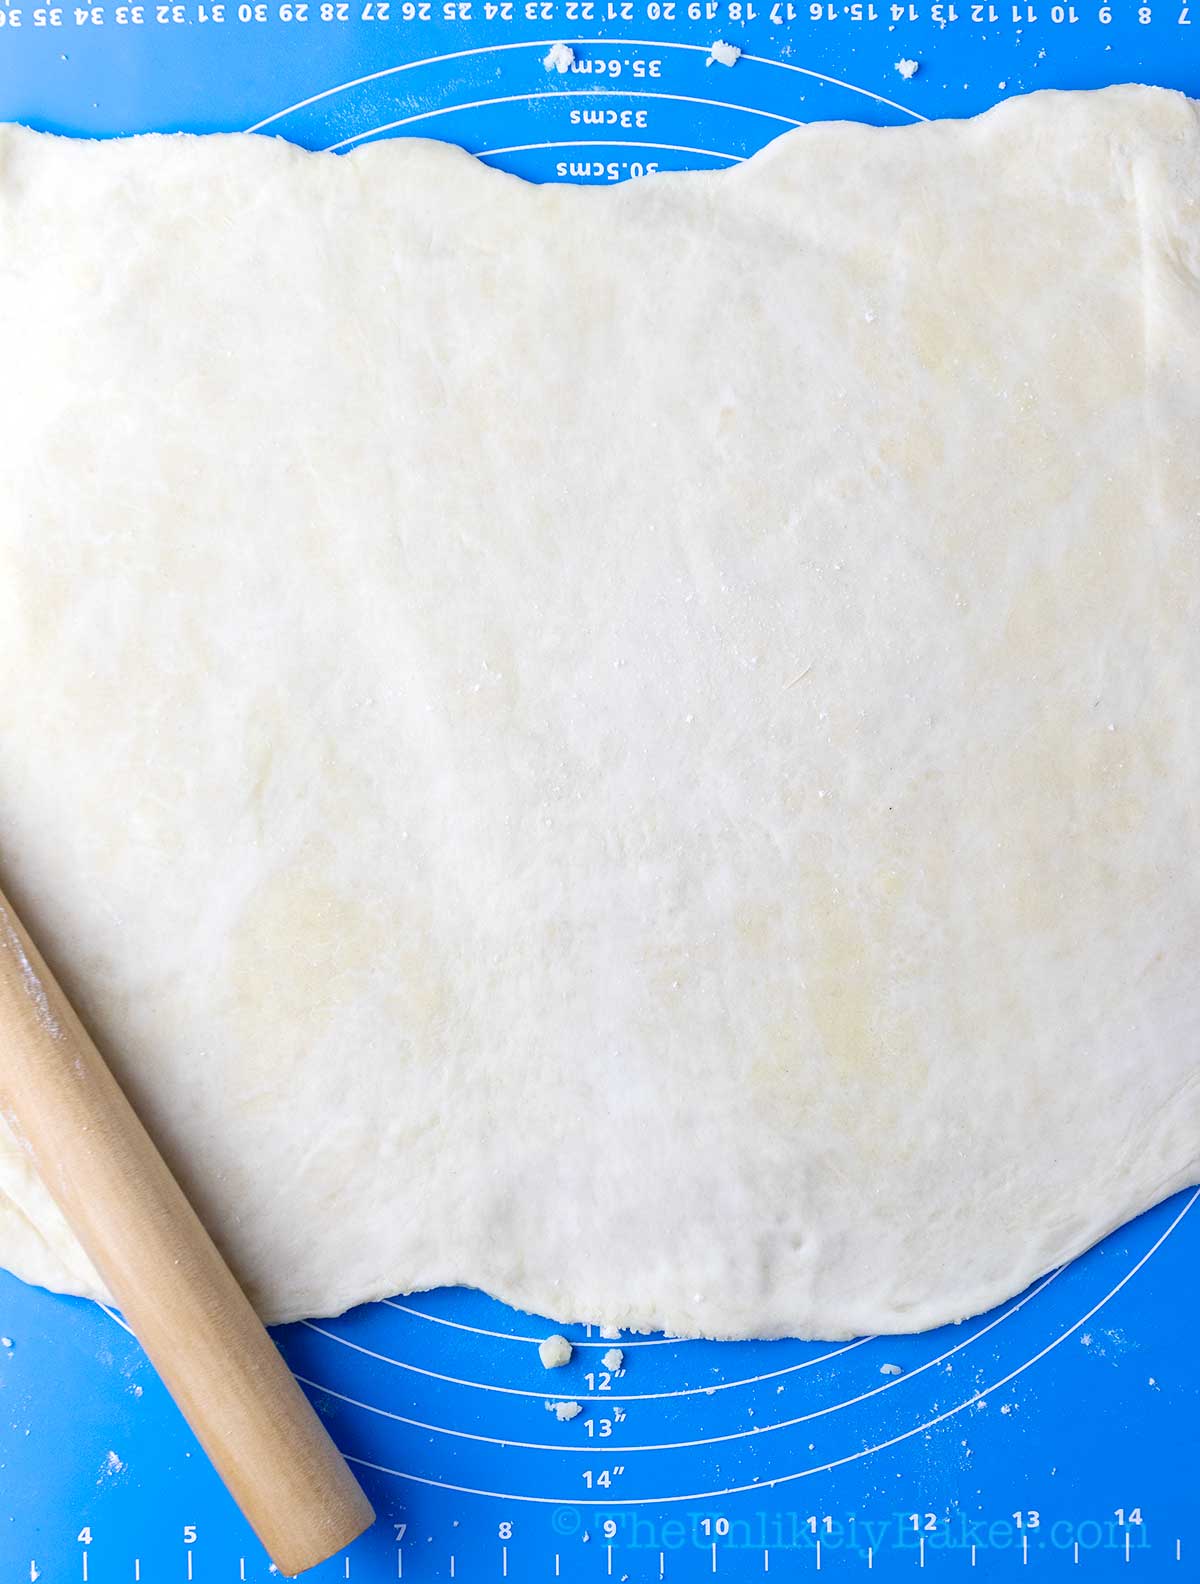
Roll and flatten.
Fold and flatten again. Repeat this step one more time (for a total of 3). This is what gives hopia dough those flaky layers.
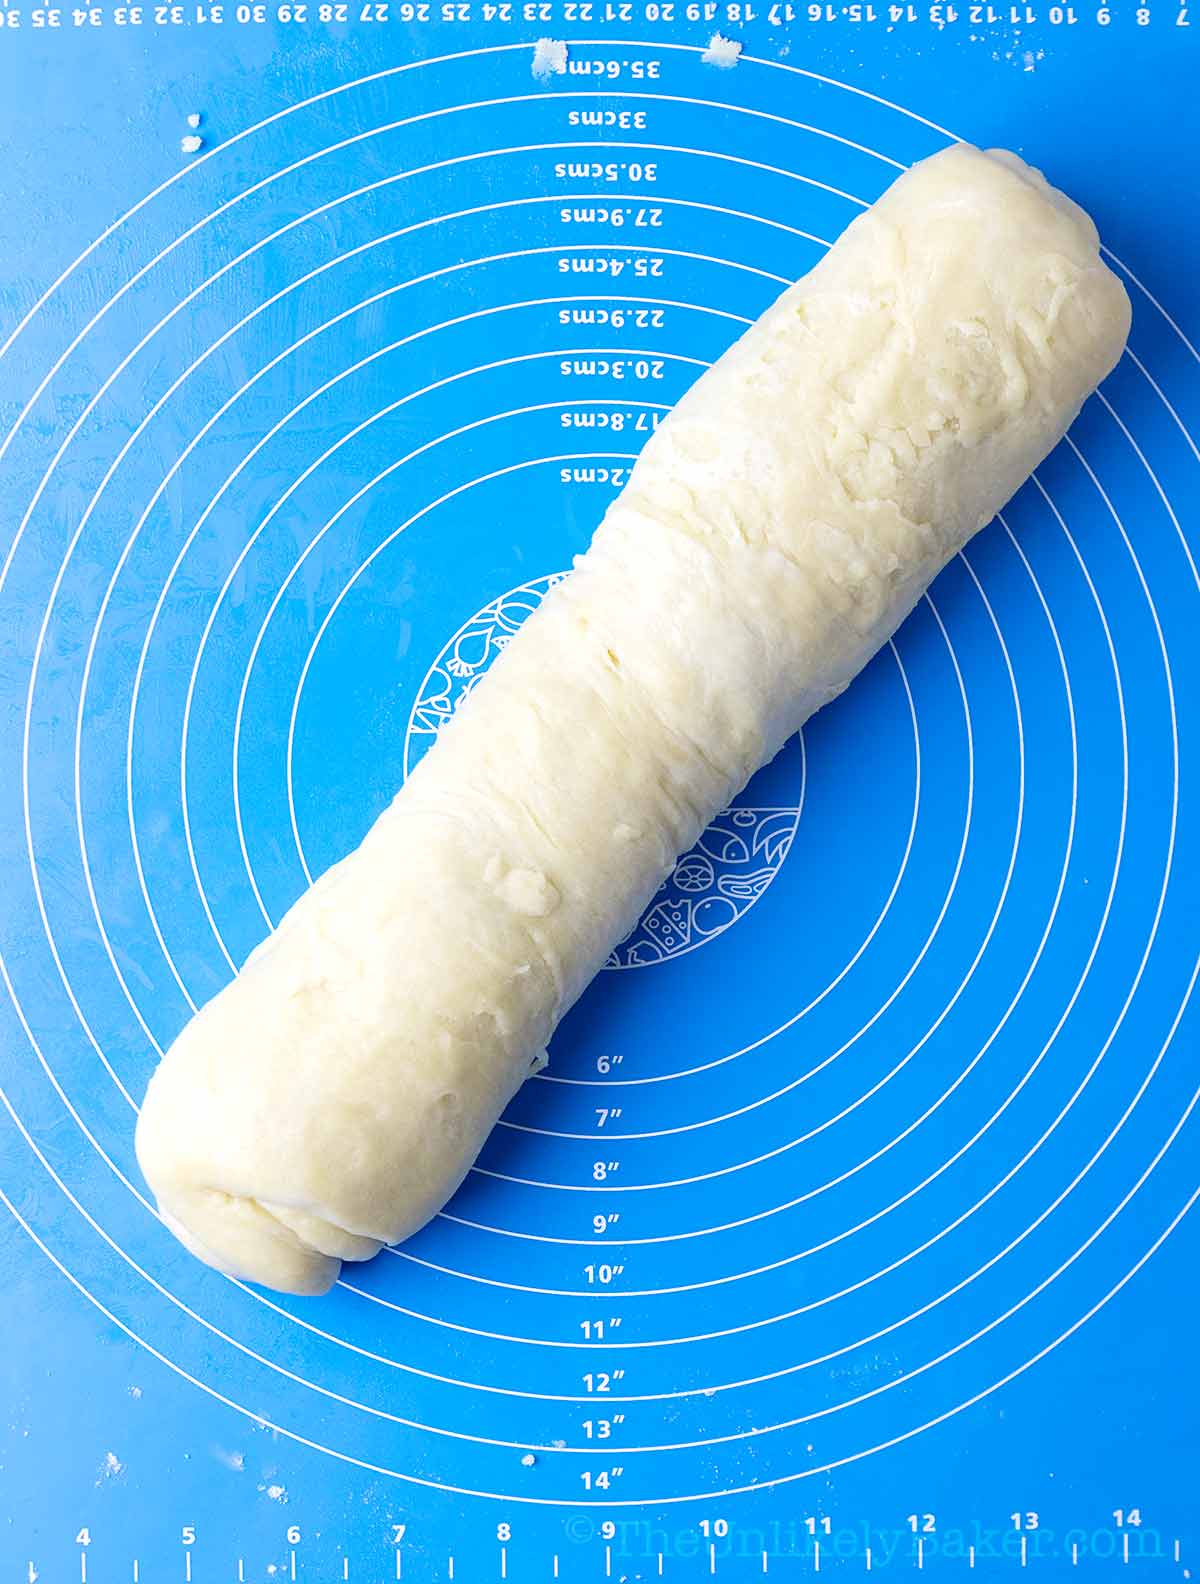
Once done, roll the dough into a log.
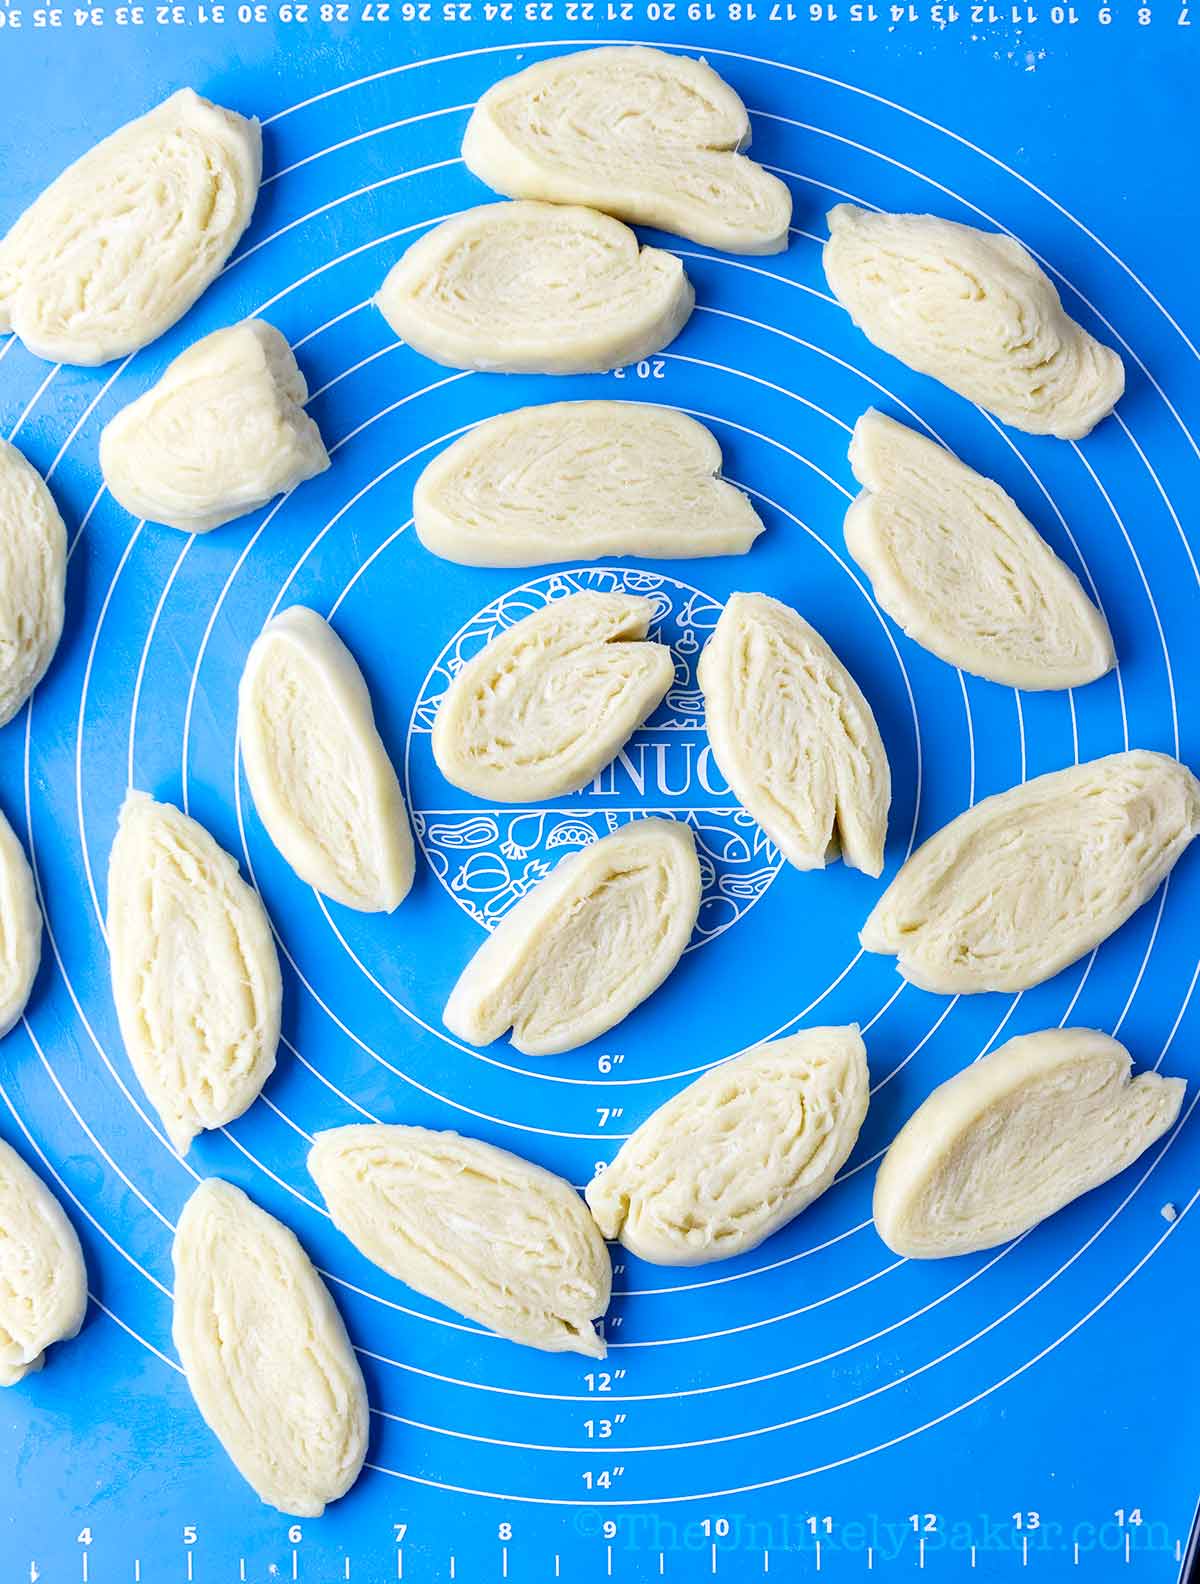
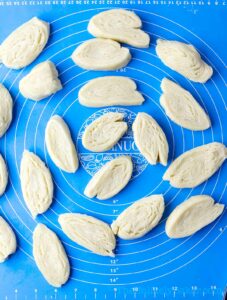
Then slice into 24 pieces. For evenly sized hopia, weigh the dough and divide by 24. The result should be the weight of each piece of dough.
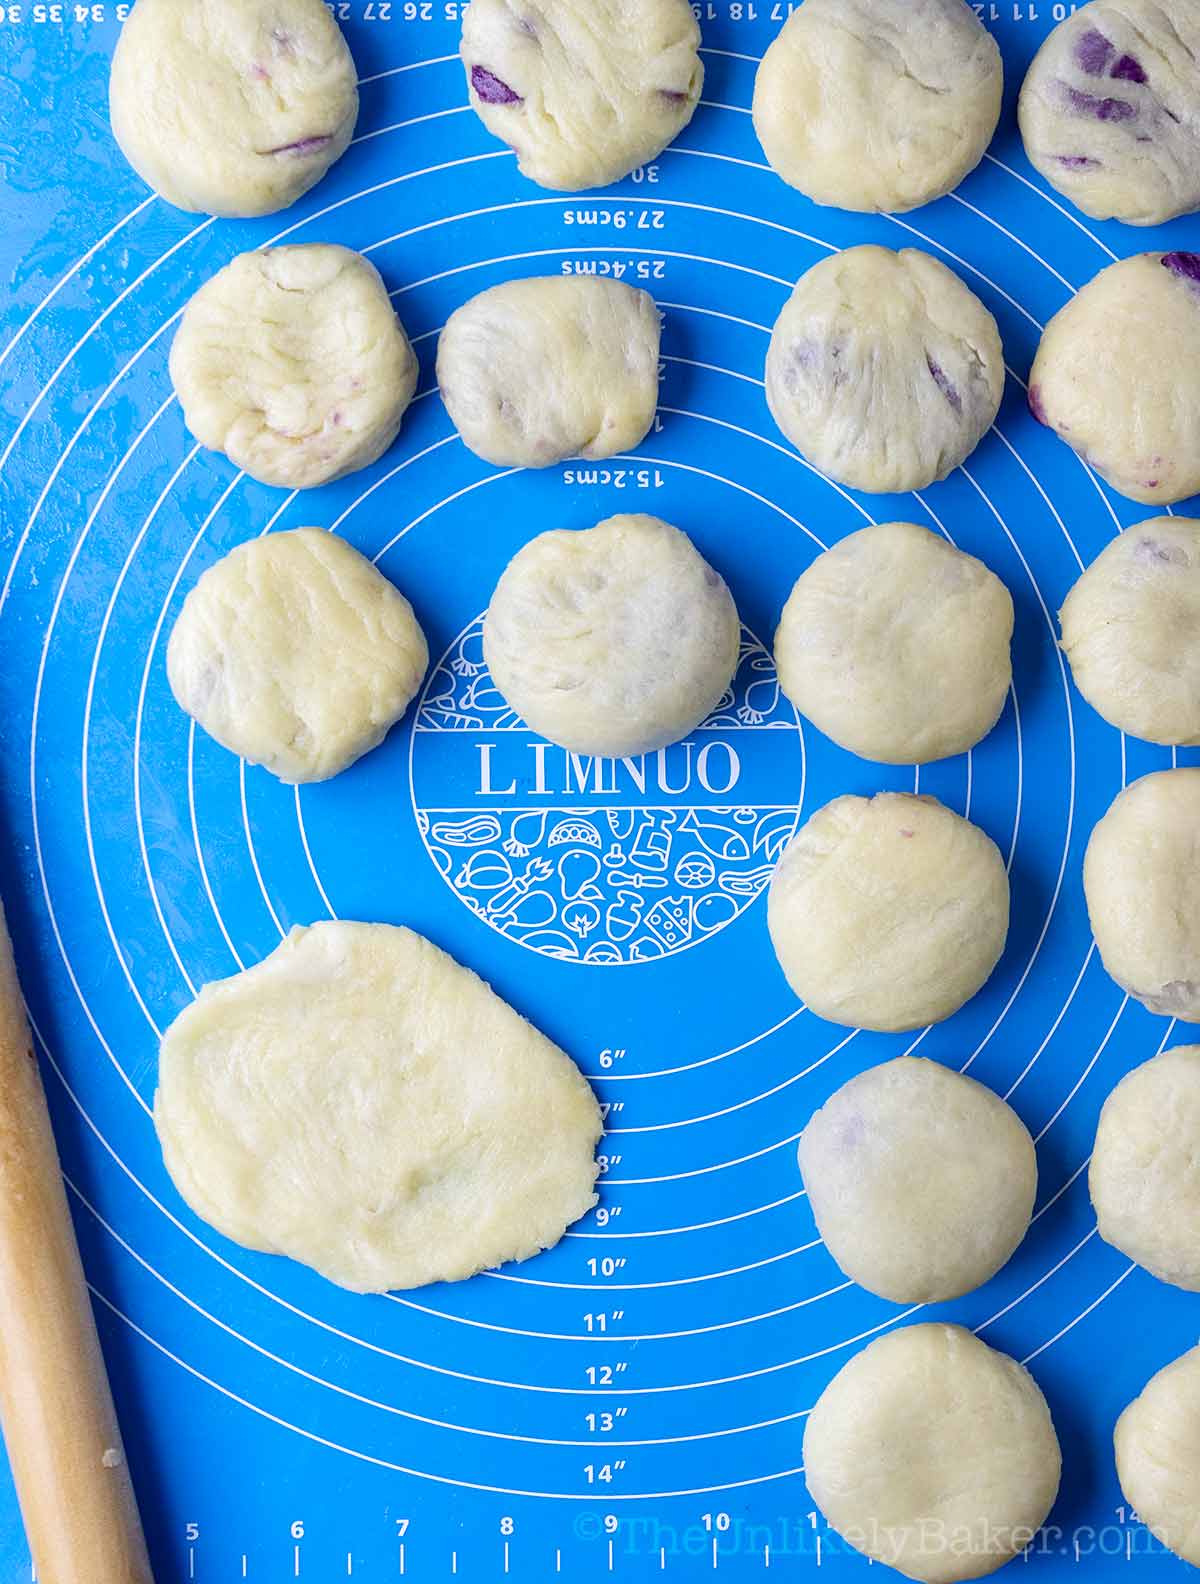
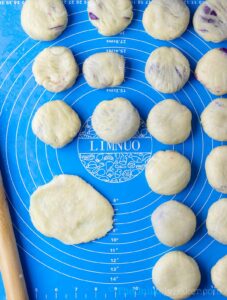
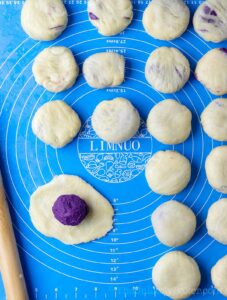
Carefully roll and flatten each piece of dough into a 2-3 inch diameter circle. Handle gently because the dough will be soft and fragile.
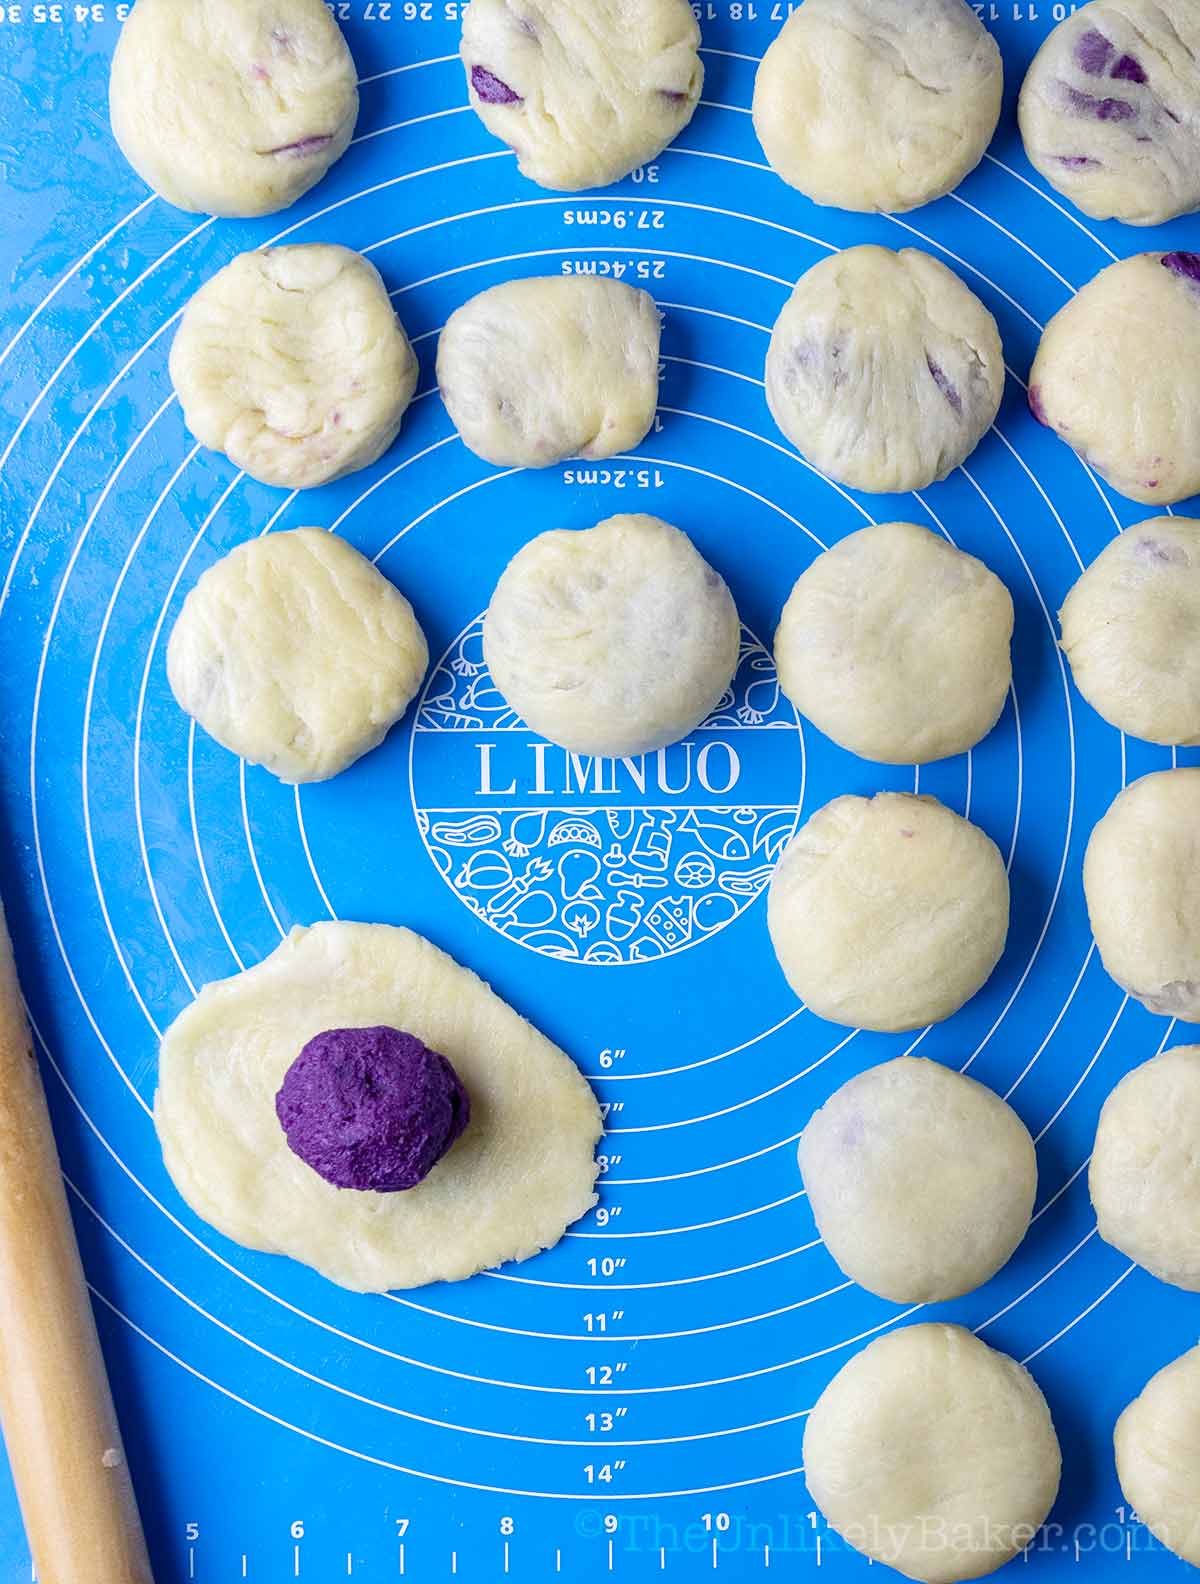
Place ube filling.
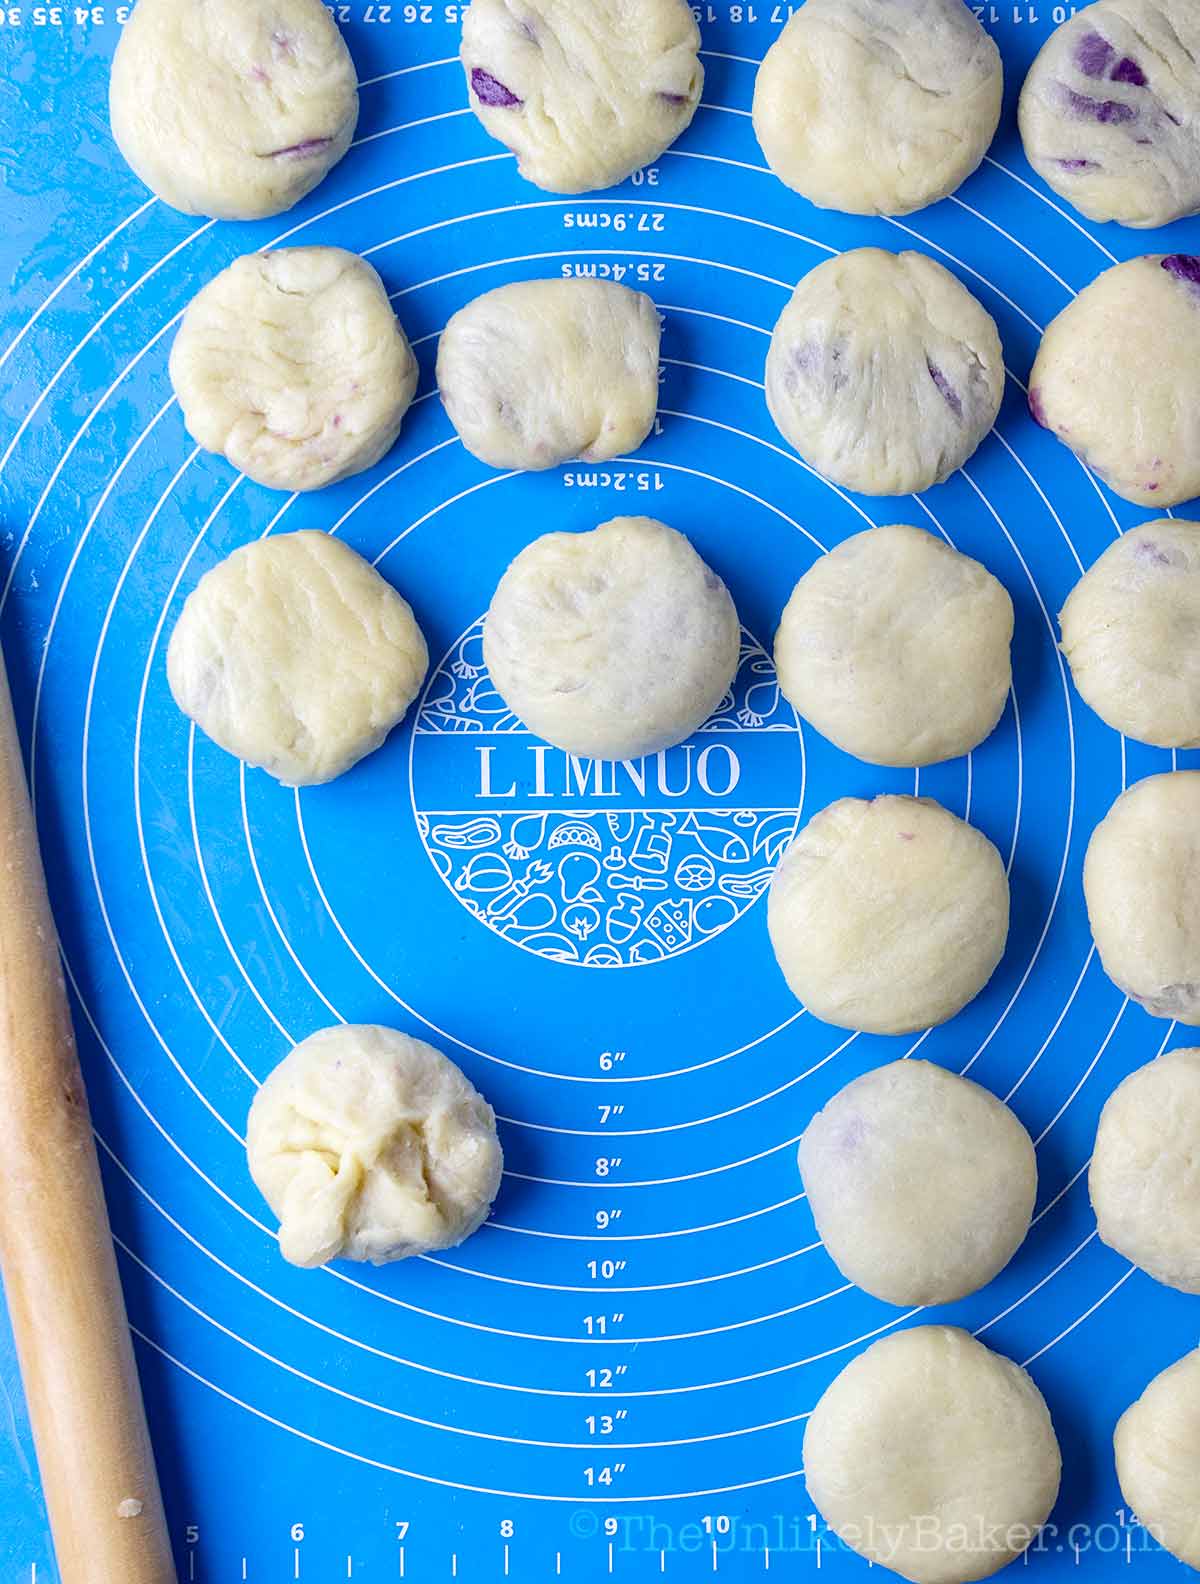
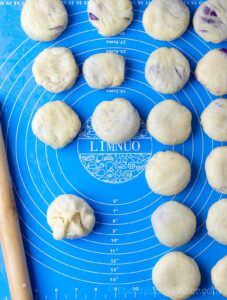
Wrap the dough around and pinch the edges to seal.
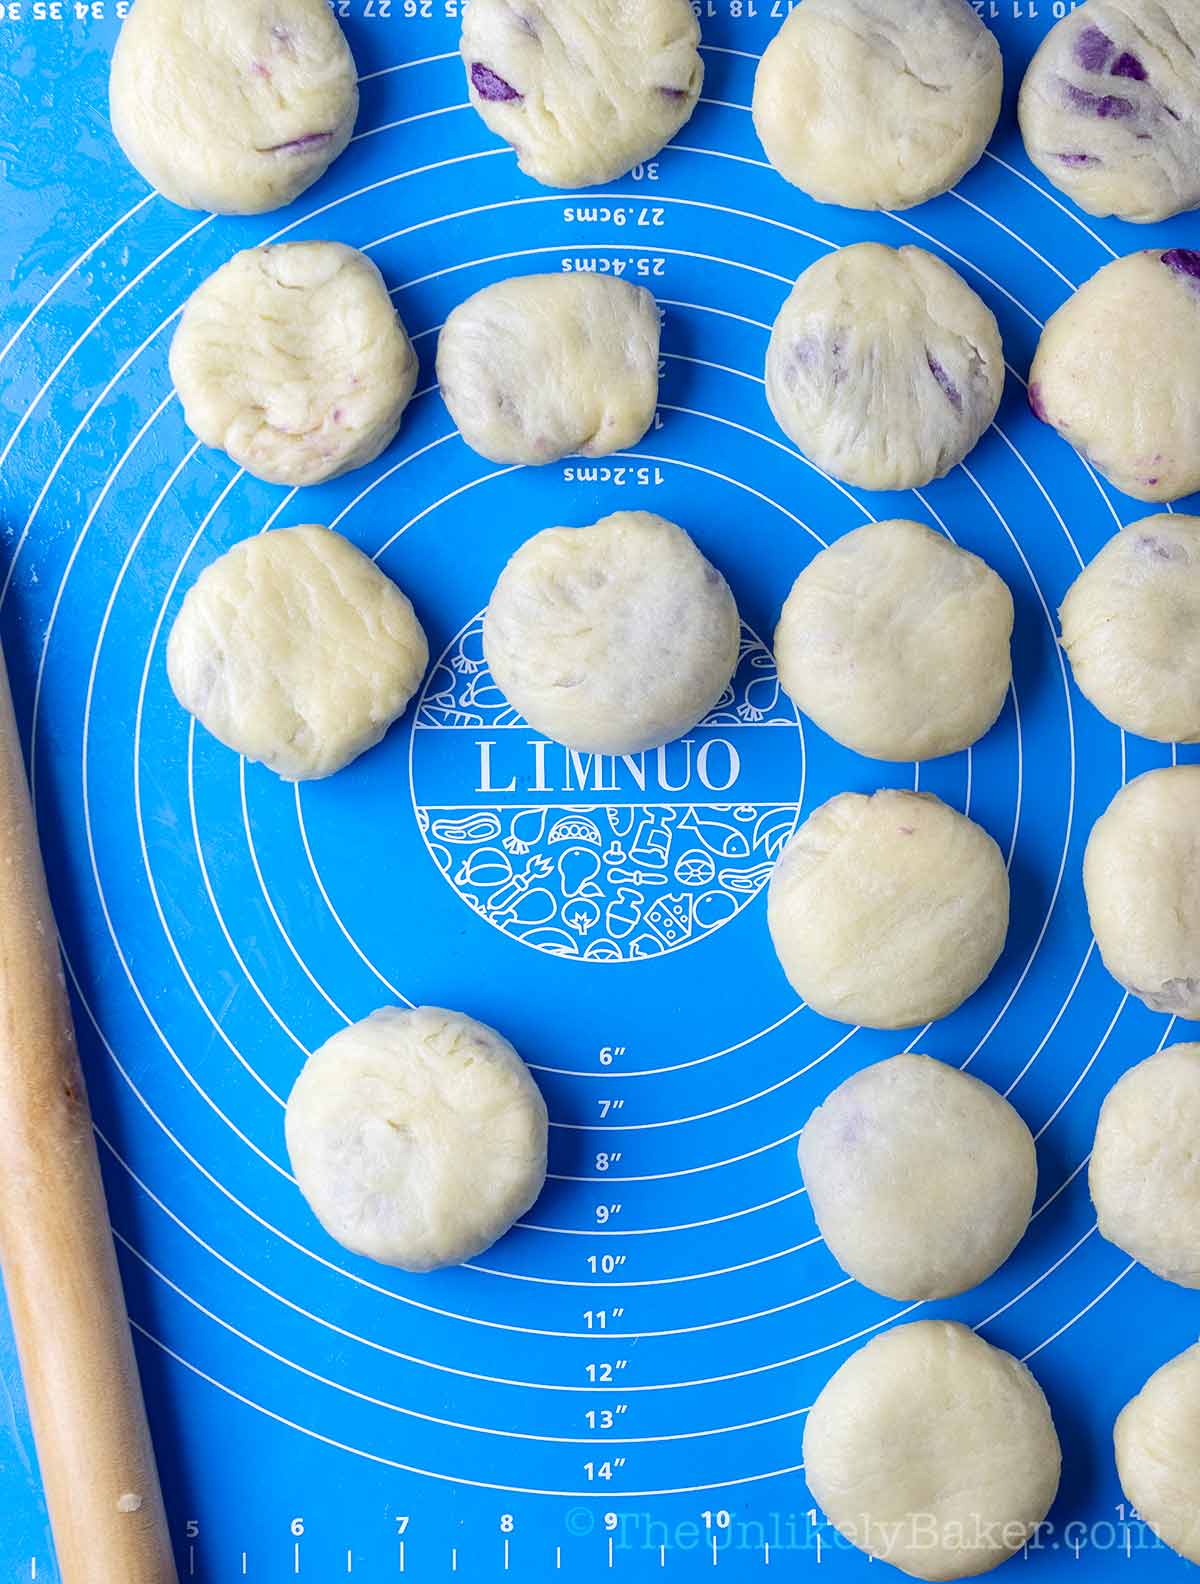
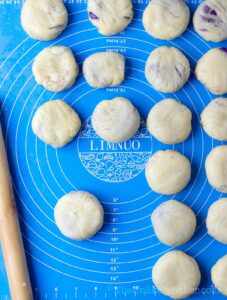
Roll and shape into a ball, then flatten slightly into a hopia shape. Repeat until you’ve used all your dough and filling.
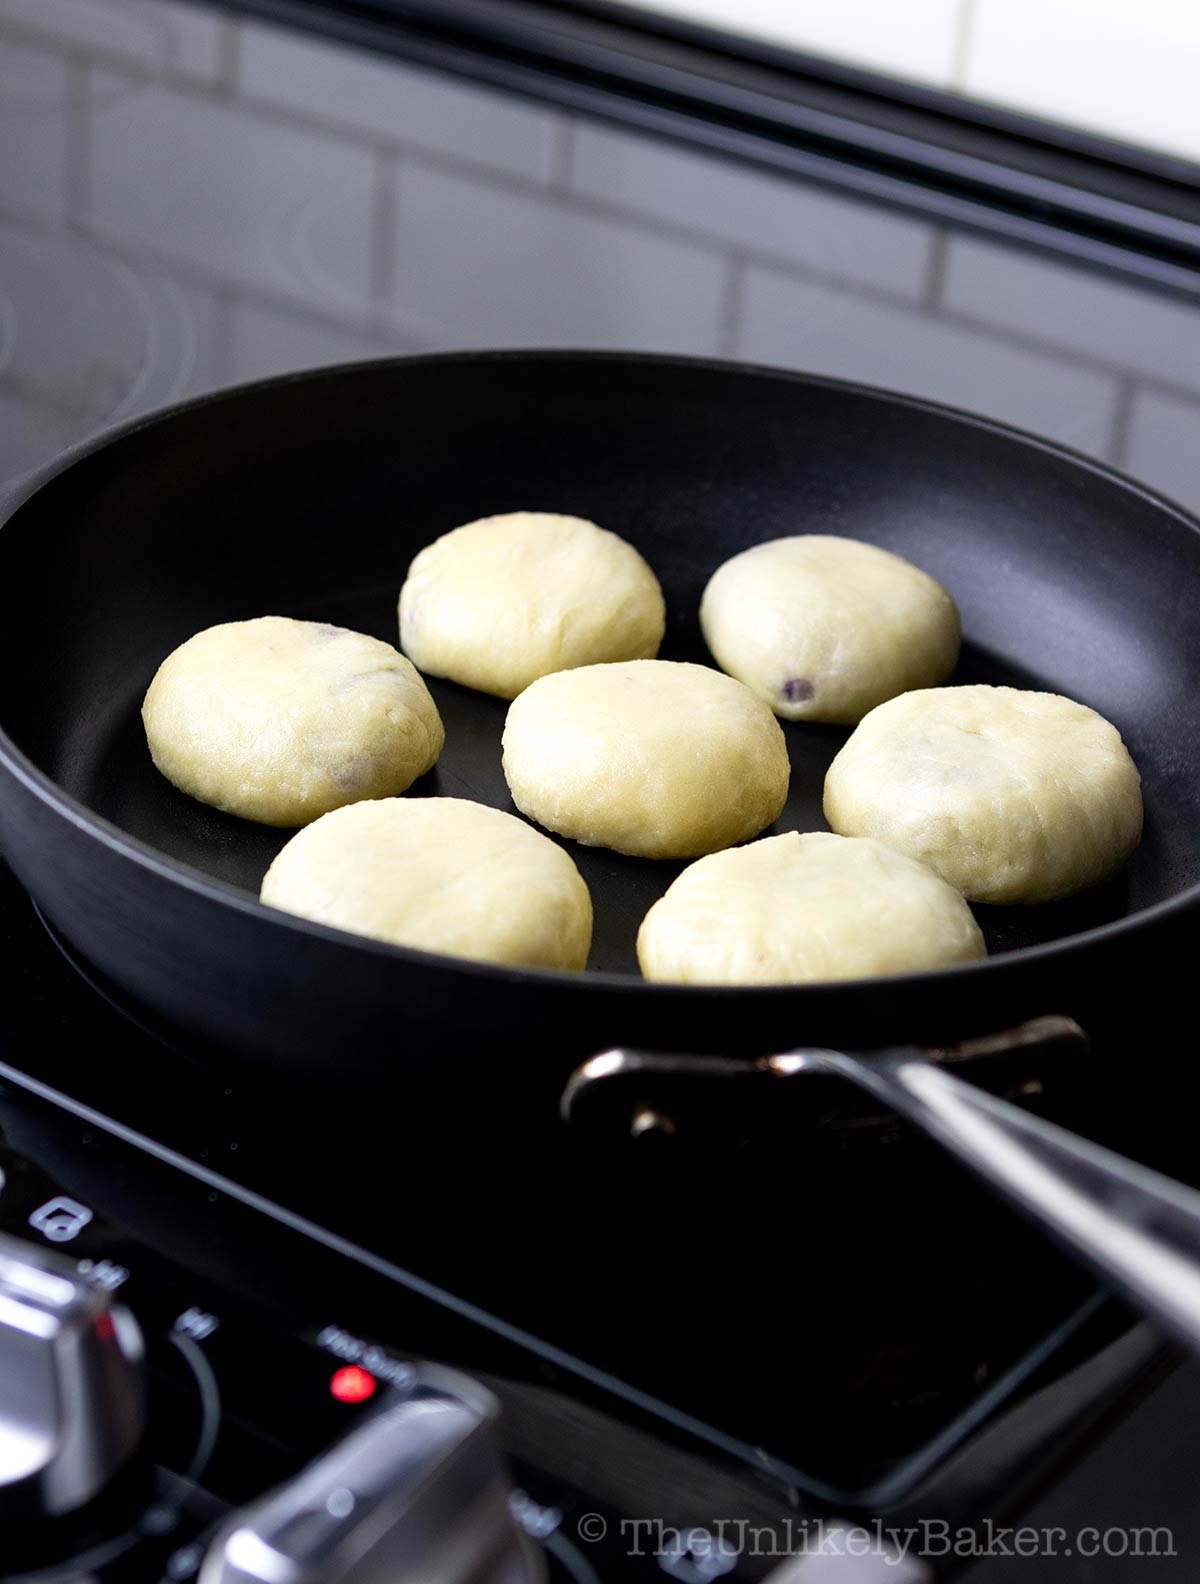
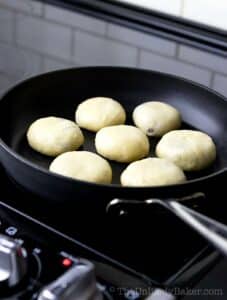
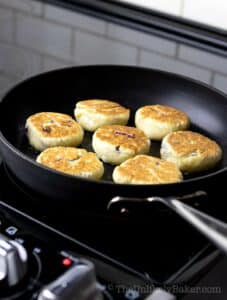
Using a non-stick pan on medium heat, place hopia on the pan allowing space around each one. Cook until golden brown.
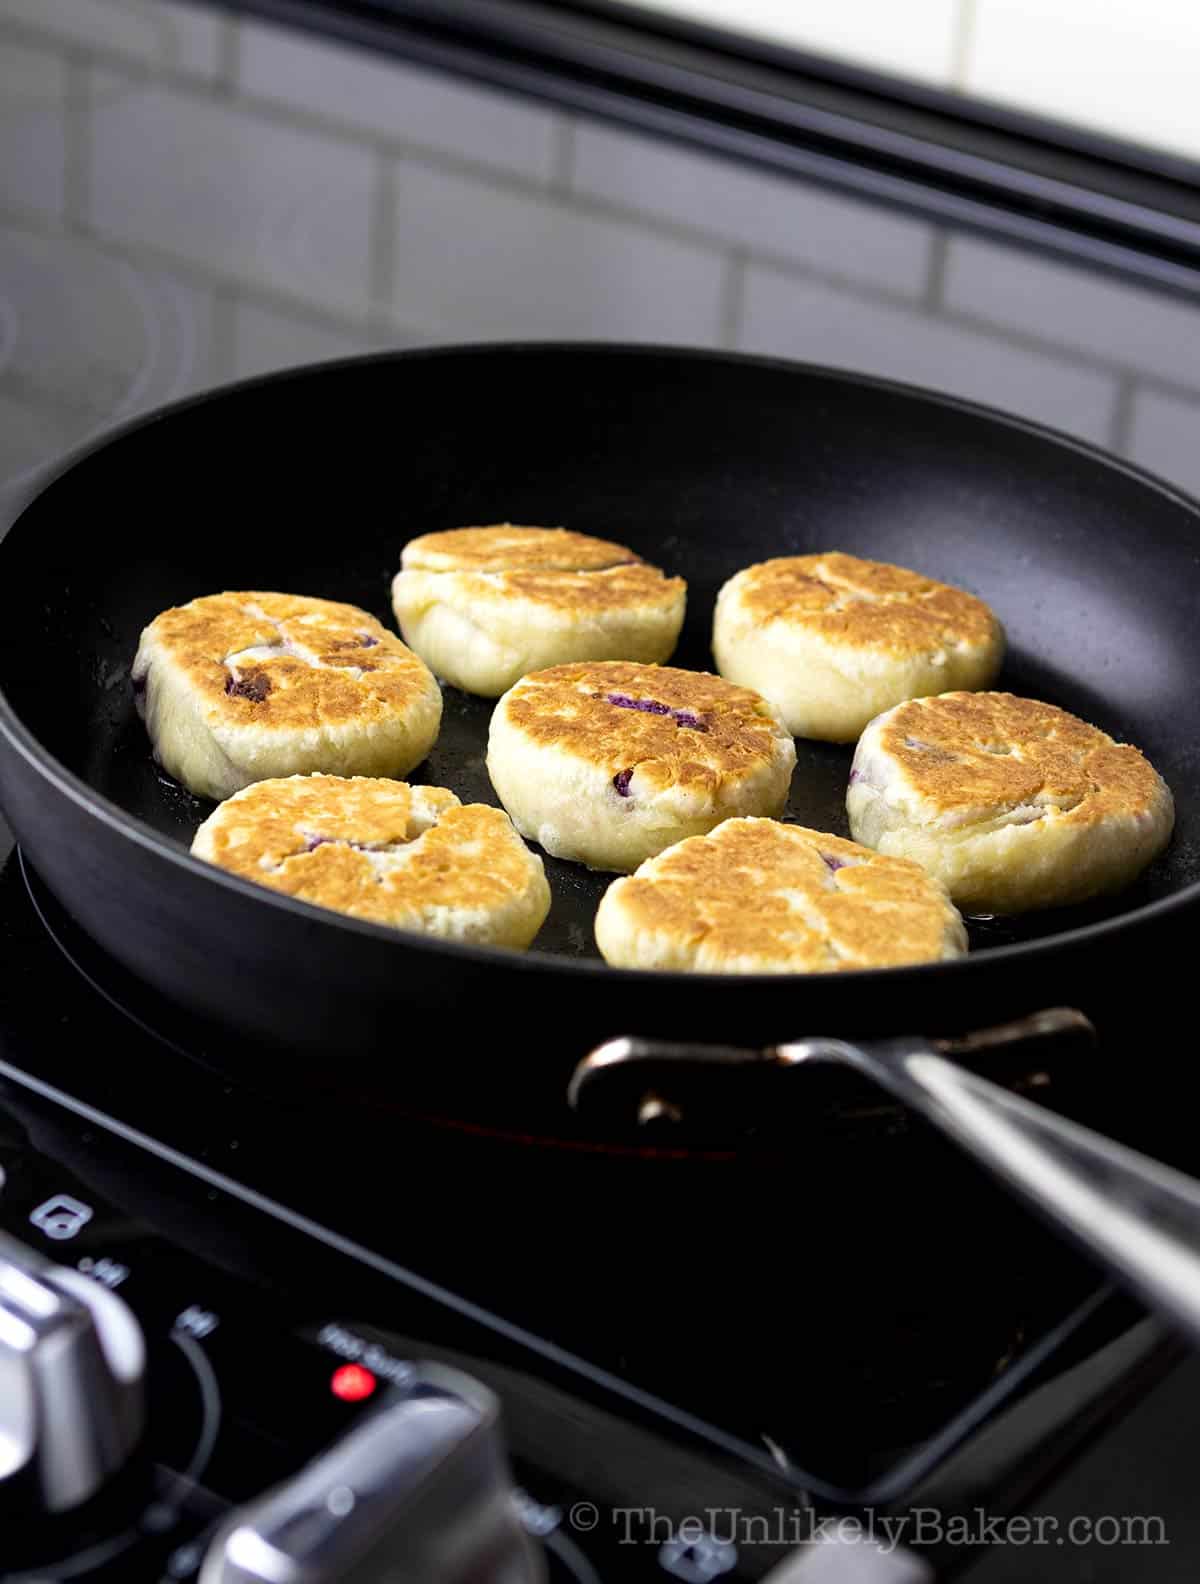
Flip and cook the other side for another 2-3 minutes. Note that this side would brown quicker.
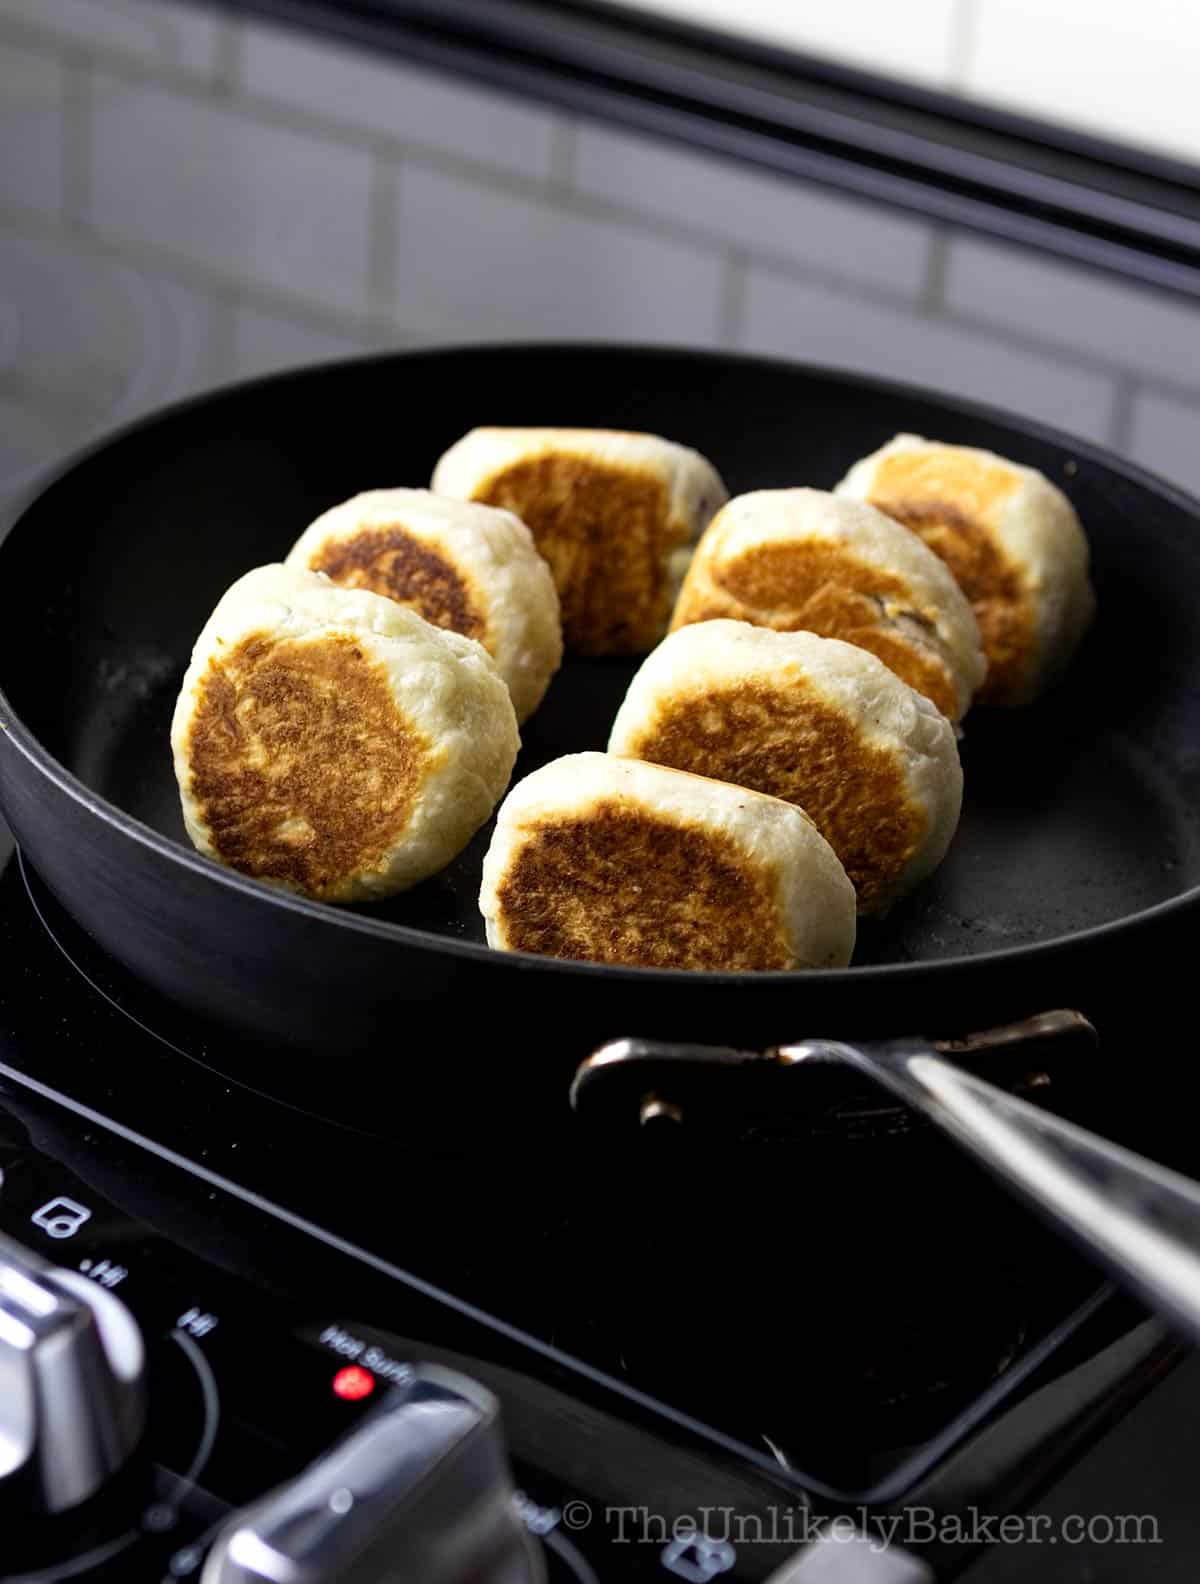
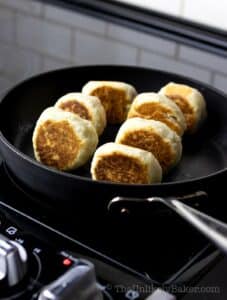
Once both sides are cooked, flip the hopia again to cook the sides. Remove from heat, cool and serve.
Expert tips
Here are more tips for perfect hopiang ube every time.
- For the thinnest, flakiest dough similar to puff pastry, it’s important not to overwork them. This is why we mix everything by hand and don’t use an electric mixer.
- To have evenly sized hopia, I recommend using a cookie scoop for the ube filling as well as a kitchen scale to weigh the filling and the dough.
- Be careful not to over-fill the hopia. We want a nice chunk of filling but we don’t want it oozing out during cooking. Also make sure to pinch the edges of your dough and shape properly.
- When cooking the hopia, it doesn’t matter what size pan you use. Just make sure you don’t crowd the pan. Also be careful not to over-cook. We’re looking for a nice golden brown exterior on each side.
- Ube hopia is better the next day! So whenever I can, I make them a day ahead of when I’m planning to serve them. If you’re short on time, allow at least a few hours for the hopia to rest and fully cool down.
Recipe FAQs
Hopia was introduced to the Philippines by Chinese immigrants in the early 1900s.
The word hopia means “good pastry” in Hokkian, a language native to and originating from the Minnan region, in the southeastern part of Fujian, in southeastern mainland China.
There are lots of varieties of hopia, even ones that are shaped like dice.
It’s often compared to mooncake as well, though mooncakes are only made with 1 dough and often have cake-y, as opposed to, flakey texture.
Absolutely! Prepare the dough as written and fill with whatever you like. You can even use your own ube filling recipe.
I usually leave ube hopia in a covered container on the counter up to two days. After that, I place them in the fridge. They should keep for up to a week.
To thaw, simply microwave for a few seconds, or place in an oven toaster, until heated through.
To freeze cooked hopia, placed them in a freeze-safe container, ideally individually wrapped in cling wrap or separated by parchment paper. They should keep for at least a month.
To thaw, place on the counter and allow to come down to room temperature before microwaving to heat the filling, or toasting to get back that flaky texture.
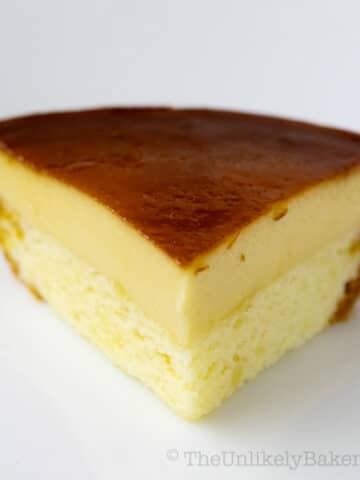
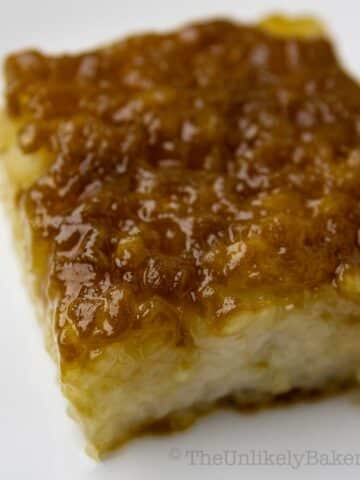
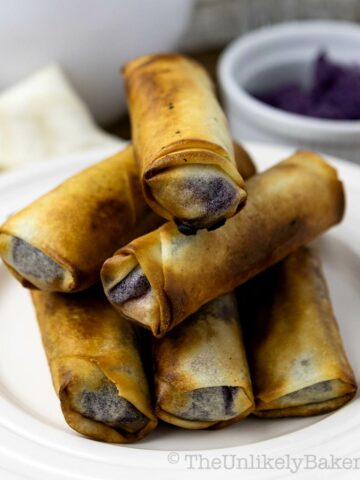
Other Philippine favorites
If you love making Filipino treats, you’ll love these:
Happy cooking!
Did you make this ube hopia recipe? I’d love to hear all about it! Leave a comment or a star rating below. You can also tag me on Instagram or Facebook. I’d love to see your creations!
You can also find me on Pinterest, Twitter and YouTube.

Ube Hopia
Ingredients
First Dough (Flour)
- 2 cups all purpose flour + 2 tbsp
- ½ tsp salt
- ½ cup oil canola or vegetable
- ½ cup water room temperature
Second Dough (Butter)
- 1½ cups all purpose flour
- ½ cup granulated sugar
- ½ cup unsalted butter softened
Filling
- 21 oz ube jam room temperature
Instructions
First Dough (Flour)
- In a large bowl, combine all ingredients and mix until incorporated. I use a wooden spoon to start, then my hands to finish combining the mixture. Be careful not to over-mix. We’re not looking for a smooth mixture. As soon as the ingredients are blended and come together in a ball, stop mixing.2 cups all purpose flour, ½ tsp salt, ½ cup oil, ½ cup water

- Wrap the dough with plastic wrap and chill in the fridge.
Second Dough (Butter)
- In another bowl, combine flour and sugar.1½ cups all purpose flour, ½ cup granulated sugar
- Add butter and cut into the flour using a pastry cutter or fork. Once incorporated, finish combining with your hands until it comes together in a ball. Again, we’re not looking for a perfectly smooth mixture here. Careful not to over-mix.½ cup unsalted butter
- Wrap the dough with plastic wrap and chill in the fridge.
Filling
- Scoop your ube filling and roll into 24 balls. For evenly sized filling, weigh each ball and make them the same weight. I usually go for 25 g each.21 oz ube jam
Making the Pastry
- Place first dough on a lightly floured surface and roll into a rectangle about ½ inch thick.
- Crumble the second dough on top of the first dough until the first dough is completely covered.
- Place plastic wrap on top and roll the second dough to flatten and smoothen it.
- Remove plastic wrap, fold your dough lengthwise (left and right) so the edges meet in the middle, then crosswise (up then down).
- Roll, flatten then fold again. Repeat this step one more time (for a total of 3 times). This is what gives hopia dough those flaky layers.
- Once done, roll the dough into a log and slice into 24 pieces. For evenly sized hopia, weigh the dough and divide by 24. The result should be the weight of each piece of dough.

Assembly
- Carefully roll and flatten each piece of dough into a 2-3 inch diameter circle. Handle gently because the dough will be soft and fragile.
- Place ube filling.
- Wrap the dough around and pinch the edges to seal.
- Roll and shape into a ball, then flatten slightly into a hopia shape. Repeat until you’ve used all your dough and filling.
Cooking
- Using a non-stick pan on medium heat, place hopia on the pan allowing space around each one. Cook until golden brown.
- Flip and cook the other side for another 2-3 minutes.
- Once both sides are cooked, flip the hopia again to cook the sides.
- Remove from heat, allow to cool, and serve.
Video
Notes
- If your first dough is too wet, add flour a little at a time until it becomes manageable.
- We want the hopia dough to be flaky so be careful not to over-work it. I don’t recommend using an electric mixer in this recipe.
- For the ube filling, I always use my homemade ube halaya. You can also buy a jar from the store; what’s important is to use ube jam that you enjoy eating on its own.
- I find that it doesn’t matter what size pan you use to cook the hopia. What matters is that you don’t crowd the pan when cooking.
- I keep hopia on the counter for up to 2 days. After that I store it in a covered container in the fridge.
- See post for more tips, FAQs and step-by-step photos.
Nutrition
Nutritional information are estimates only.
Jo
Sooo good and its not that hard to make only time consuming but other than that its delishhh. Thank you.
Jolina
So glad you liked them Jo!
Taylor Metzler
Could I make the pastry portion ahead of time?
Jolina
Hi Taylor, I’ve only ever frozen cooked hopia but you should be able to make the dough ahead. Happy baking!
JR
I made this last week and it was a hit. I would like to do this again but this time with munggo/ bean paste. Would you happen to have the recipe to make that?
Jolina
Hi JR, glad you liked them! I don’t have munggo filling recipe yet, coming soon 🙂
Eric
I was unhappy with this recipe. First, I could not get the second dough to form a ball it was too dry and crumbly. I had to increase the amount of butter and add a tablespoon or so of water before it would all stick together. Some other recipes on the web called for less flour or more shortening/ butter or water in the second dough. Second, I could not roll out the second dough as thin as I would like, without it cracking due to the flaky layers of dough. Third, I could not close up the hopia dough without cracking it. I had to dip my fingers in water to moisten the dough ends. And I had to reduce the amount of Ube halaya in each hopia; otherwise, it would squeeze out. My Filipino friends and I did find the Ube tasty, but the dough was too thick.
Jolina
Hi Eric, it took me a while to get the dough just right. It takes lots of practice! Hope you try again 🙂
Ramil
I am proud to read a Filipino bread featured on your site. I am a Filipino and hopia with baboy is my favorite. I didn’t know that I could make hopia without an oven. I can’t wait to try this recipe!
Andrea
Hii can i substitute margarine for butter? Would that affect how it would turn out?
Jolina
Hi Andrea, I haven’t tried but they’re generally considered good subs for each other.
Susan
First time making hopia and they came out delicious! Even better next day. Thanks for the recipe!
Jolina
So happy to hear that Susan! You’re very welcome!
Concep
Hi Jolina, can I add macapuno to the filling?
Jolina
Hi Concep, I haven’t tried but I bet you can! Just ensure you don’t overfill the hopia. Enjoy!
Honey
Hi Jolina! I never thought I’d be making hopia either but I really wanted to try this and WOW my family is impressed! I will be making again and again to perfect my pastry. Thanks for the inspiration and the delicious recipe!!
Jolina
You’re very welcome! It’s great when we get to make these treats at home right? 🙂 Enjoy!
Jamie
I love this recipe. It is so easy and so delicious.
I made this and my sister loves it!
Jolina
Happ to hear that Jaime!
Carmie
First time making hopia and it turned out great! I’ve made your ube jam lots of times it’s a family favorite so thought I’d turn it into hopia this time. So delicious. Can’t wait to try your other ube recipes. Thanks Jolina!
Jolina
Glad you like it Carmie! Enjoy all things ube 🙂