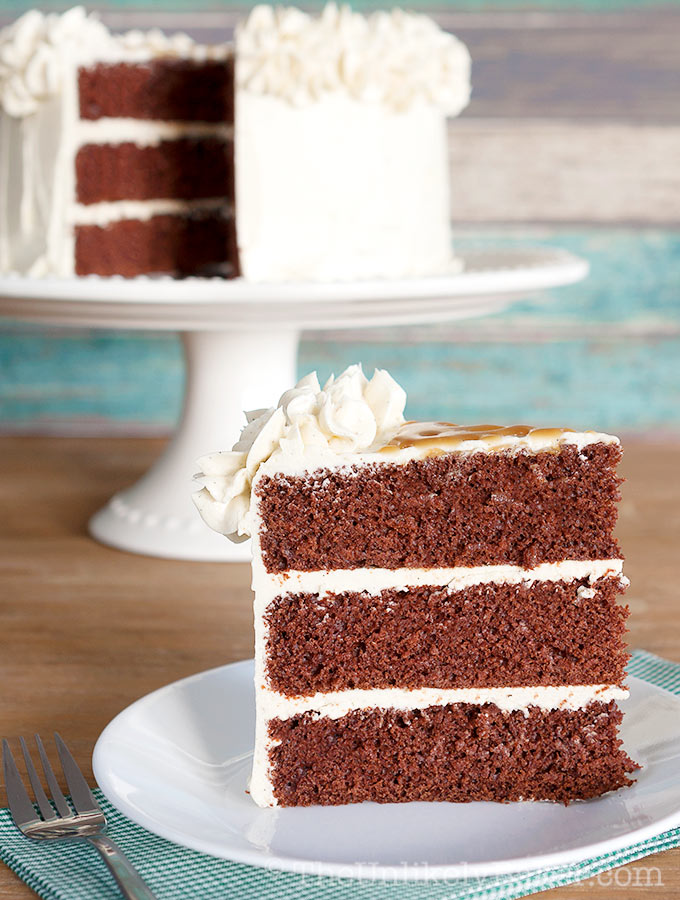
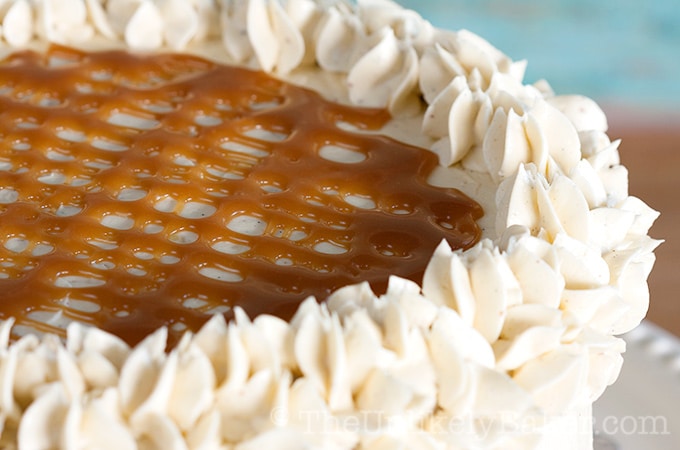
London fog cake with earl grey buttercream — layers of rich, moist, chocolate cake covered with luxurious earl grey Swiss meringue buttercream then topped with decadent salted caramel sauce. The components work perfectly together for one amazing cake.
(Looking for another stunning layer cake to wow your guests? Try this delicious Red Velvet Cake with Ermine Frosting. Fun and festive for the holidays too.)
I’m ridiculously lucky at promos and giveaways. I win free show tickets, small amounts in the lottery (I’m really just waiting for my jackpot prize to come around), I’ve even won an emergency car kit (how random is that?).
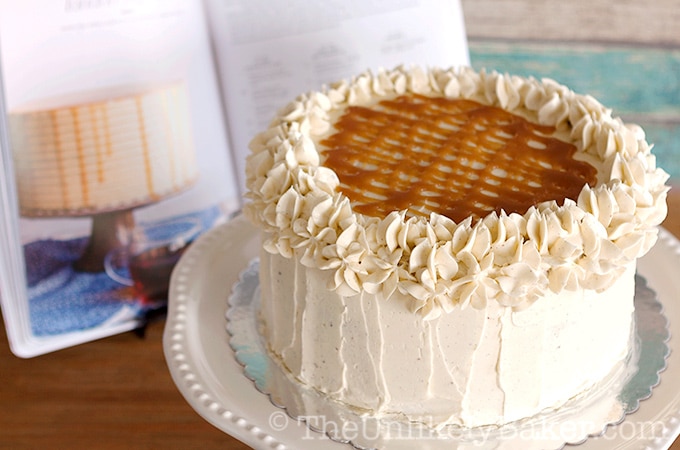
But my favourite so far is winning Coco Cake Land’s giveaway for Tessa Huff’s cookbook, Layered. I love baking cakes and this book is all about them.
There are a lot of tips on how to bake them successfully and how to make them pretty.
The pictures are stunning and although they intimidated me at first, Tessa’s tips and instructions boosted my confidence — that even a home baker like me can create showstopper cakes too.
Enter Red.
Her birthday was coming up and I promised that I’d bake her a birthday cake. I went further and said she can go ahead and pick any cake from Layered (who is this person I’ve become?). So she did and picked the London Fog Cake.
Armed with Layered and my newfound confidence, I proceeded to bake one of the most amazing cakes I’ve ever made and tasted in my life.
What is London fog cake?
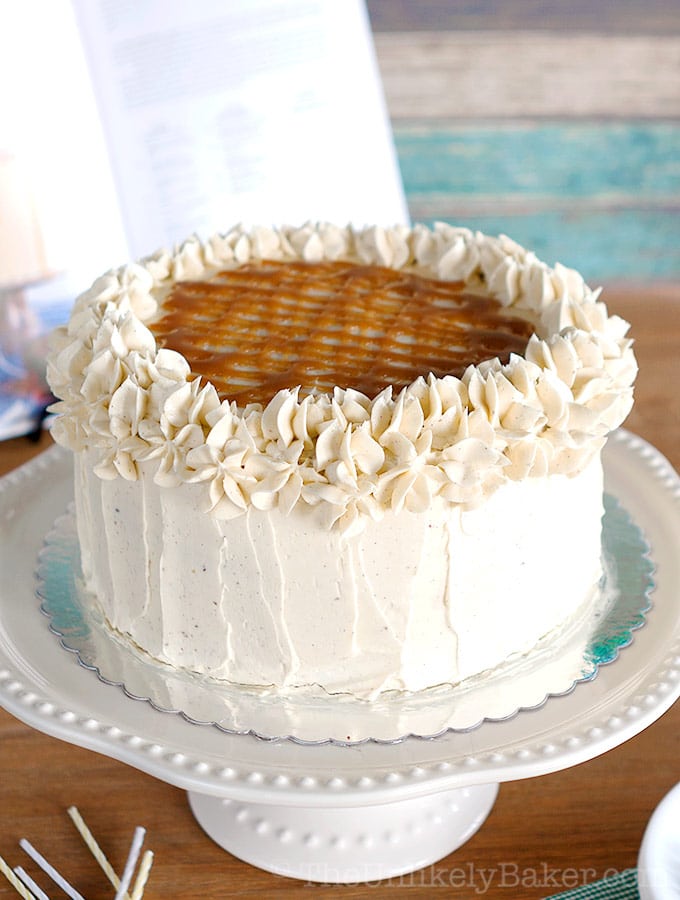
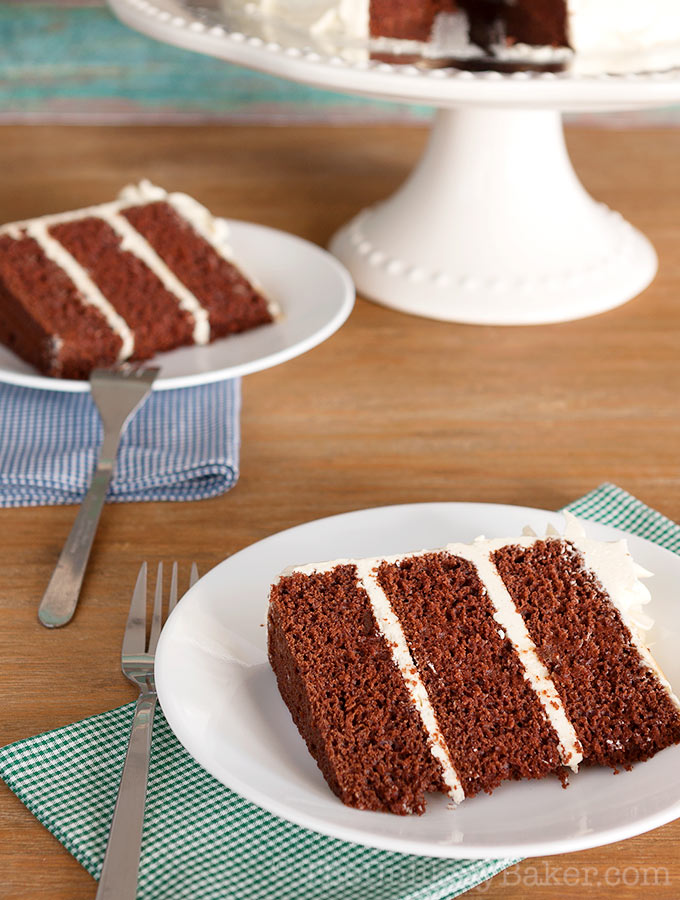
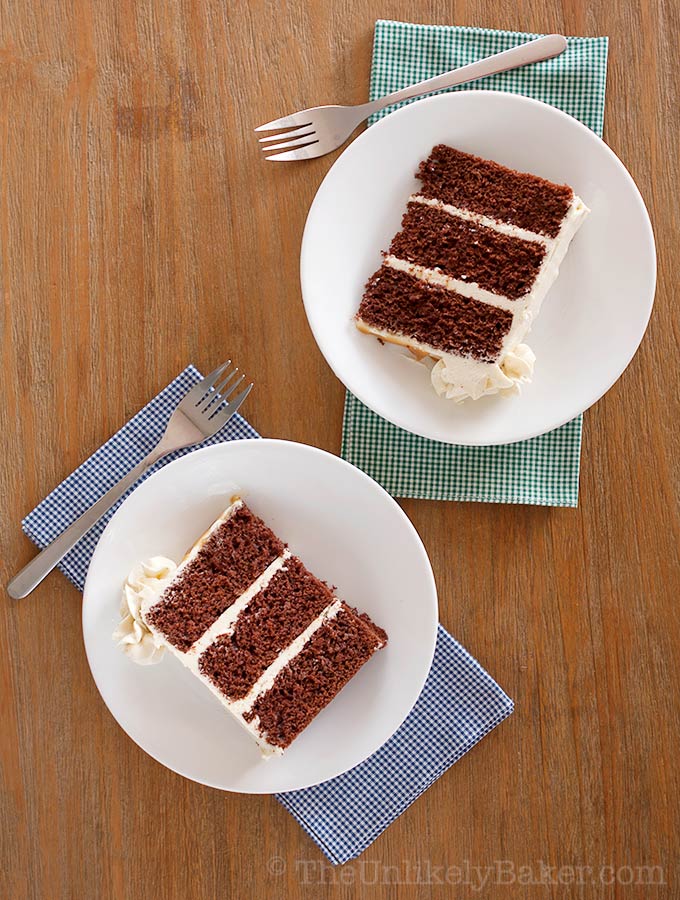
The London fog cake is at its heart a chocolate layer cake. And the chocolate cake is great on its own. Soft, moist and bursting with chocolate flavour — the way all chocolate cakes should be.
The star of the show is the earl grey buttercream though.
The earl grey butter incorporated into the silky Swiss meringue buttercream results to a flavour so unique, so complex, so brilliant that you wonder why you never thought to do it before (love earl grey? Try this earl grey ice cream).
What completes this sophisticated trifecta of flavours is the salted caramel sauce.
There’s a salted caramel sauce recipe provided in the book but I used my go-to salted caramel sauce recipe instead.
History of the London fog cake
Ever wonder about the history of the London fog cake? It has such an interesting name you’d think it originated in London and has something to do with fog.
But it’s actually inspired by the London fog drink — an earl grey tea latte made with steamed milk and vanilla that first popped up in Vancouver, British Columbia (Oh, Canada!).
It’s been popular in this part of the world for years though Starbucks has been serving it for a while now too. (Here’s a great recipe to make it at home.)
The drink is warm, cozy and unique; the cake version is just extraordinary. So let’s get baking!
How to make London fog cake
First let’s make the chocolate layer cakes. (For the detailed recipe, please scroll to the bottom of the page for a printable recipe card.)
1. PREP YOUR PANS. Preheat oven to 350F. Grease and flour the bottom and sides of 3 8-inch cake pans. For good measure, I also always line the bottom with parchment paper but you don’t have to.
2. COMBINE YOUR DRY INGREDIENTS. In a large bowl, sift all-purpose flour, cocoa powder, baking powder, baking soda and salt.
3. COMBINE YOUR WET INGREDIENTS. Using an electric hand mixer or a stand mixer fitted with the paddle attachment, beat oil and sugar on medium speed for 2 minutes. With the mixer still running, add eggs, vanilla extract and almond extract. Remember to scrape the bottom and sides of your bowl.
4. ADD FLOUR AND MILK TO YOUR BATTER. With the mixer still running on low speed, add your flour mixture to the batter, alternating with milk. Make sure each addition is incorporated well.
5. DRIZZLE COFFEE. Still on low speed, gradually drizzle in coffee (be careful, it will splatter). Mix on low-medium speed for no more than 30 seconds or until combined.
6. TRANSFER BATTER TO PANS. Evenly divide the batter into your 3 pans and bake until a toothpick inserted in the middle of the cakes comes out clean or with minimal crumbs. Cool on a wire rack for 15 minutes then remove cakes from pans and cool on rack completely.
How to make earl grey buttercream
For the out-of-this-world earl grey buttercream, we start by infusing butter with earl grey tea.
1. MAKE EARL GREY INFUSED BUTTER. In a medium saucepan, place butter and loose earl grey tea leaves and cook on medium heat until the butter melts. Switch to low heat and simmer for 5 minutes. Remove from the heat and let the tea steep for another 5.
2. SOLIDIFY BUTTER. To remove the tea leaves, strain the butter through a fine-mesh sieve into a bowl and refrigerate until the butter becomes solid again but only until the consistency of softened butter. In the meantime, you can start making your Swiss meringue buttercream.
3. COMBINE EGG WHITES AND SUGAR. Put egg whites and sugar in the bowl of your stand mixer. Using your stand mixer’s whisk attachment, manually whisk the mixture until combined.
4. DISSOLVE SUGAR. Place the bowl over a saucepan filled with a few inches of simmering water (make sure the water doesn’t touch the bottom of the bowl) and whisk until the mixture reaches 160F.
5. WHIP EGGS TO MEDIUM-STIFF PEAKS. Attach the bowl onto your stand mixer and whisk on medium-high speed until you reach medium-stiff peaks (about 8-10 minutes). At this point, when you touch the bowl it should not be hot anymore (should feel more like room temperature).
6. ADD BUTTER TO YOUR MERINGUE. Switch to the paddle attachment and on low speed add vanilla bean paste. Also proceed to add your tea butter and the rest of your butter a couple of tablespoons at a time until the mixture is well combined and incorporated. Switch to medium-high speed again and beat the buttercream until smooth, glossy and creamy (about 3-5 minutes).
Ingredients
While this cake is certainly impressive, the ingredients to make it are surprisingly simple, pantry staples.
For the chocolate cake, you need:
- All purpose flour
- Unsweetened, natural cocoa powder
- Baking powder and baking soda
- Salt
- Canola oil (or any other neutral oil)
- Granulated sugar
- Eggs
- Vanilla extract
- Almond extract
- Milk
- Strong-brewed coffee
To make the earl grey Swiss meringue buttercream, you need:
- Unsalted butter
- Loose earl grey tea leaves
- Egg whites
- Granulated sugar
- Vanilla bean paste
(you can substitute with vanilla extract)
I used this recipe for easy salted caramel sauce.
Baking tools
I use my stand mixer to make the Swiss meringue buttercream. Other than that, it’s just the usual mixing bowls, measuring cups and measuring spoons.
To decorate the cake, I really like my cake turnable, bench scraper and angled spatula. I’m not the best cake decorator but these make my cake decorating life easier (and fun!).
Recipe FAQs
Here are some common questions I’ve been asked about making this cake.
Coffee in chocolate cakes enhances the chocolate flavour. However, if you can’t or don’t want to include coffee in your cake, you can substitute an equal amount of hot water.
In general, loose tea leaves are richer and impart more flavour than teabags. Teabags are also prone to get dull and stale after a while.
If you’re unable to get earl grey loose tea leaves though, you can use teabags in a pinch; just keep in mind that you may need to use more and steep for longer to get that same full, vibrant earl grey flavour.
An important step when making Swiss meringue buttercream is making sure the egg whites are cooked (temperature should reach 160F on a candy thermometer).
If you don’t have a candy thermometer, no worries; you can still make Swiss meringue buttercream. Check for doneness by rubbing the egg white-sugar mixture between your fingers. If the sugar is fully dissolved and the mixture is smooth, it’s ready.
Admittedly, there are a lot of steps in making layer cakes but they are really simple steps and the end result is always fantastic. Hard to beat that feeling of slicing into a layer cake and seeing those perfect layers!
I find that the key to making layer cakes (and baking, in general) is mis en place or, simply, hardcore organization. I make sure all my ingredients are measured, laid out and ready to go.
I also make sure to read the recipe thoroughly before I begin.
Easy layer cake recipes
Obsessed with layer cakes? Here are more recipes for you.
- A rainbow cake is a fun, impressive layer cake that’s easier to make than it looks. All you need is your favourite vanilla cake and tint it with the colours of the rainbow!
- Here’s another fun one for you — funfetti cake.It really is the most awesome birthday cake you can bake for someone you love.
- For the lemon lovers in your life, bake this lemon cake with lemon curd filling — smooth and silky lemon curd filling the layers of the soft lemony cakes frosted with lemon buttercream. Did I mention there was lemon?
- And for chocolate fans, it doesn’t get any chocolatier than this chocolate chiffon cake with whipped cream frosting.
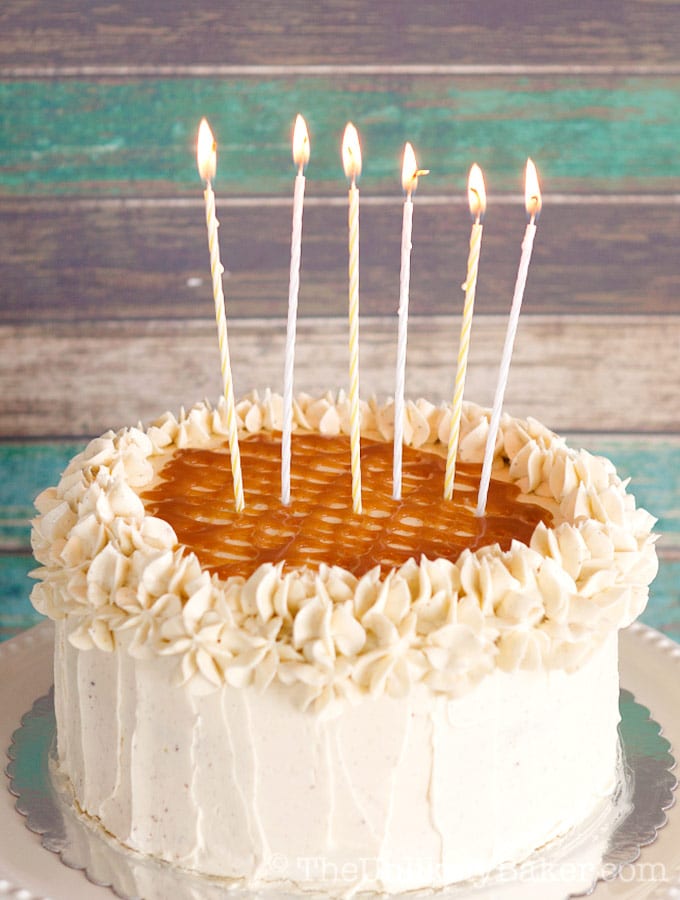
I know I’m not a great cake decorator (obviously lol) but I couldn’t be happier with the end result here. The London fog cake looks pretty enough (ha!) and it tastes fantastic.
Best of all, my birthday celebrant was over the moon.

London Fog Cake with Earl Grey Buttercream
Ingredients
For the Chocolate Cake:
- 2 ½ cups all purpose flour
- 1 cup unsweetened natural cocoa powder
- 2 ½ tsp baking powder
- ¾ tsp baking soda
- 1 tsp salt
- ½ cup + 2 tablespoons canola oil or any other neutral oil
- 2 cups granulated sugar
- 2 pcs large eggs room temperature
- 1 pc egg yolk from large egg room temperature
- 2 tsp vanilla extract
- ½ tsp almond extract
- 1 ½ cups milk room temperature
- 1 cup strong-brewed coffee hot
For the Earl Grey Buttercream:
- 2 cups unsalted butter room temperature
- ¼ cup loose Earl Grey tea
- ½ cup + 2 tablespoons egg white room temperature
- 1 ¼ cups granulated sugar
- 1 ½ tsp vanilla bean paste
Instructions
For the Chocolate Cake:
- Preheat oven to 350F. Grease and flour the bottom and sides of 3 8-inch baking pans. For good measure, I also always line the bottom with parchment paper but you don't have to. Set aside.
- Sift 2 ½ cups all purpose flour, 1 cup cocoa powder, 2 ½ teaspoons baking powder, ¾ teaspoon baking soda and 1 teaspoon salt. Set aside.
- Using an electric hand mixer or a stand mixer fitted with the paddle attachment, beat ½ cup + 2 tablespoons oil and 2 cups sugar on medium speed for 2 minutes. With the mixer still running, add the 2 eggs, the egg yolk, 2 teaspoons vanilla and ½ teaspoon almond extract. Remember to scrape the bottom and sides of your bowl.
- Switch to low speed and add a third of your flour mixture then half of your milk. Add the next third of your flour, the rest of your milk and the last of your flour. Make sure each addition is incorporated well. Again remember to scrape for rouge batter.
- Still on low speed, gradually drizzle in the coffee (be careful, it will splatter). Mix on low-medium speed for no more than 30 seconds or until combined.
- Evenly divide the batter into your 3 pans and bake for 23-27 minutes or until a toothpick inserted in the middle of the cakes comes out clean or with minimal crumbs.
- Cool on a wire rack for 15 minutes then remove cakes from pans and cool on rack completely.
For the Earl Grey Buttercream:
- In a medium saucepan, place 1 cup butter and ¼ cup Earl Grey tea and cook on medium heat until the butter melts. Switch to low heat and simmer for 5 minutes. Remove from the heat and let the tea steep for another 5.
- Strain the butter through a fine-mesh sieve into a bowl and refrigerate until the butter becomes solid again but only until the consistency of softened butter.
- In the meantime, put ½ cup + 2 tablespoons egg whites and 1 ¼ cups sugar in the bowl of your stand mixer. Using your stand mixer's whisk attachment, manually whisk the mixture until combined. Place the bowl over a saucepan filled with a few inches of simmering water (make sure the water doesn't touch the bottom of the bowl) and whisk until the mixture reaches 160F (if you don't have a candy thermometer, you can check for doneness by rubbing the mixture between your fingers. If the sugar is fully dissolved and the mixture is smooth, it's ready).
- Attach the bowl onto your stand mixer and whisk on medium-high speed until you reach medium-stiff peaks (about 8-10 minutes). At this point, when you touch the bowl it should not be hot anymore (should feel more like room temperature).
- Switch to the paddle attachment and on low speed add the 1 ½ teaspoons vanilla bean paste. Also proceed to add your tea butter and the rest of your butter a couple of tablespoons at a time until the mixture is well combined and incorporated.
- Switch to medium-high speed again and beat the buttercream until smooth, glossy and creamy (about 3-5 minutes).
For the Salted Caramel Sauce:
- See this salted caramel sauce recipe
Assembly:
- Trim the tops of your cakes to make them level and of equal height. Place the first piece on a cake turntable and spread frosting evenly. Repeat with the next layers until the cake is covered with buttercream.
- Decorate as desired and top with salted caramel sauce.
Video
Nutrition
Nutritional information are estimates only.
(Recipe adapted from Layered and used with permission from the author).
Happy baking!
Did you make London fog cake with earl grey buttercream? I’d love to hear from you in the comments section below.


Hannah
This looks amazing! I often have trouble with cakes not rising very well but if there’s 3 layers i guess it’s not so much of a problem! Must try this, yum!
Jolina
Hi Hannah! If your cakes are not rising you should make sure your leavening agents like baking powder or soda are fresh. That should solve your “rising problem” 🙂 Hope this helps!
Vy
The title alone is enough to make my mouth water let alone actually trying it.
Jolina
Isn’t it? 🙂 Have you tried London fog, the drink, before? My hook was the buttercream. It’s fantastic 🙂
Nellwyn
This sounds absolutely amazing! I adore London Fogs and have an Early Grey tea just about every day! Plus chocolate and salted caramel are amazing together as well. I’m definitely going to have to make this… good thing my birthday is coming up so I have an excuse to eat lots of cake!
Jolina
Hello Nellwyn! I do love Earl Grey and I have a cup almost everyday too. The flavours on this cake is just awesome, it works together so well. We have Tessa Huff’s brilliance to thank for that! And advance happy birthday to you! Hope you have a wonderful birthday (and yes, lots and lots of cake!)
Jolina
Hi Mutange! Thank you! I did once upon a time think about selling them but the cost would come out to be very expensive compared to the cakes available around my area. Nobody would buy my cakes lol! So now I mostly bake for family and friends (free of charge too!) 🙂
Jolina
Hello Kasee! Thanks very much for the pin! 🙂
Jolina
Thanks a lot Shannon! Happy Wednesday to you! 🙂
Jolina
Thanks very much Ahmed! I love cakes too 🙂 This combination is really unique, very interesting. Hope you get the chance to try the recipe 🙂
LaKisha Riddick
I love chocolate cake. I love Earl Grey Tea. I never thought of this as a dessert combination! Your pics make the cake look delicious. I think you did a great job! Pinned!
Jolina
Hi LaKisha! The combination is brilliant isn’t it? It’s a recipe from the Layered cookbook – it has all kinds of good stuff in there. And I mean GOOD STUFF 🙂 Thanks for pinning!
Lima
This looks absolutely amazing. Thanks for sharing.
Also, I don’t know how you cut the cut to the absolutely beautiful.
Jolina
Thank you very much! And to answer your question – with much difficulty lol! But seriously, I run a really sharp knife under hot water, wipe it down and very carefully cut. Maybe I say a little prayer while I cut. Maybe 🙂
Anne
This looks so good! I’m definitely bookmarking this to try that salted caramel drizzle on my next cake attempt! 🙂
Jolina
Thanks a lot Anne! That salted caramel really brings everything together. And really, salted caramel makes everything better eh? 🙂 Let me know how your cake experiment goes! Would love to hear all about it.
Sonia
The Buttercream sound DIVINE !!
Jolina
It is really is something else Soniya. You have to taste it to believe 🙂
Suchi
Looks soo good!! I have never made layered cake. I cant wait to get my hands on that book.
Jolina
Hi Suchi! Thank you! It’s really an excellent cookbook. It’s pretty but also very informative. So not just for collecting but for actually using 🙂 I can’t wait to try other cakes on there.
Red
Not your ordinary chocolate cake. The flavour profile is top notch!!! Thanks for the amazing birthday cake
Jolina
An extraordinary cake for an extraordinary person? Lol! You are very welcome you 🙂
Dawn
Wow! What a cake! The picture from the book looks awesome, but yours looks even better!! I think your cake decorating skills are beautiful! As soon as I saw the pic I was wowed! What a lovely thing to do for somebody, make them a cake and not only make them a cake, but they get to pick out which one!! Lucky them! Could totally go for a piece (or 2) of this one right now!
Jolina
Aww shucks really? Thanks Dawn! I wanted to do the drippy thing but I was afraid my cake would look like a murder scene haha! And yeah, Red’s been really nice to me all these years so she totally deserves to pick her own cake. Though I must admit I ate a piece (or 2) of her cake too lol.
Natanja
I love the flavor combinations here! This is definitely a combo I want to try.
I know that you yourself are always really strict about your cake decorating skills, but honestly this is really beautiful! Your layers are so even. I always think that’s the hardest part- to make everything straight.
Well done! 🙂
Jolina
Thanks a lot Natanja! I can be pretty hard on myself you’re right 🙂 But I still can’t do a really smooth clean finish on the sides. Work in progress I guess 🙂 This is a really unique combination isn’t it? I can honestly say I’ve never had anything quite like it 🙂