

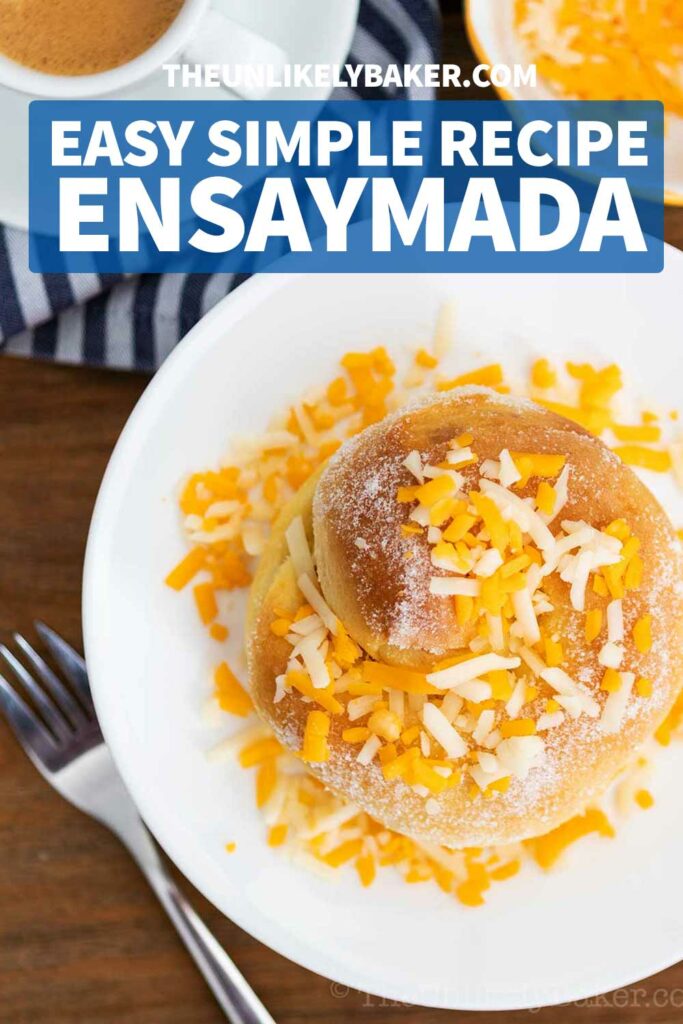

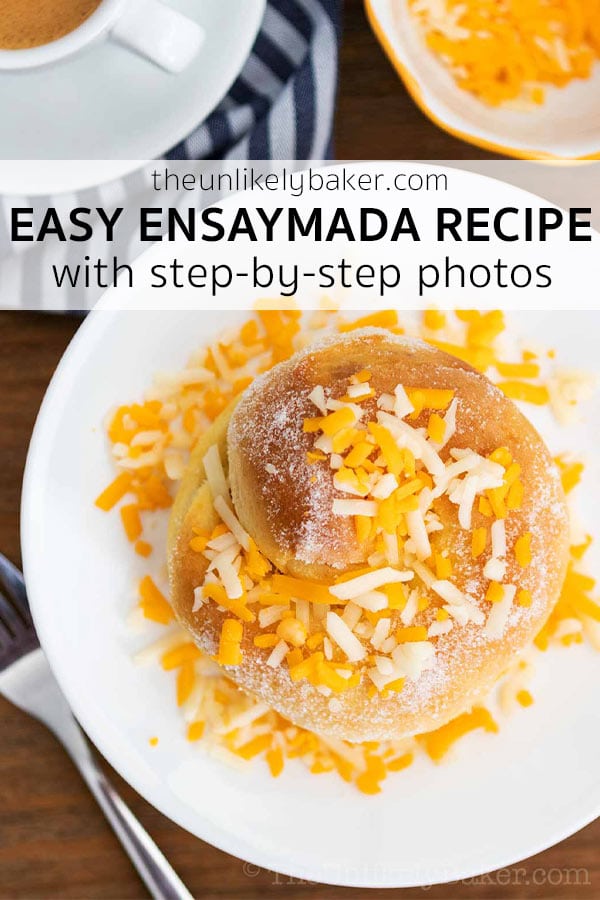
Easy ensaymada recipe for soft, cheesy, Filipino ensaymada every time. No shortening, can be made without molders, simple and delicious! I also include step-by-step photos, baking tips and FAQs.
(Enjoy baking bread? Try these sweet and lemony bread rolls or these ube bread rolls. And if cheddar cheese in bread is your thing, you will love these cheese bars.)
There’s just something so special about baking bread.
Kneading the dough. Waiting for your dough to rise. Watching your creation take shape.
But the best thing for me is the smell. Nothing beats the smell of homemade freshly baked bread filling your kitchen.
I love making pandesal. It transports me home at first smell, at first bite.
When I feel the occasion needs something extra special though, I roll up my sleeves and make ensaymada.
What is ensaymada?
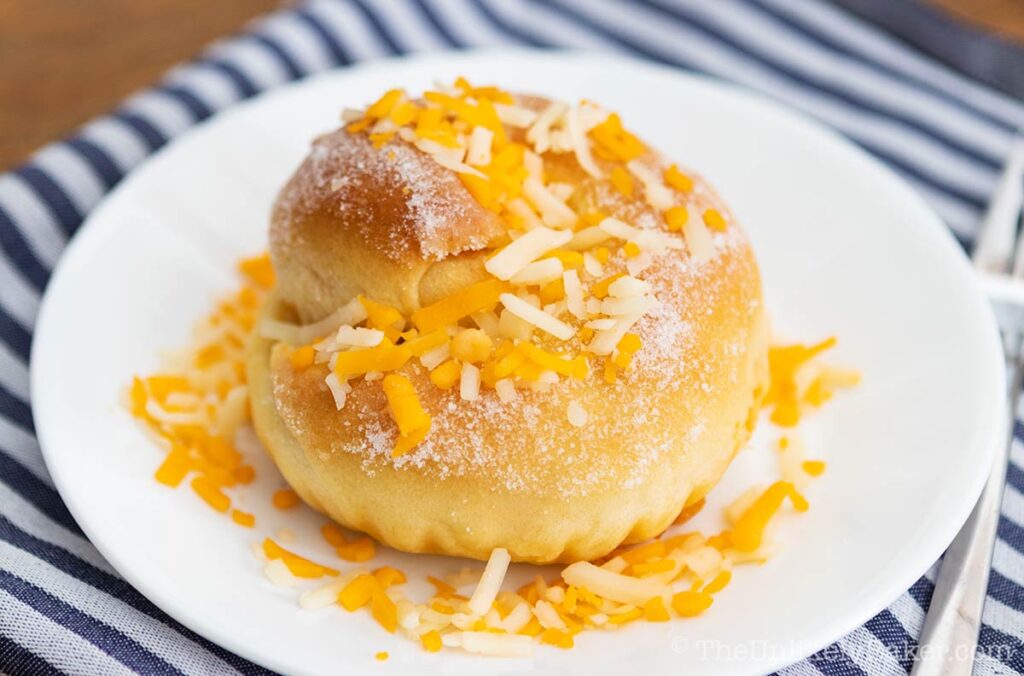
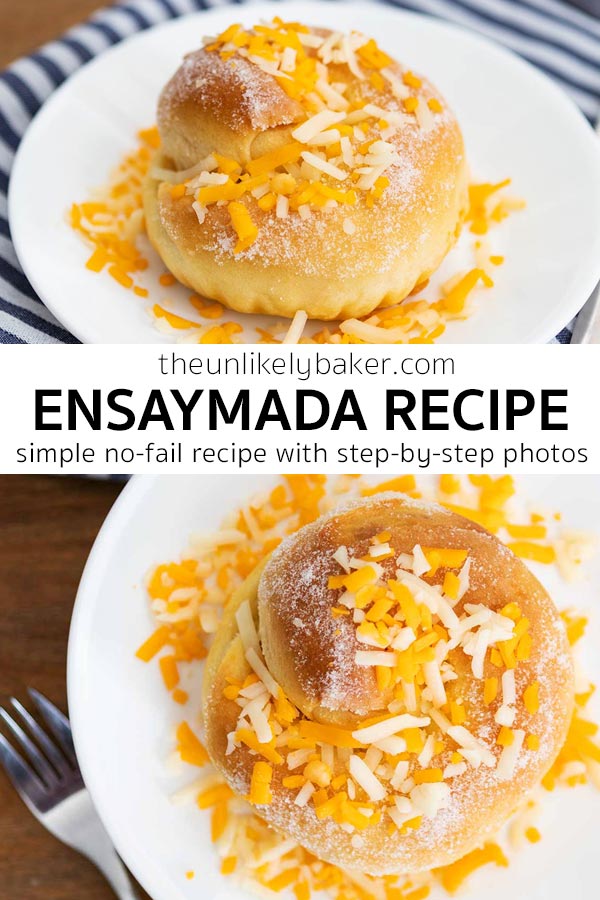
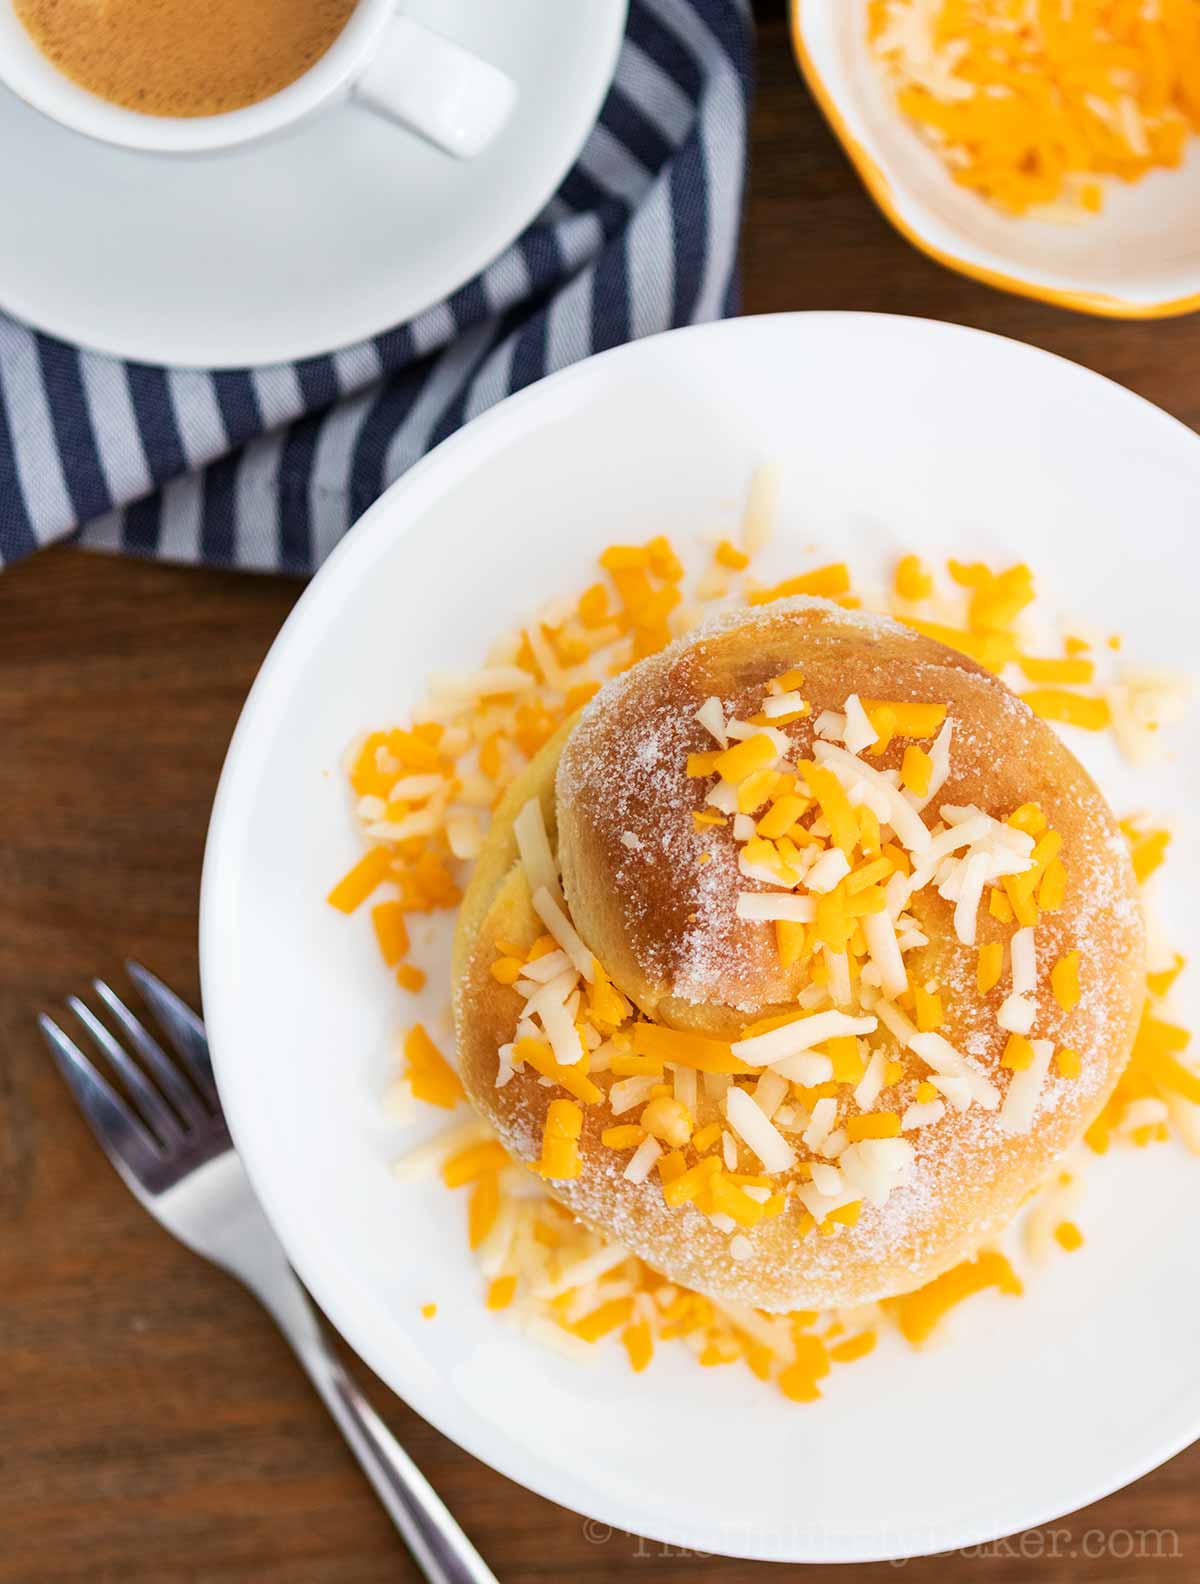
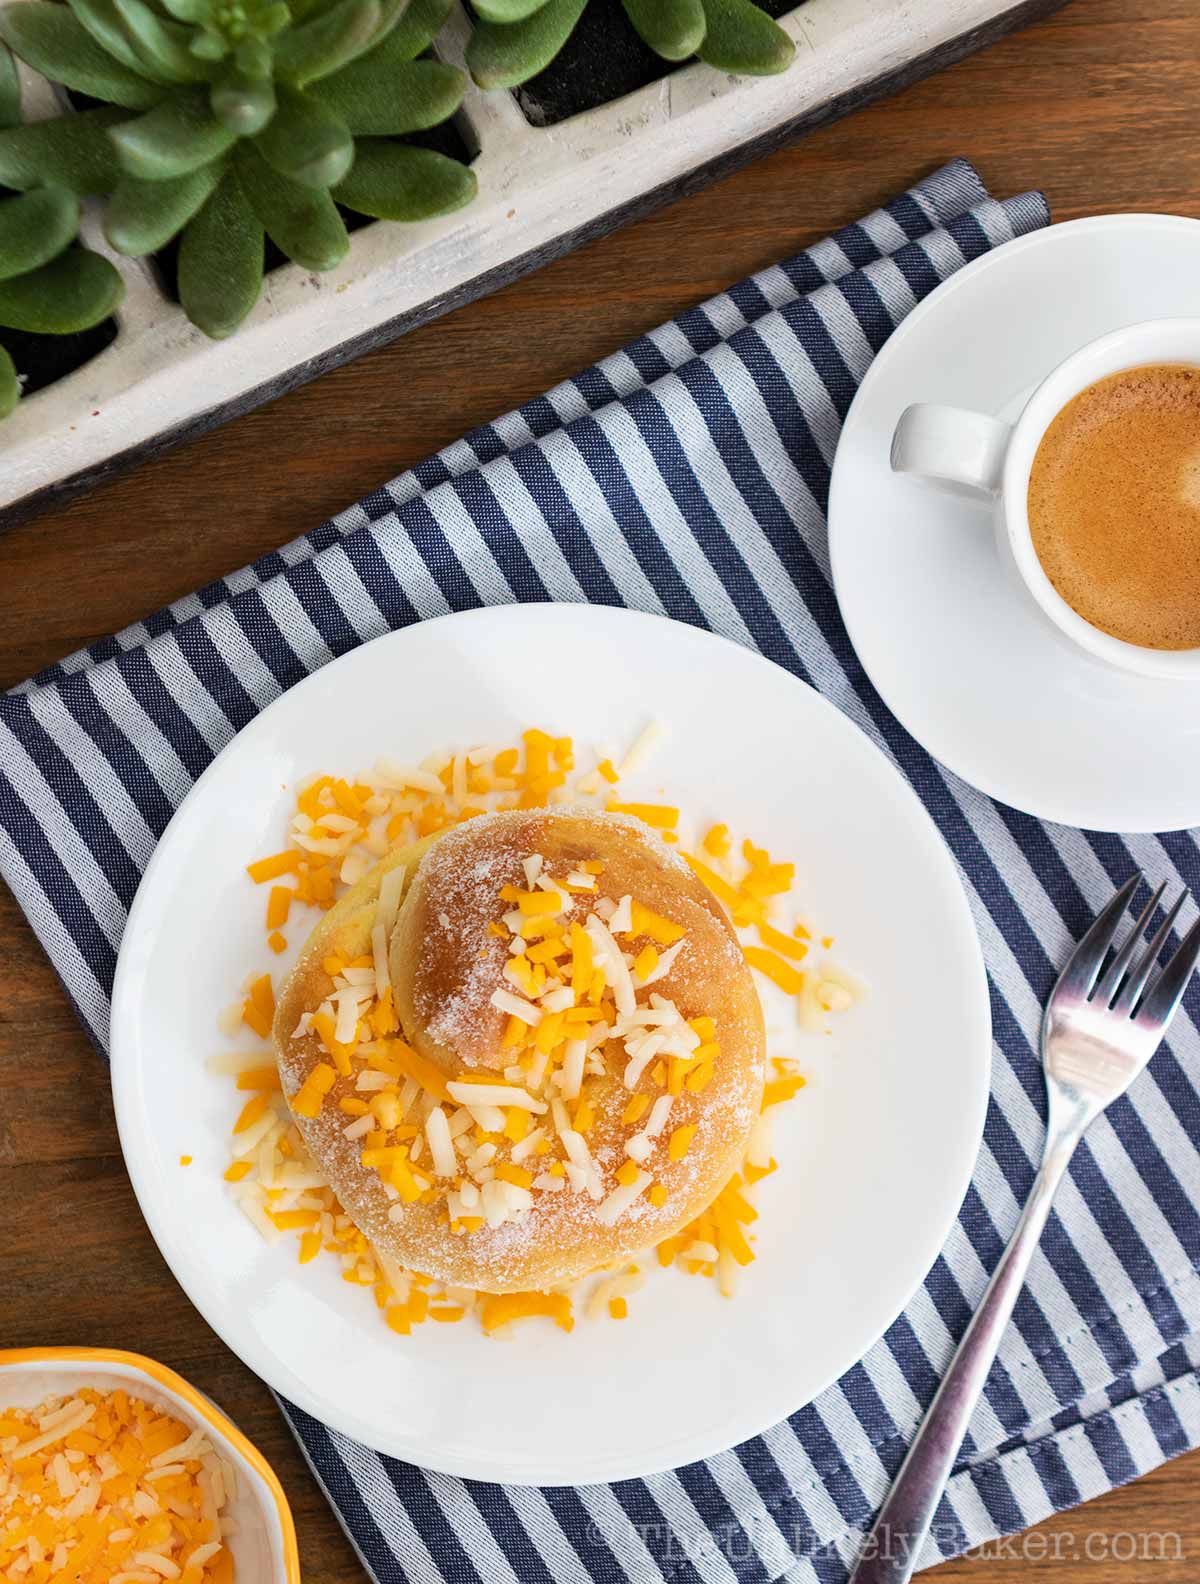
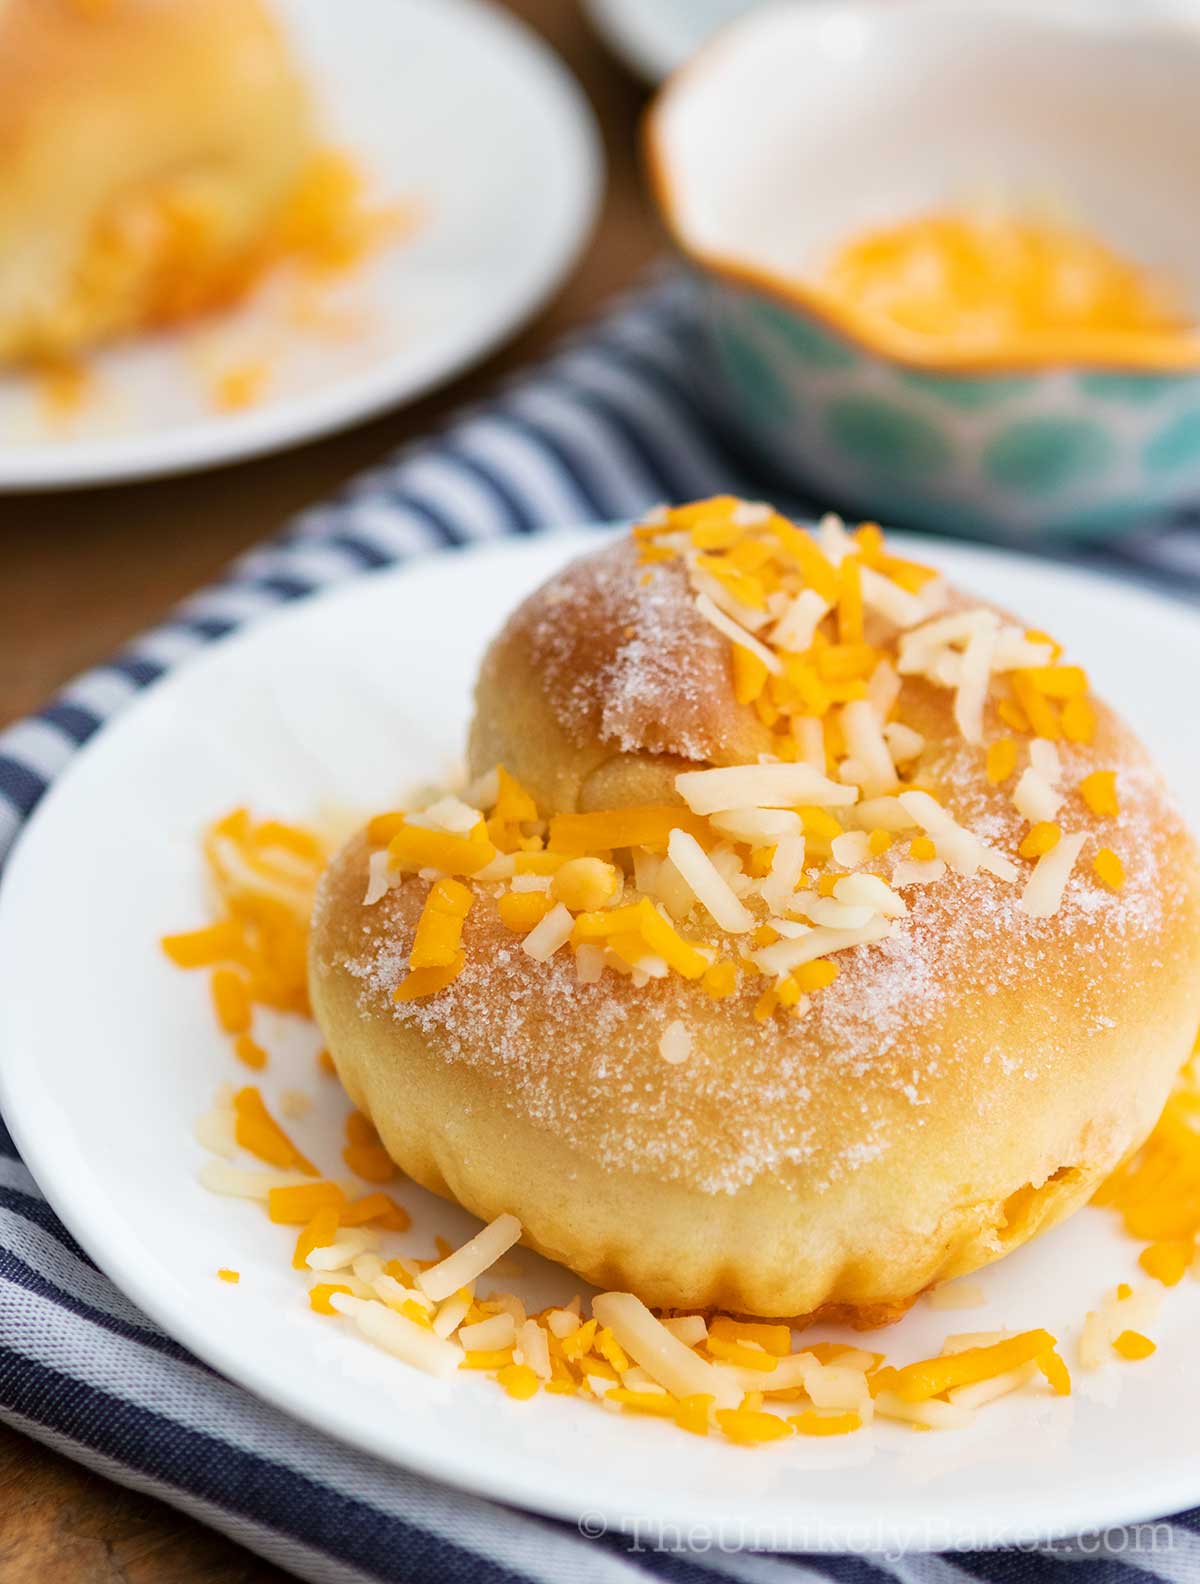
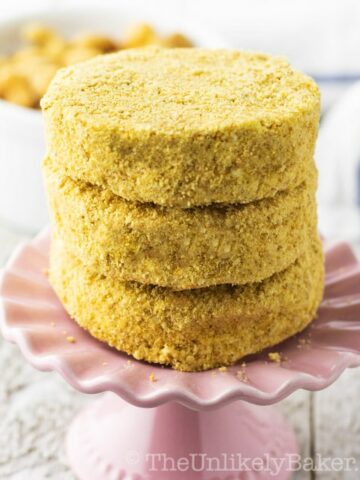
Ensaymada is a kind of Filipino bread that’s brushed with butter, sprinkled with grated cheese and baked until soft and tender.
It’s then brushed with more melted butter, dunked in sugar, and again generously sprinkled with cheddar cheese. So good!
It’s called ensaymada because it traces its origins to the Spanish bread Mallorcan ensaïmada.
There really is no direct English translation for ensaymada but it’s been called Filipino sweet buns, Filipino brioche, soft sweet bread, cheese rolls or cheesy bread.
Related: How to Make the Best Ube Ensaymada
How to make it the easy way
Full disclosure: making traditional ensaymada is a very lengthy process.
If you look for classic ensaymada recipes, you’ll find that most have about a thousand steps. Who has the patience? (Evidently not me lol.)
So I decided to make it simpler and quicker — if you take a peek at the recipe below, each step is short and easy. I broke it down into pain-free, no-fail, manageable parts.
Plus, I added step-by-step photos so you can follow along from start to finish.
There are 5 “phases” — from activating the yeast to sprinkling the cheese on the finished product. Follow each phase and you’ll do great!
Don’t expect a Muhlach, a Goldilocks or a Red Ribbon ensaymada though. The process to make that kind of ensaymada is different.
This ensaymada is closer to the ensaymada you’ll find at your local bakery or panaderia. Soft, cheesy, sugary, buttery, authentic, old fashioned, absolutely delicious.
Ingredients
To make this popular Filipino bread, you most likely already have the ingredients in your pantry like sugar, salt, flour and butter. A few things to note:
- Milk – I use 1 or 2% skim milk
- Oil – some recipes use shortening but using oil works wonderfully here
- Cheddar cheese – I like using sharp cheddar cheese
You also need a packet of active dry yeast not instant yeast.![]()
Baking tools
You can, but I don’t use the hook attachment![]() of my stand mixer when making ensaymada. I prefer to do everything by hand.
of my stand mixer when making ensaymada. I prefer to do everything by hand.
What makes this ensaymada recipe easy (easier) for me to make is using the following:
- Silicone baking mat
 – non-slip and makes clean up so easy
 - French rolling pin – lighter and easier to use than a regular rolling pin IMO
- Bench or board scraper – the only kitchen tool Alton Brown travels with (true story!)
- Kitchen scale – so important for precision baking
Step-by-step photos
Now that we have the ingredients and the tools, it’s time to make ensaymada!
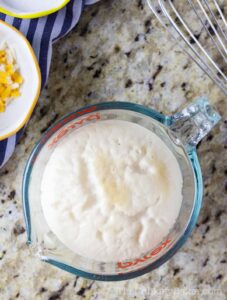
PHASE 1: Prep yeast mixture.
(1) In a measuring cup, stir warm water, active dry yeast and sugar until dissolved.

(2) Set aside and let stand until bubbly.
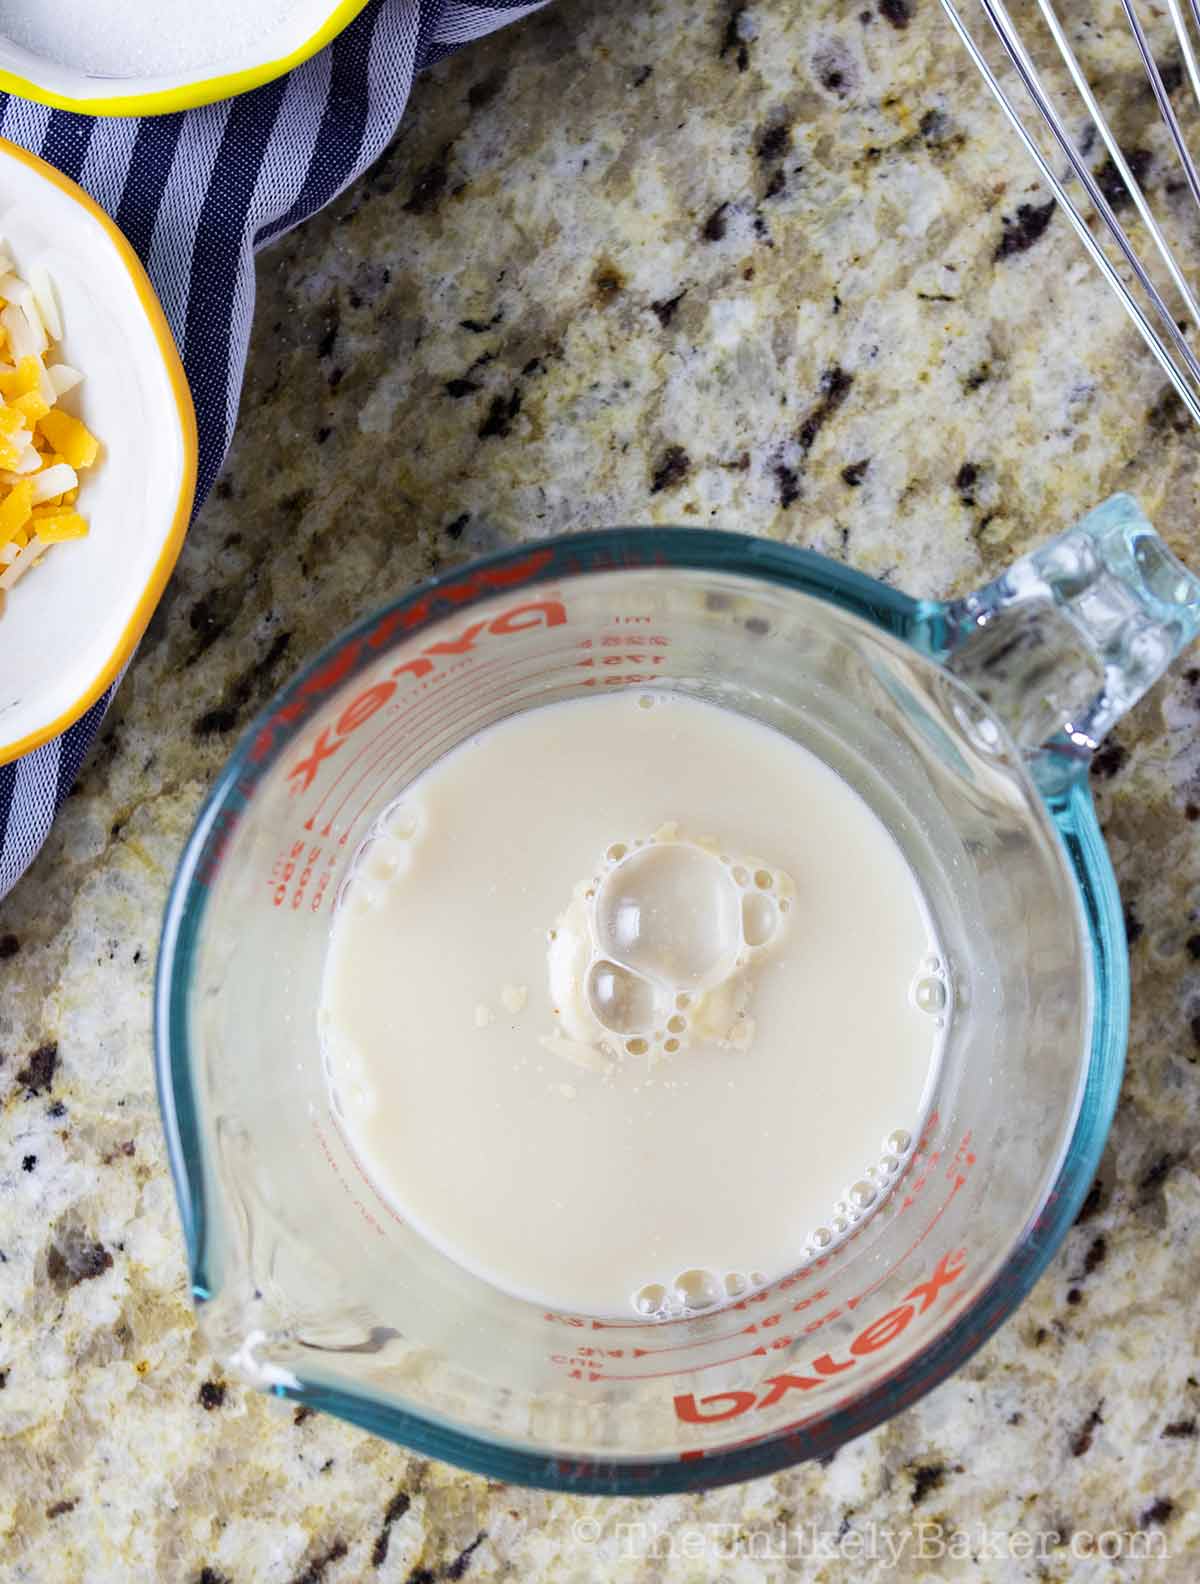
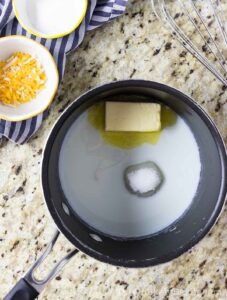
PHASE 2: Prep milk mixture.

(1) In a medium saucepan on medium heat, warm milk until you see bubbles forming at the edges. Remove from heat and stir sugar, salt, and butter until the butter has melted.
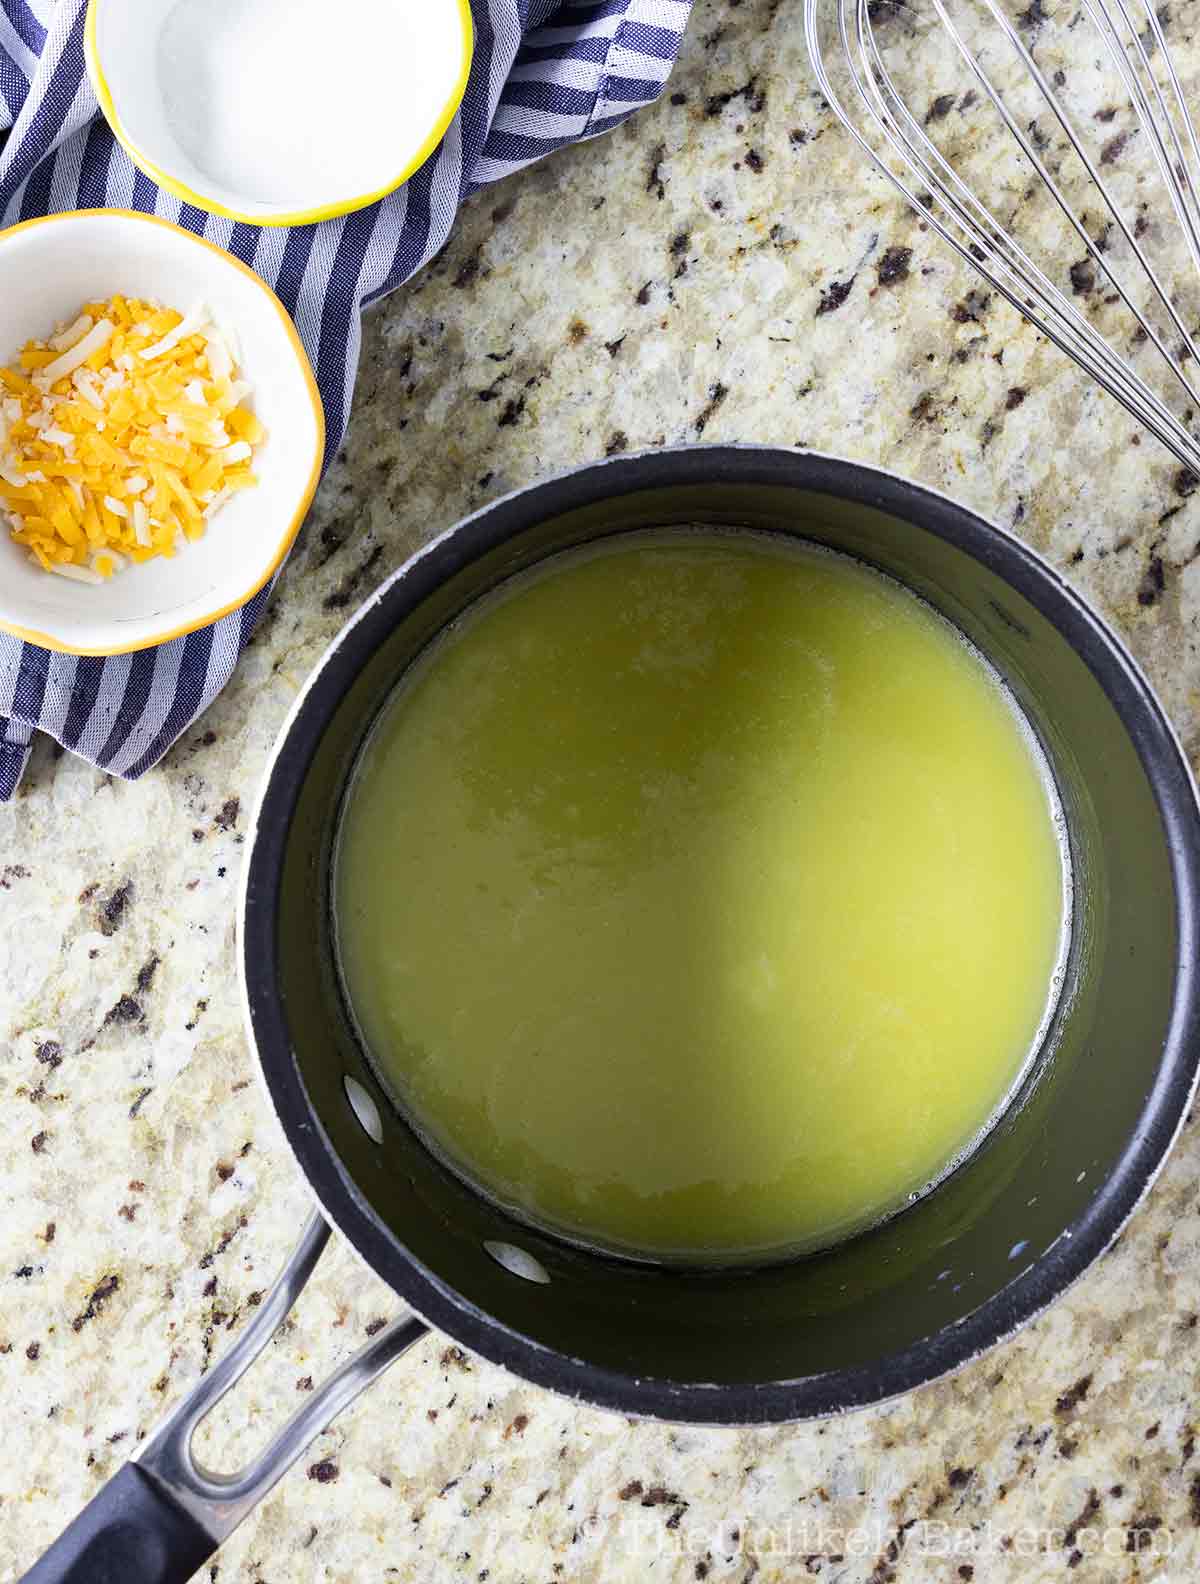
(2) Set aside and allow to cool until lukewarm.
PHASE 3: Work on the dough.
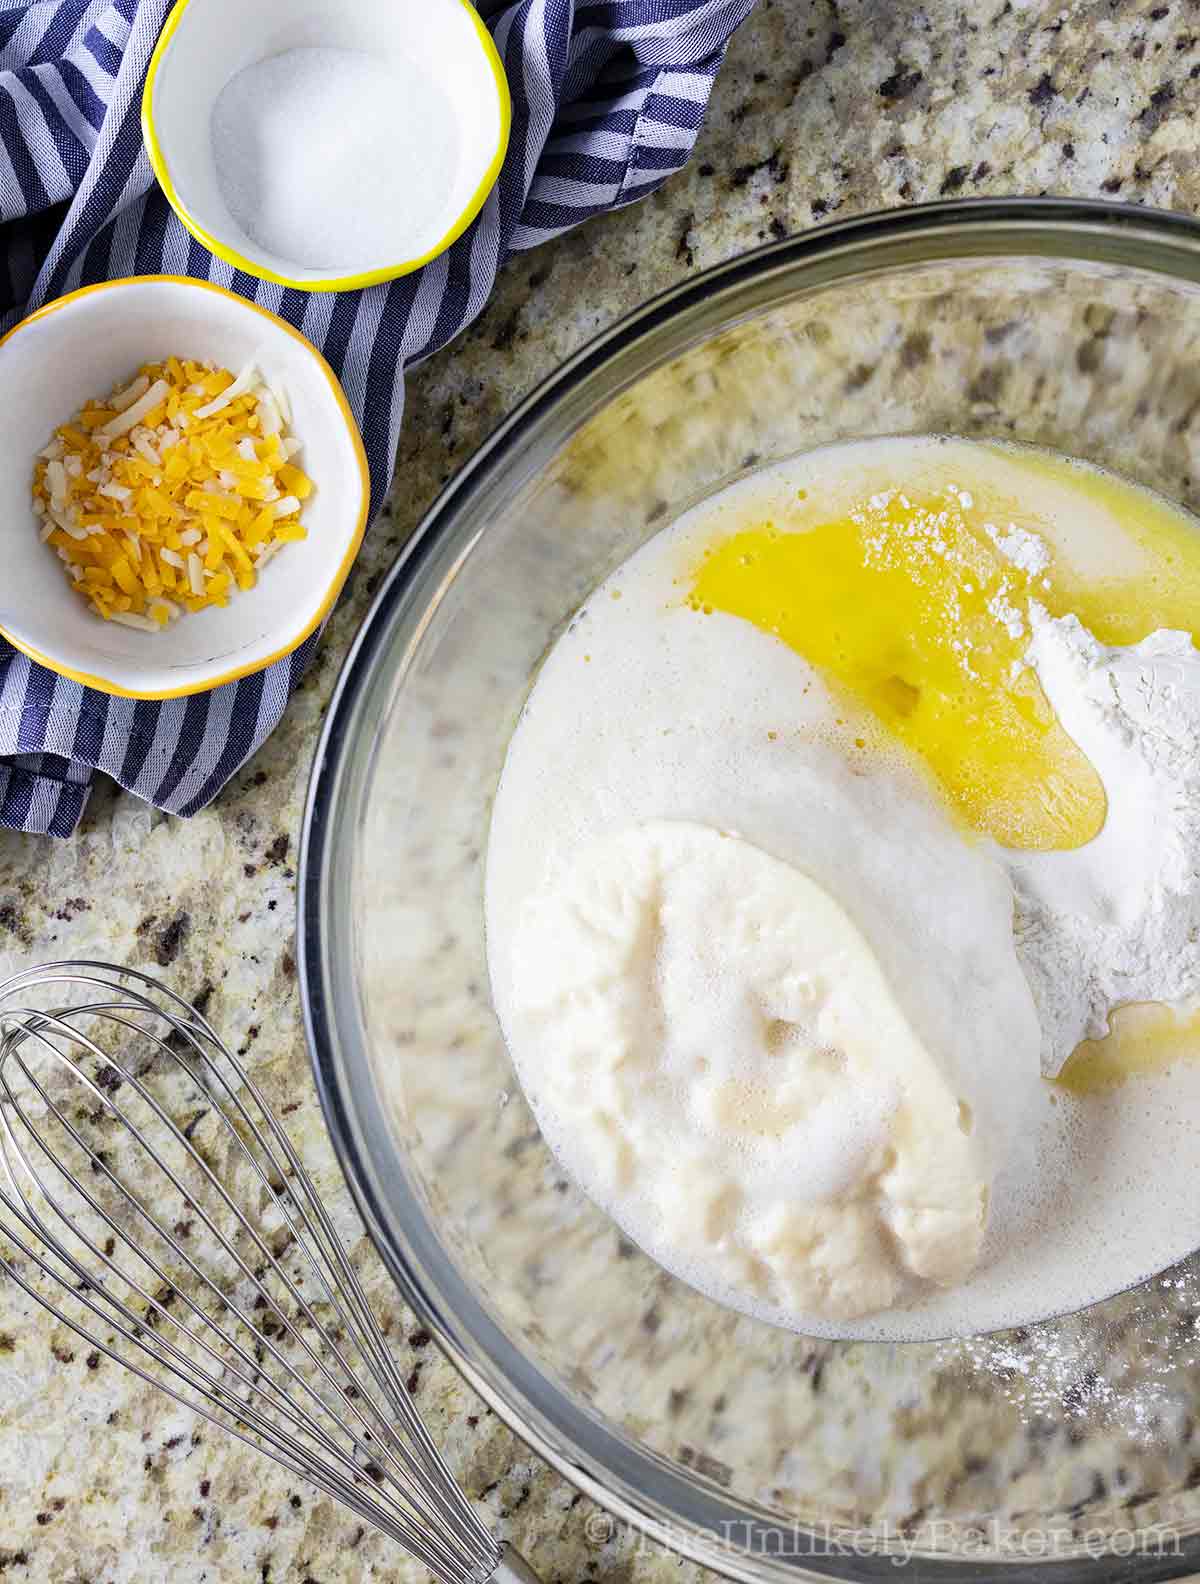
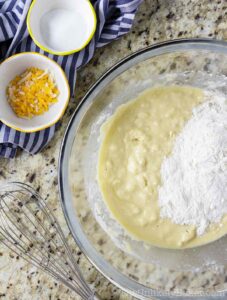
(1) In a large bowl, combine your yeast mixture, your milk mixture, eggs and 1 ½ cups flour.
(2) Stir until combined.

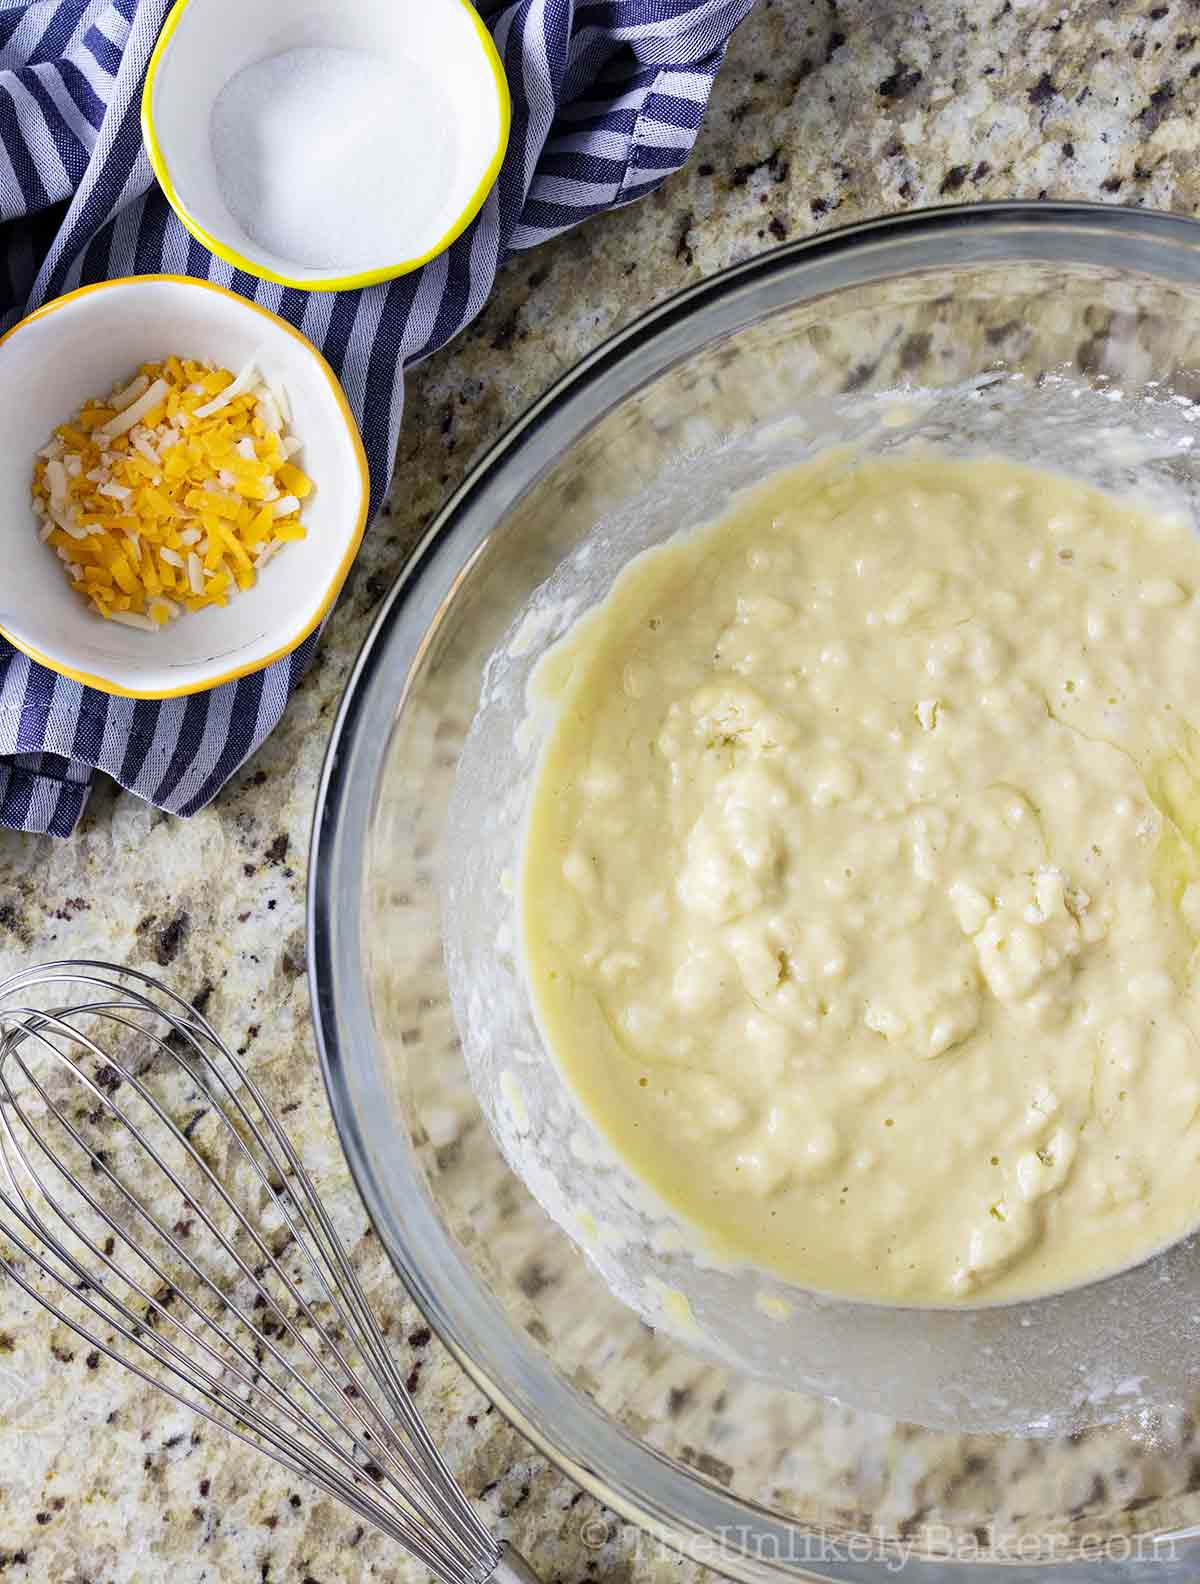
(3) Proceed to add the rest of your flour ½ cup at a time, combining well after each addition.
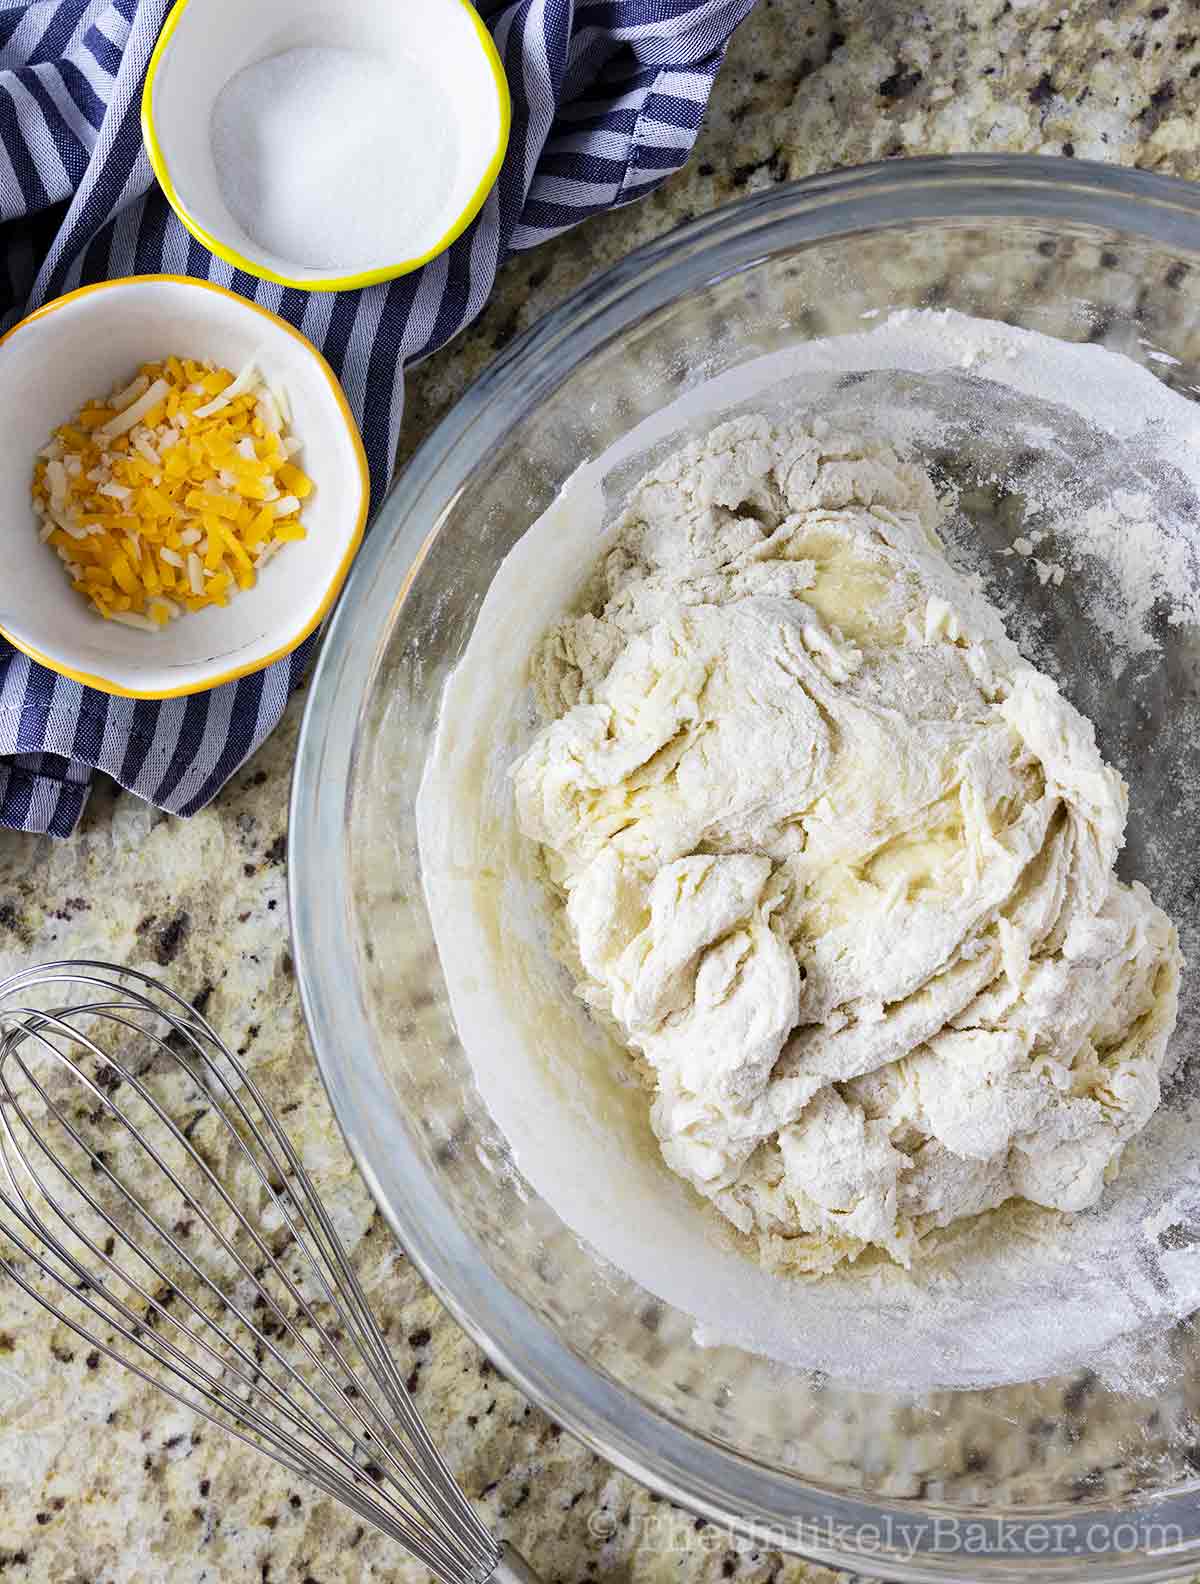
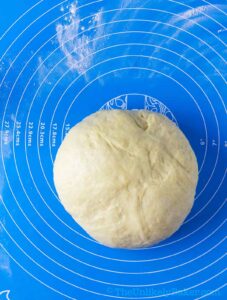
(4) Once the dough starts pulling and sticking together in a ball…
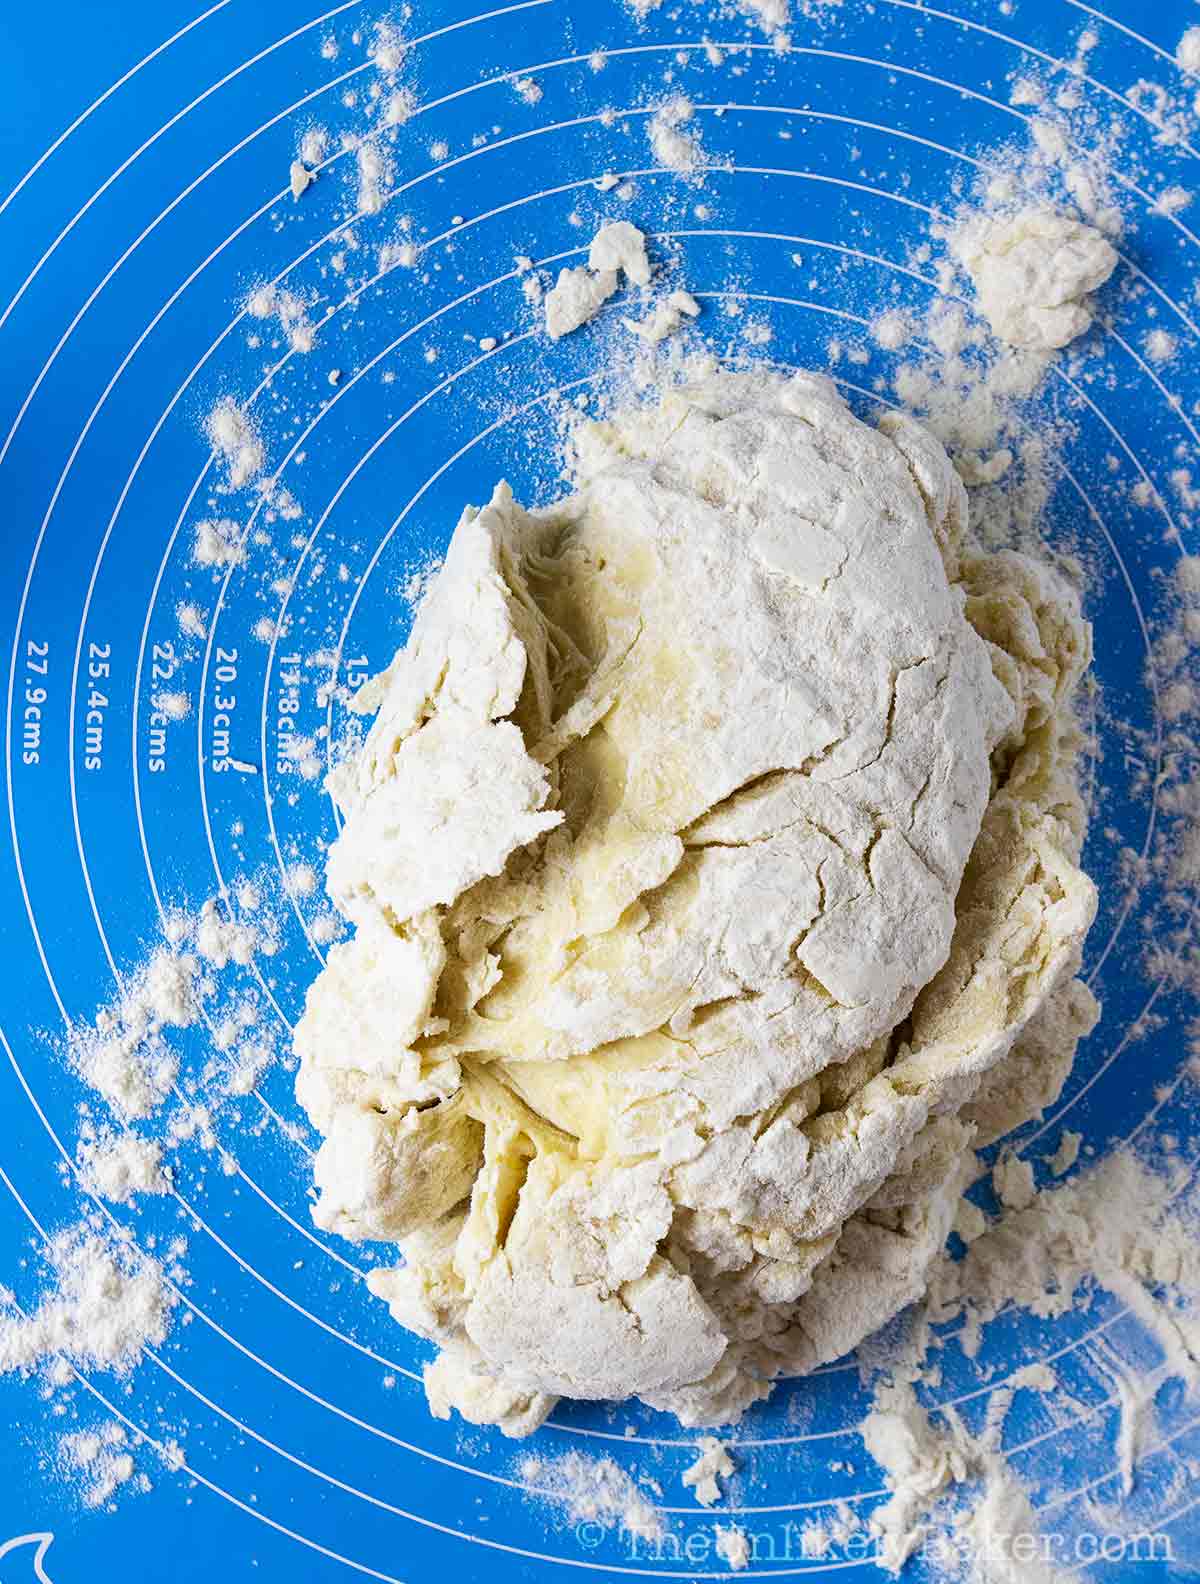
…transfer to a lightly floured surface…
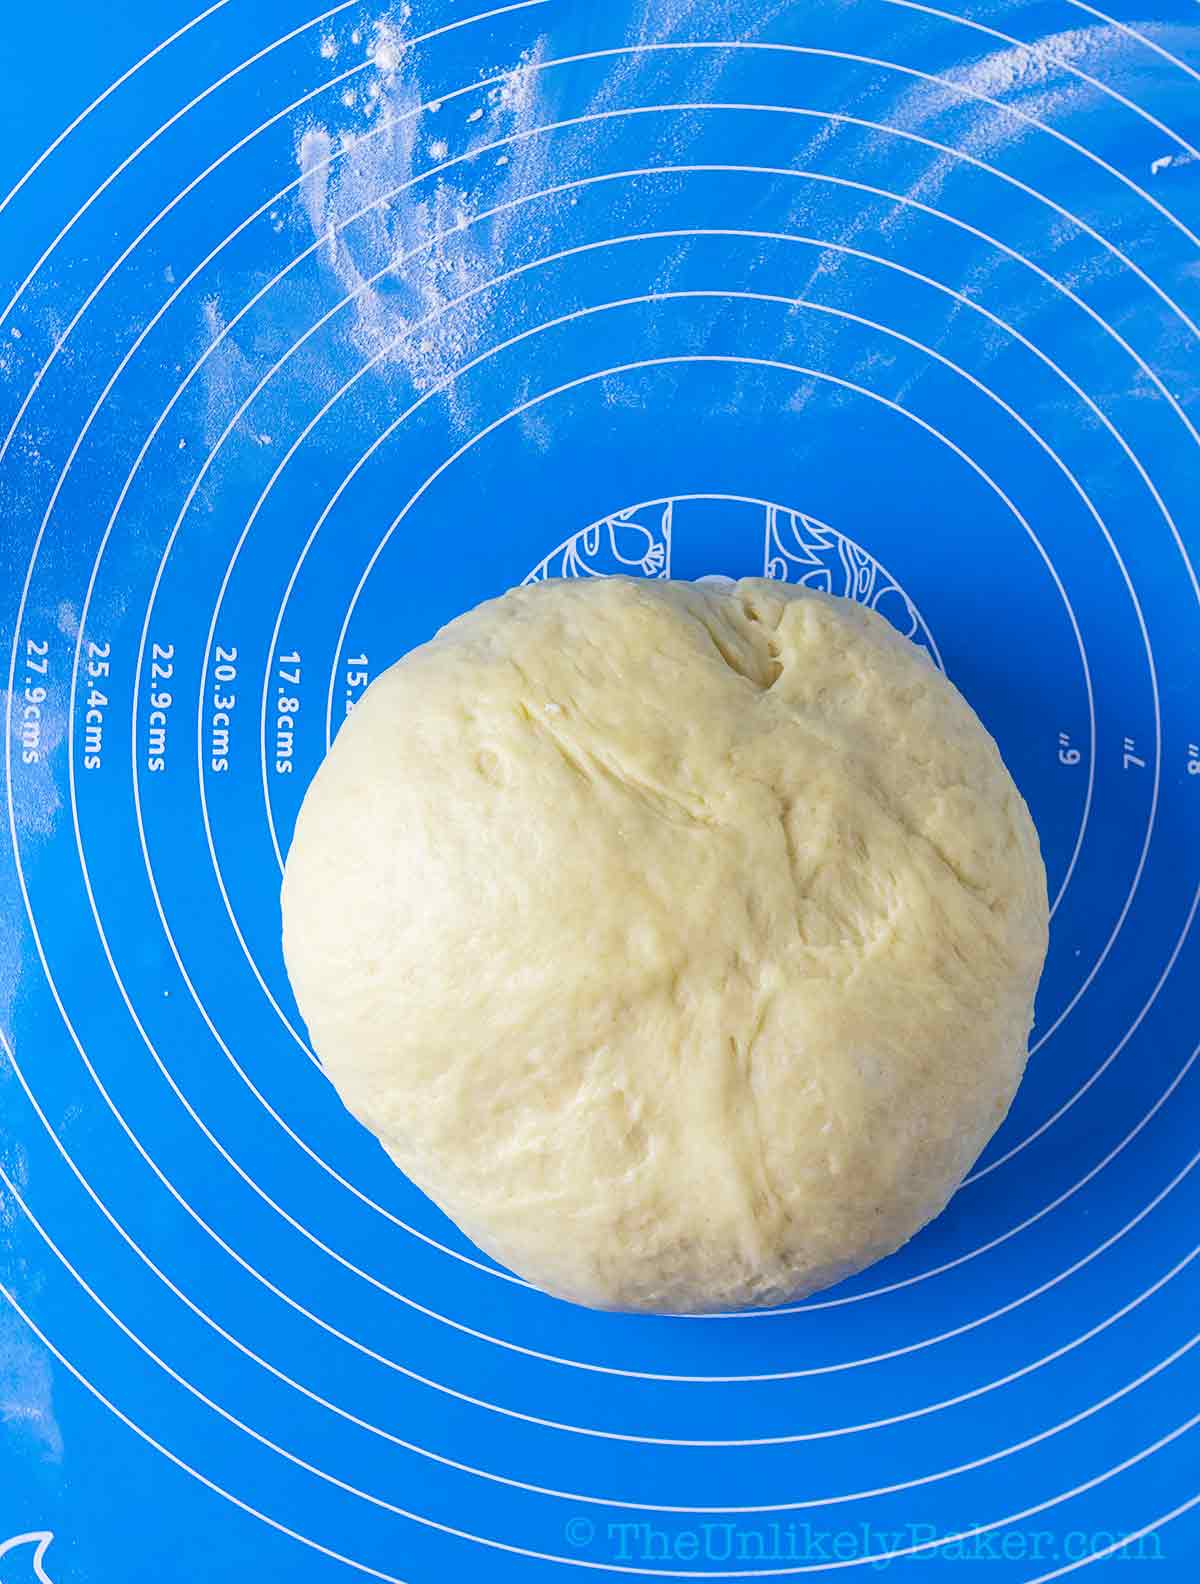
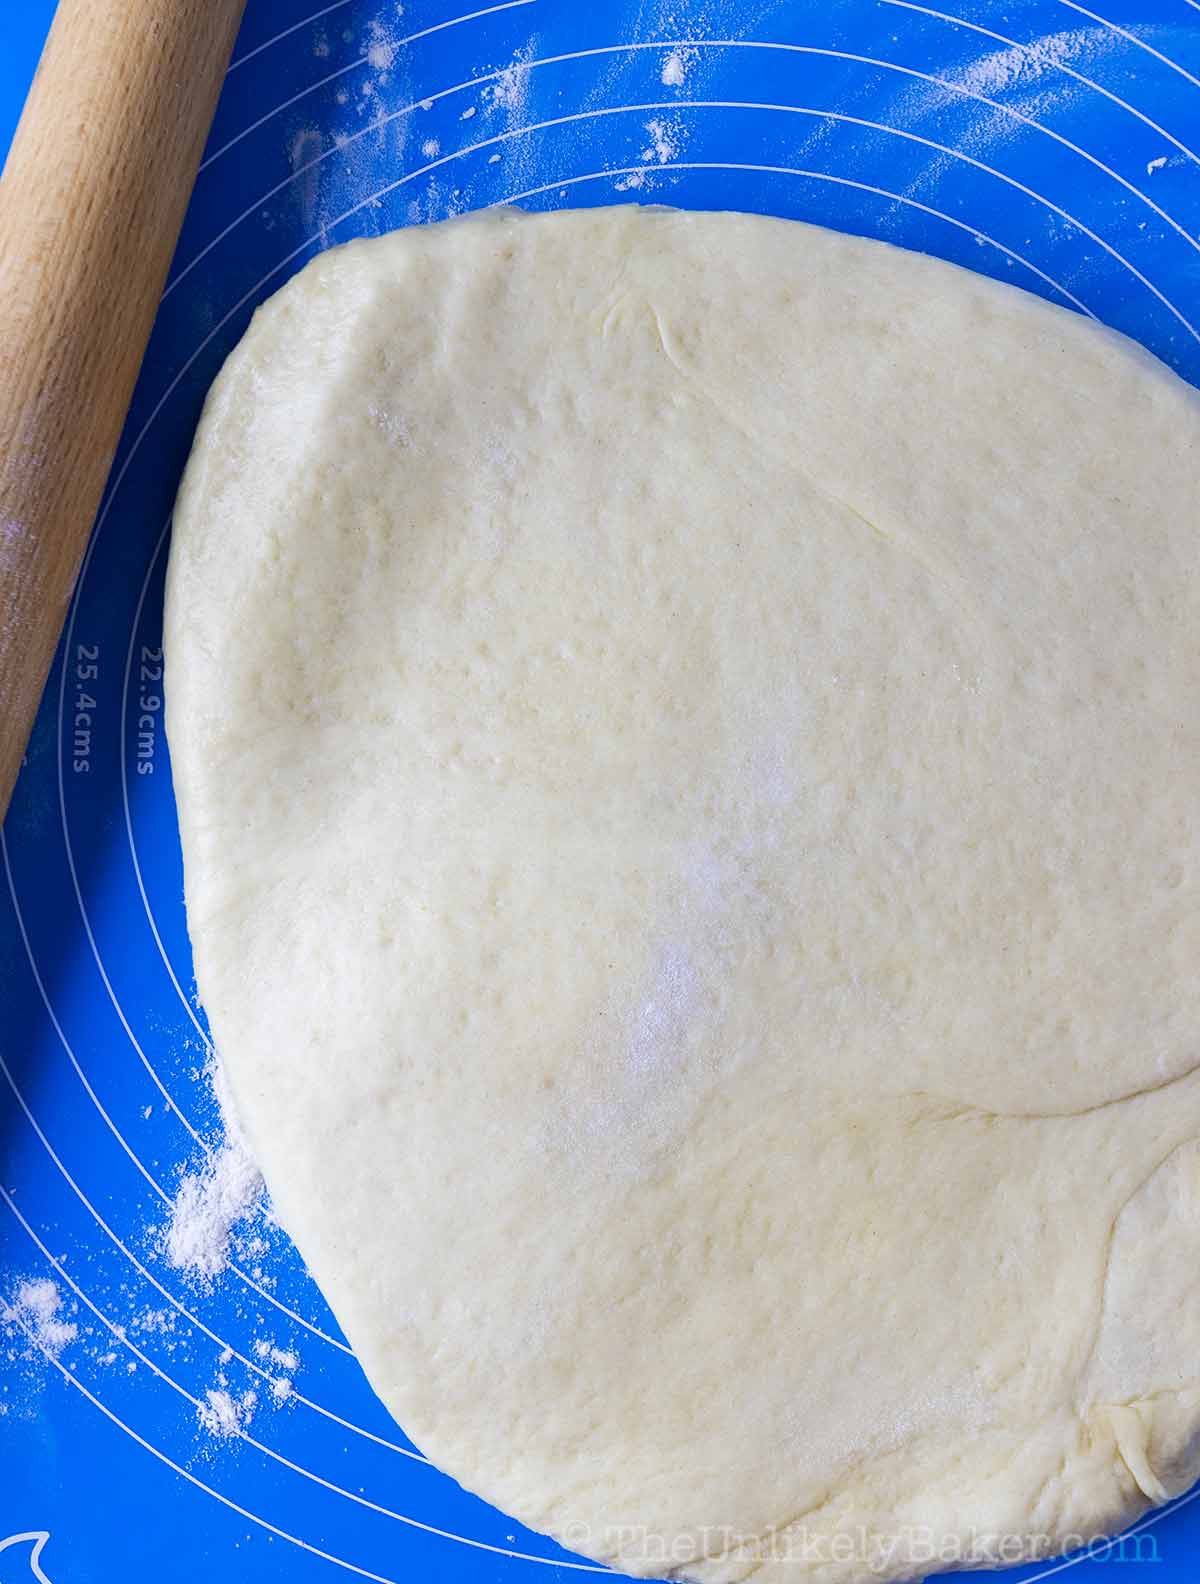
…and knead until smooth and elastic.
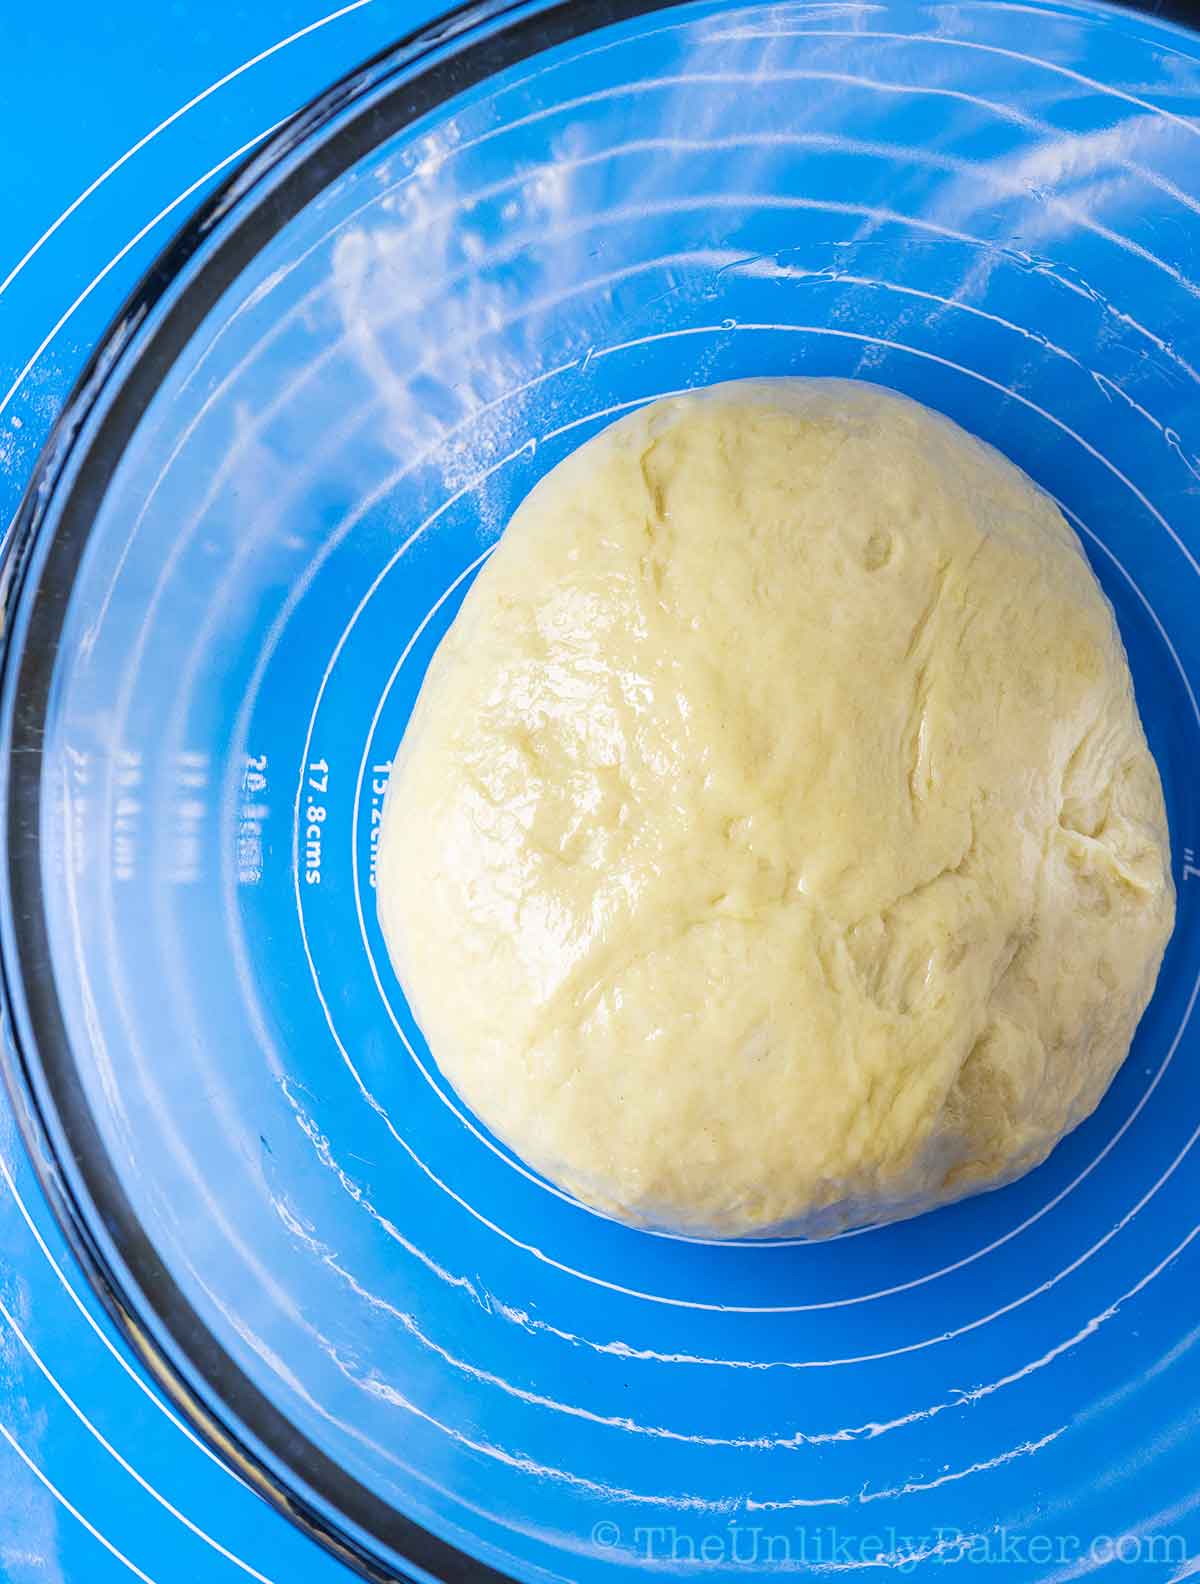
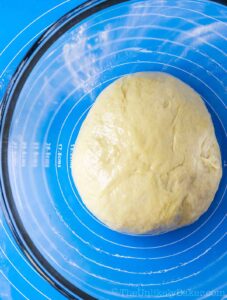
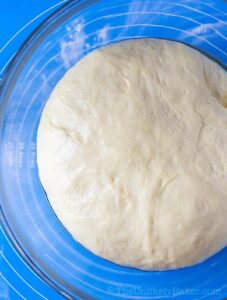
(5) Place your dough in a large bowl with oil and turn to ensure the dough is coated completely.
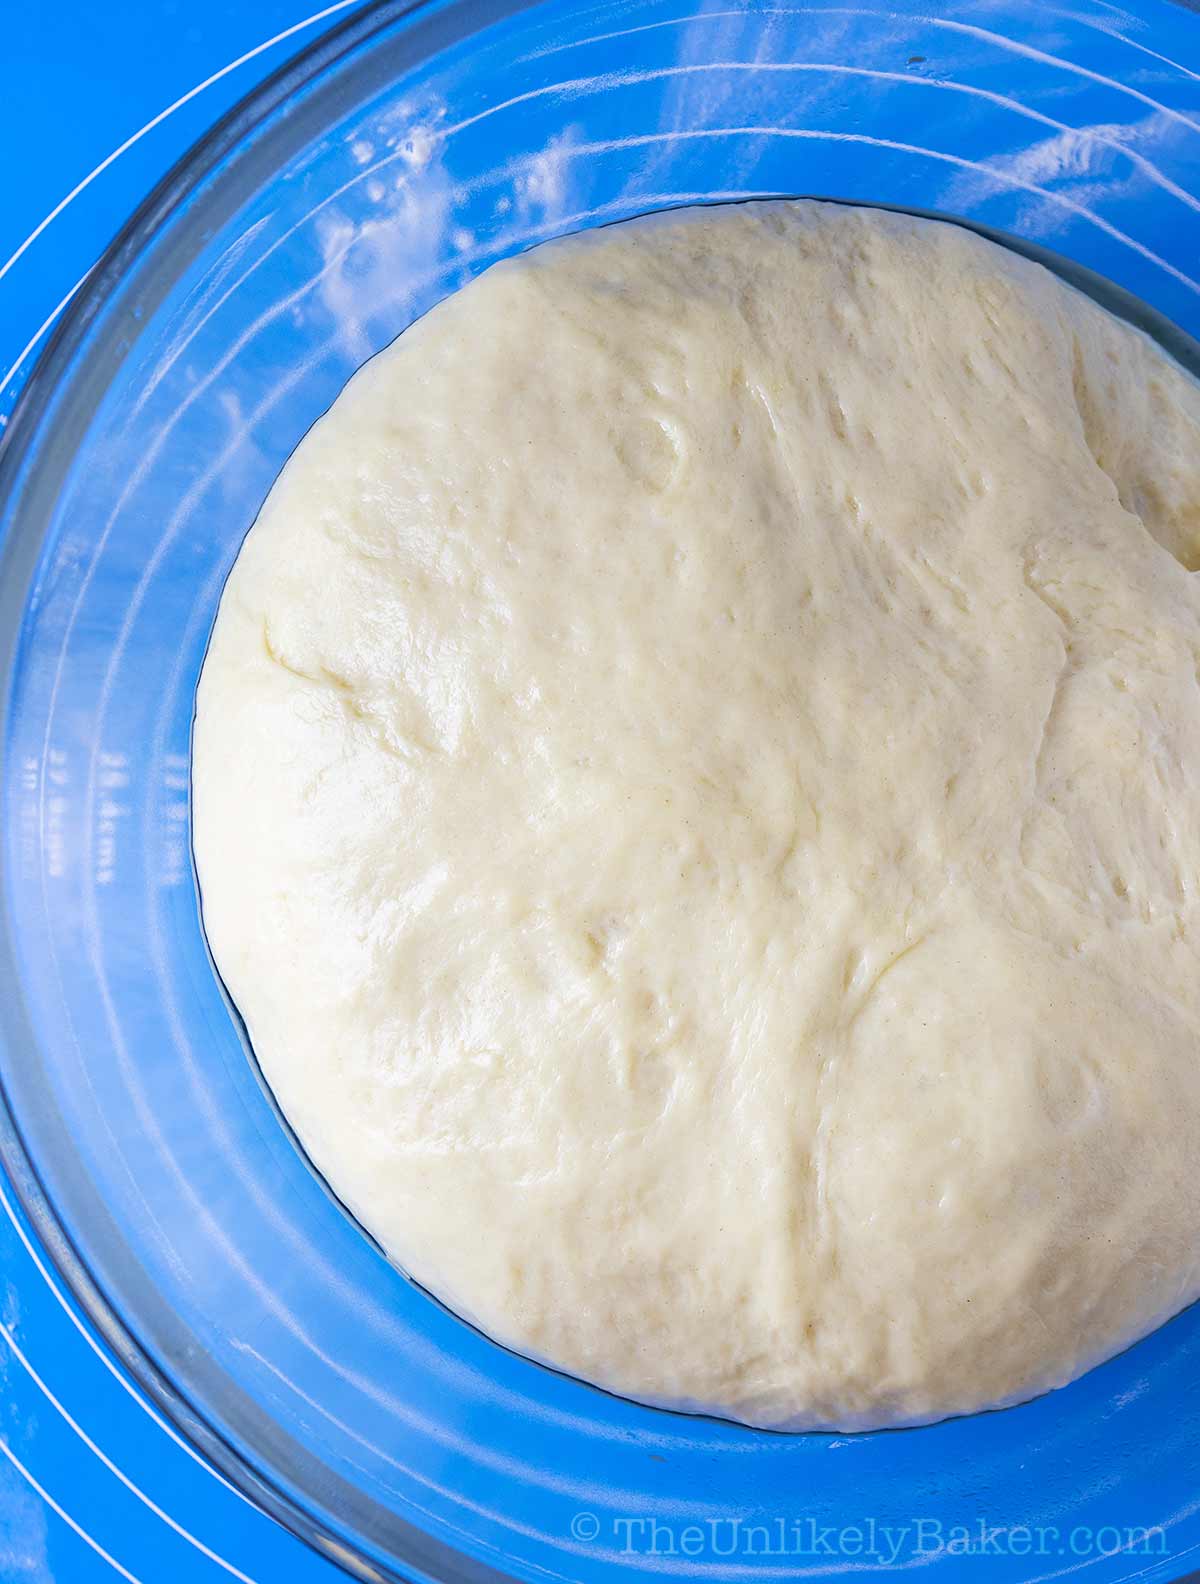
(6) Cover with a damp cloth and allow to rise in a dry, warm place until it doubles in size.
PHASE 4: Assemble and bake.
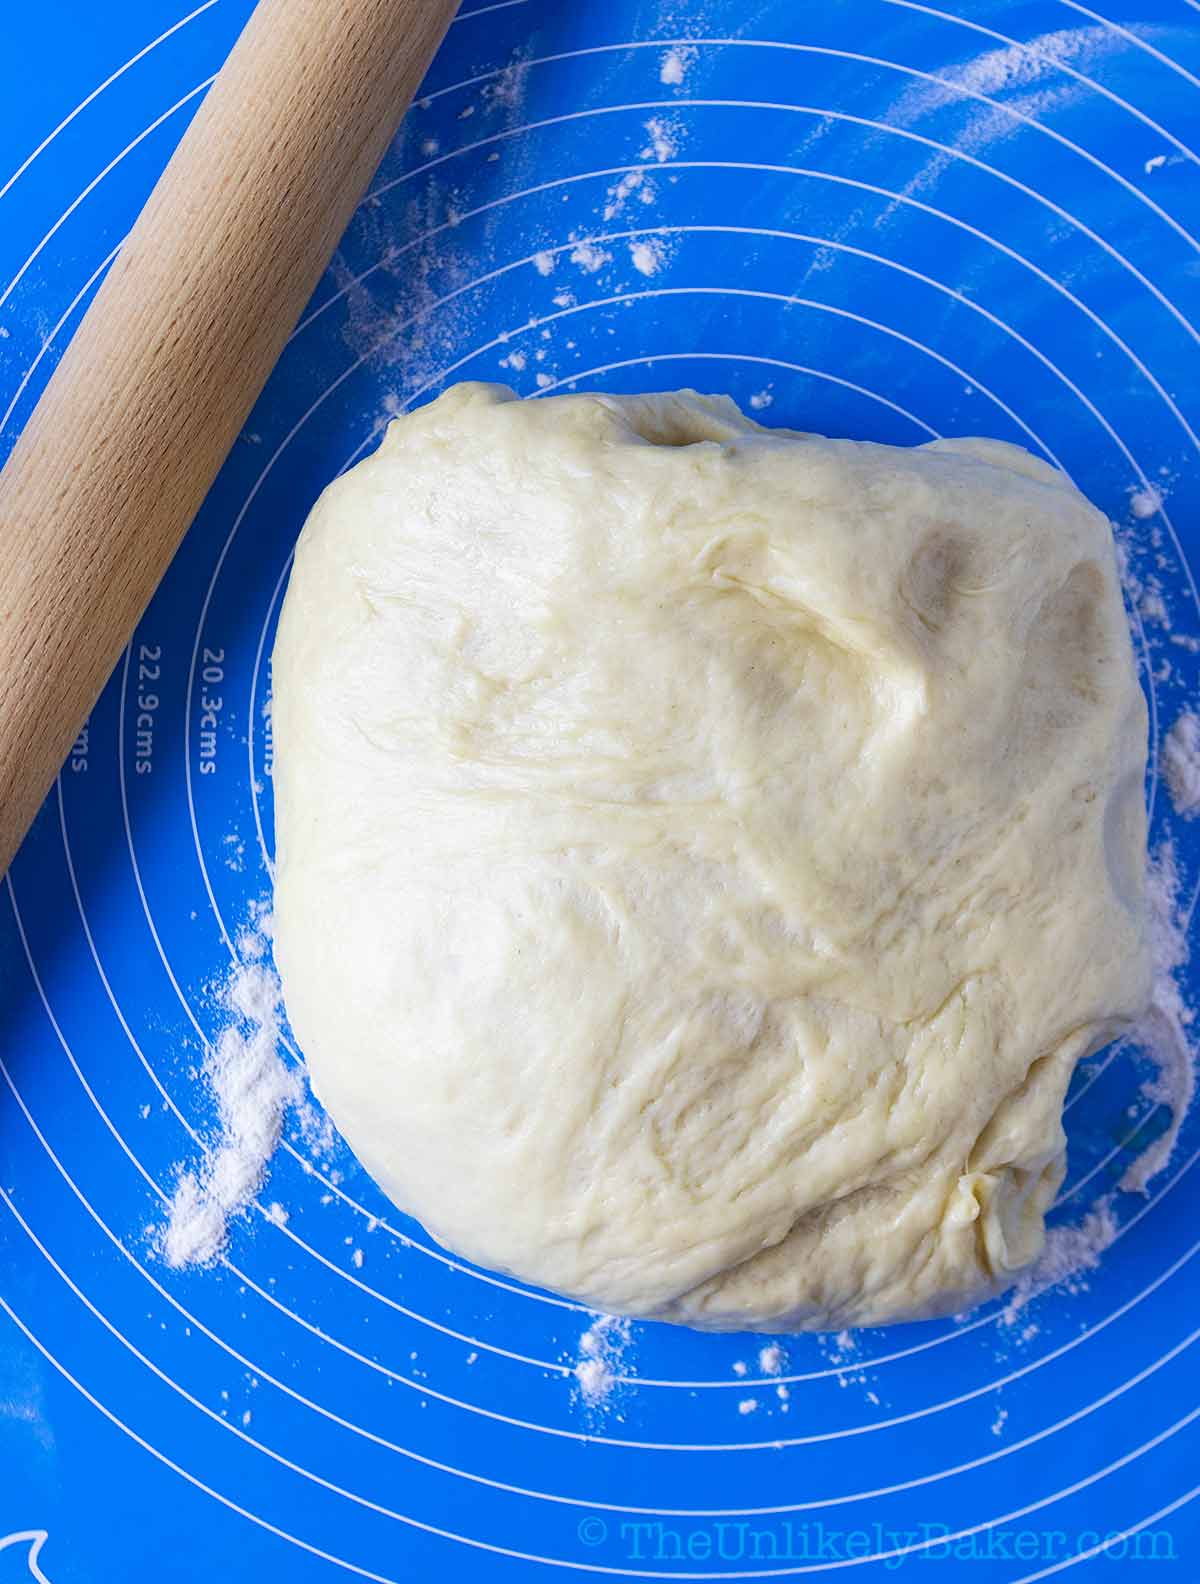
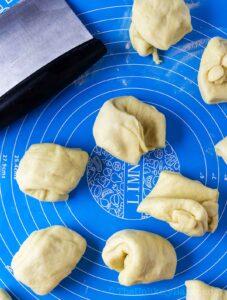
(1) Once your dough is ready, transfer to a lightly floured surface.
(2) Roll out slightly.
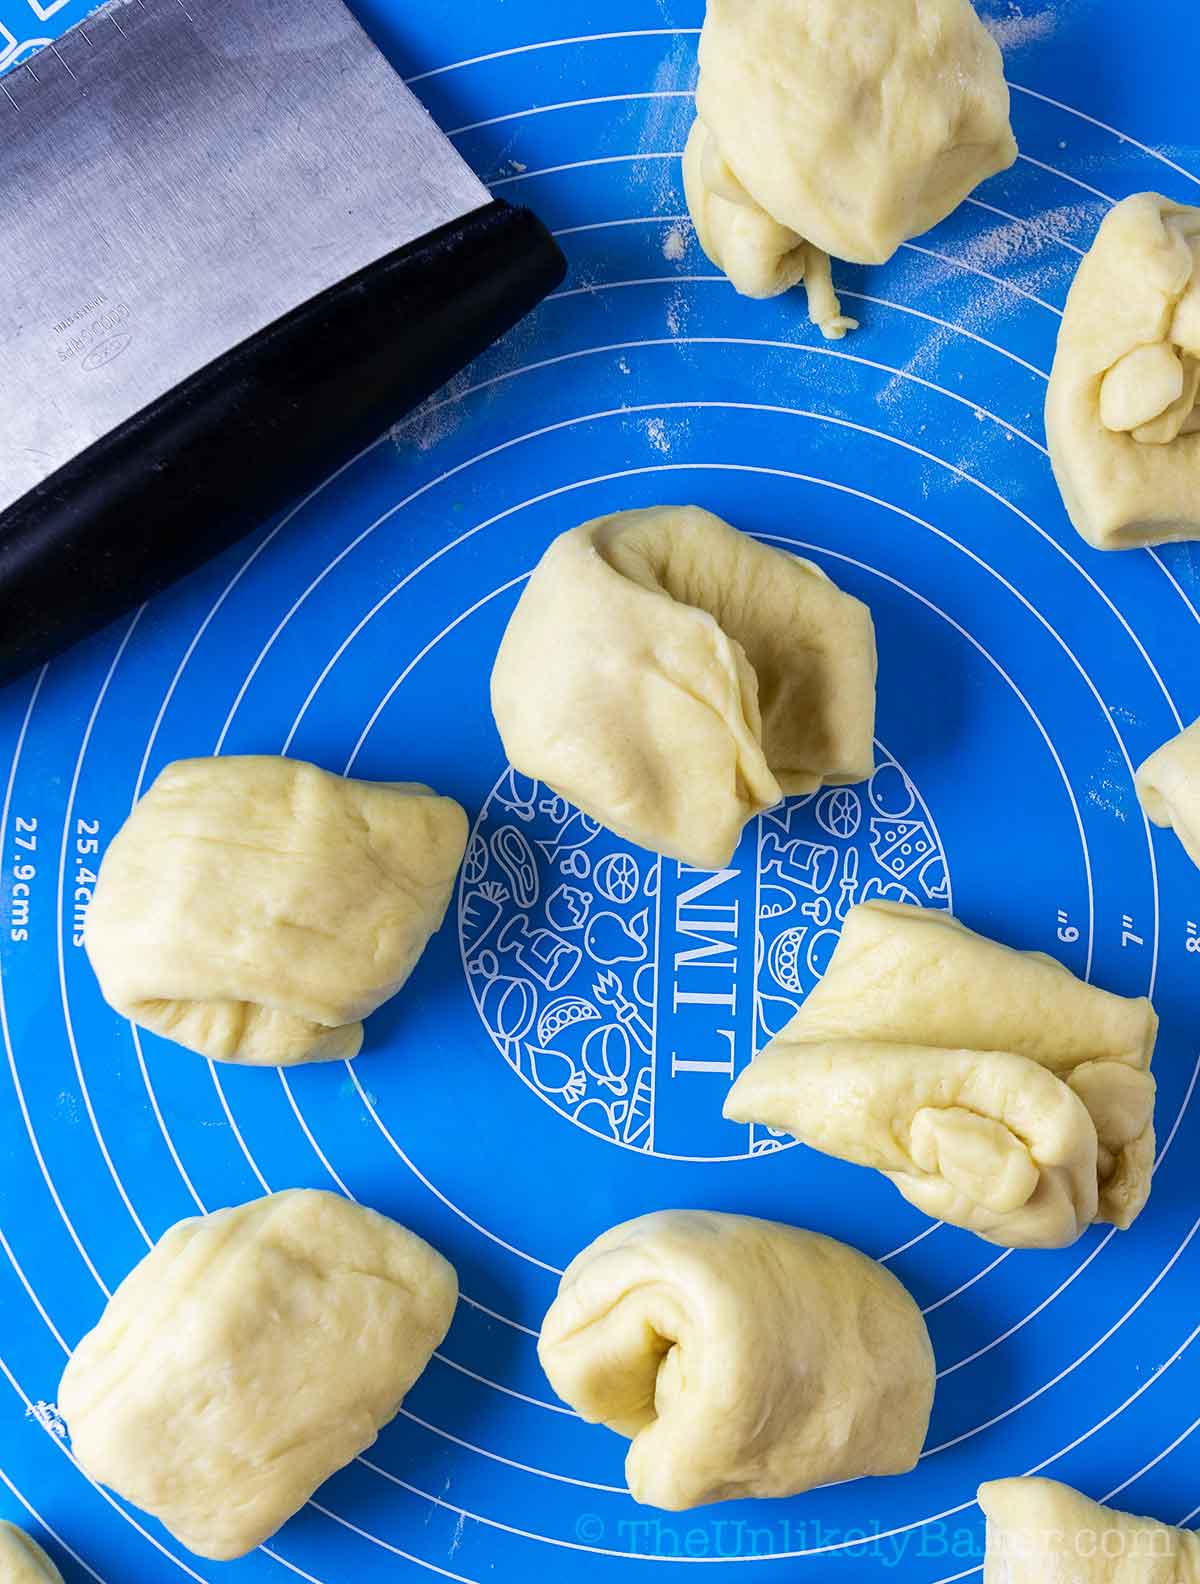
(3) Evenly divide into 12 pieces.

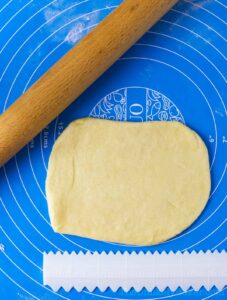
(4) Flatten each one into a (roughly) 4×6 inch rectangle.
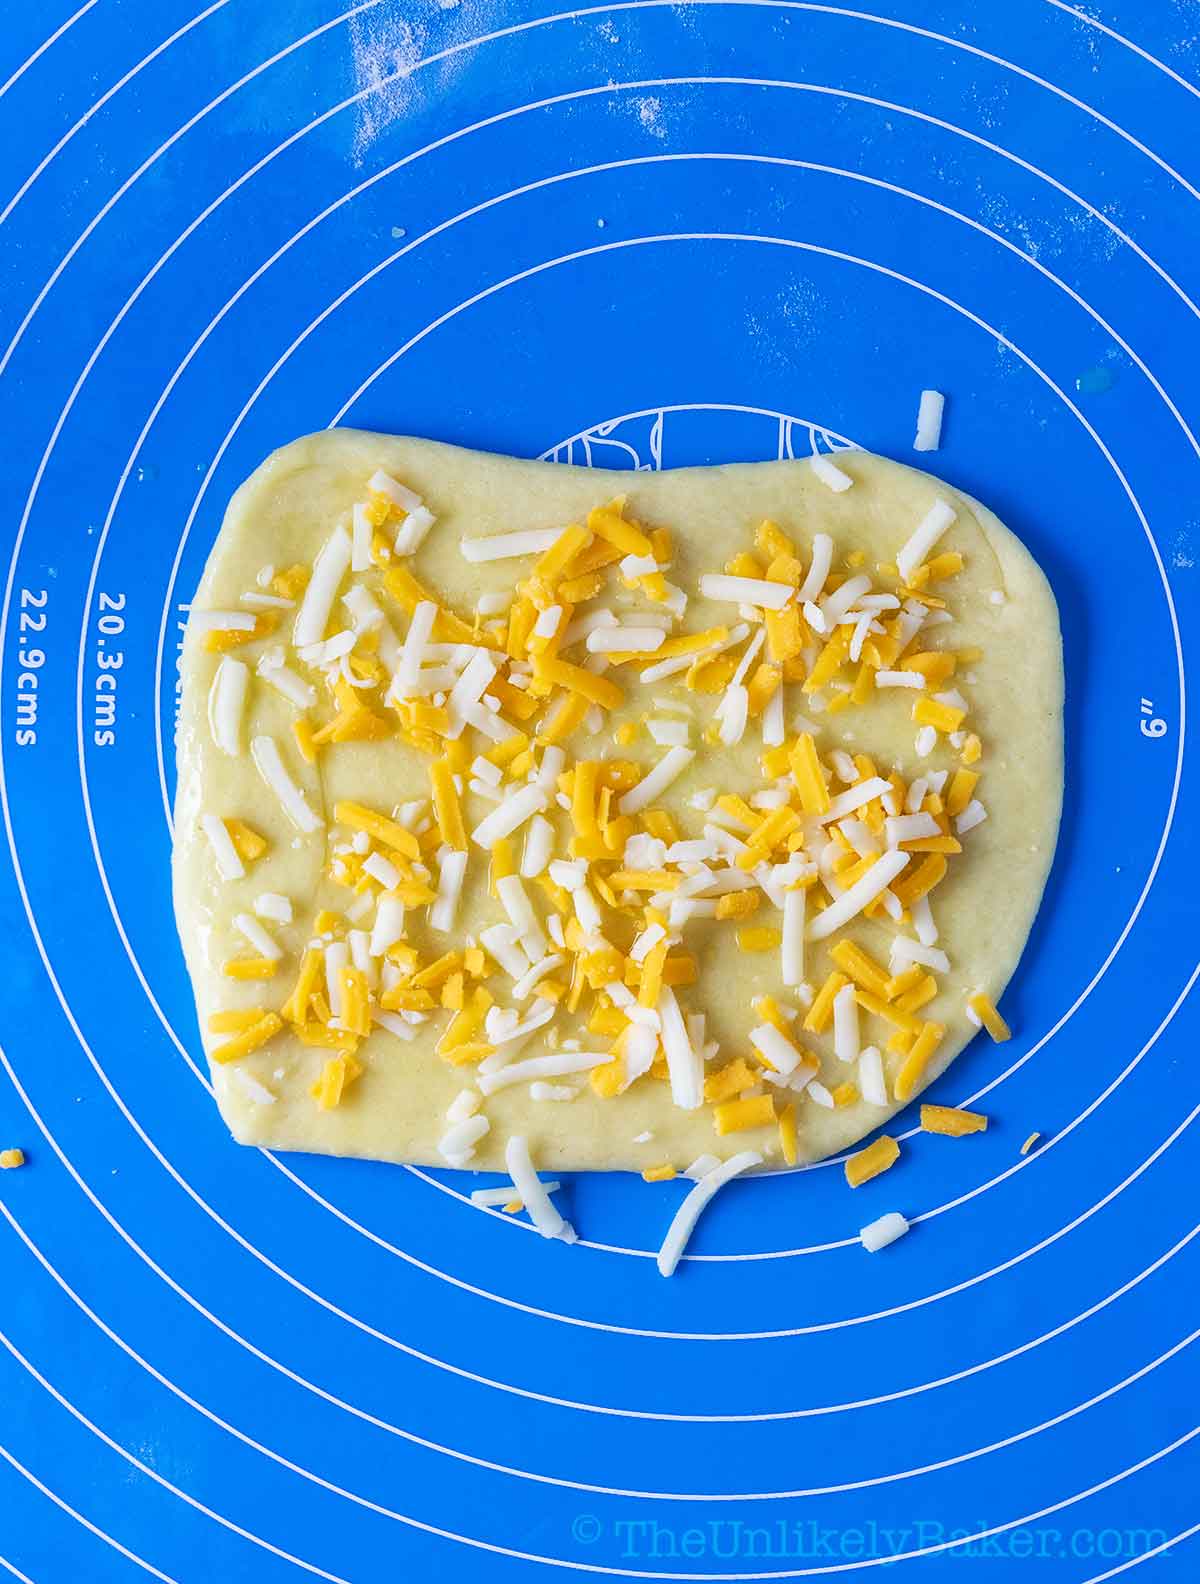
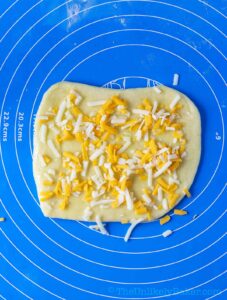
(5) Brush each piece with melted butter and sprinkle with cheddar cheese.
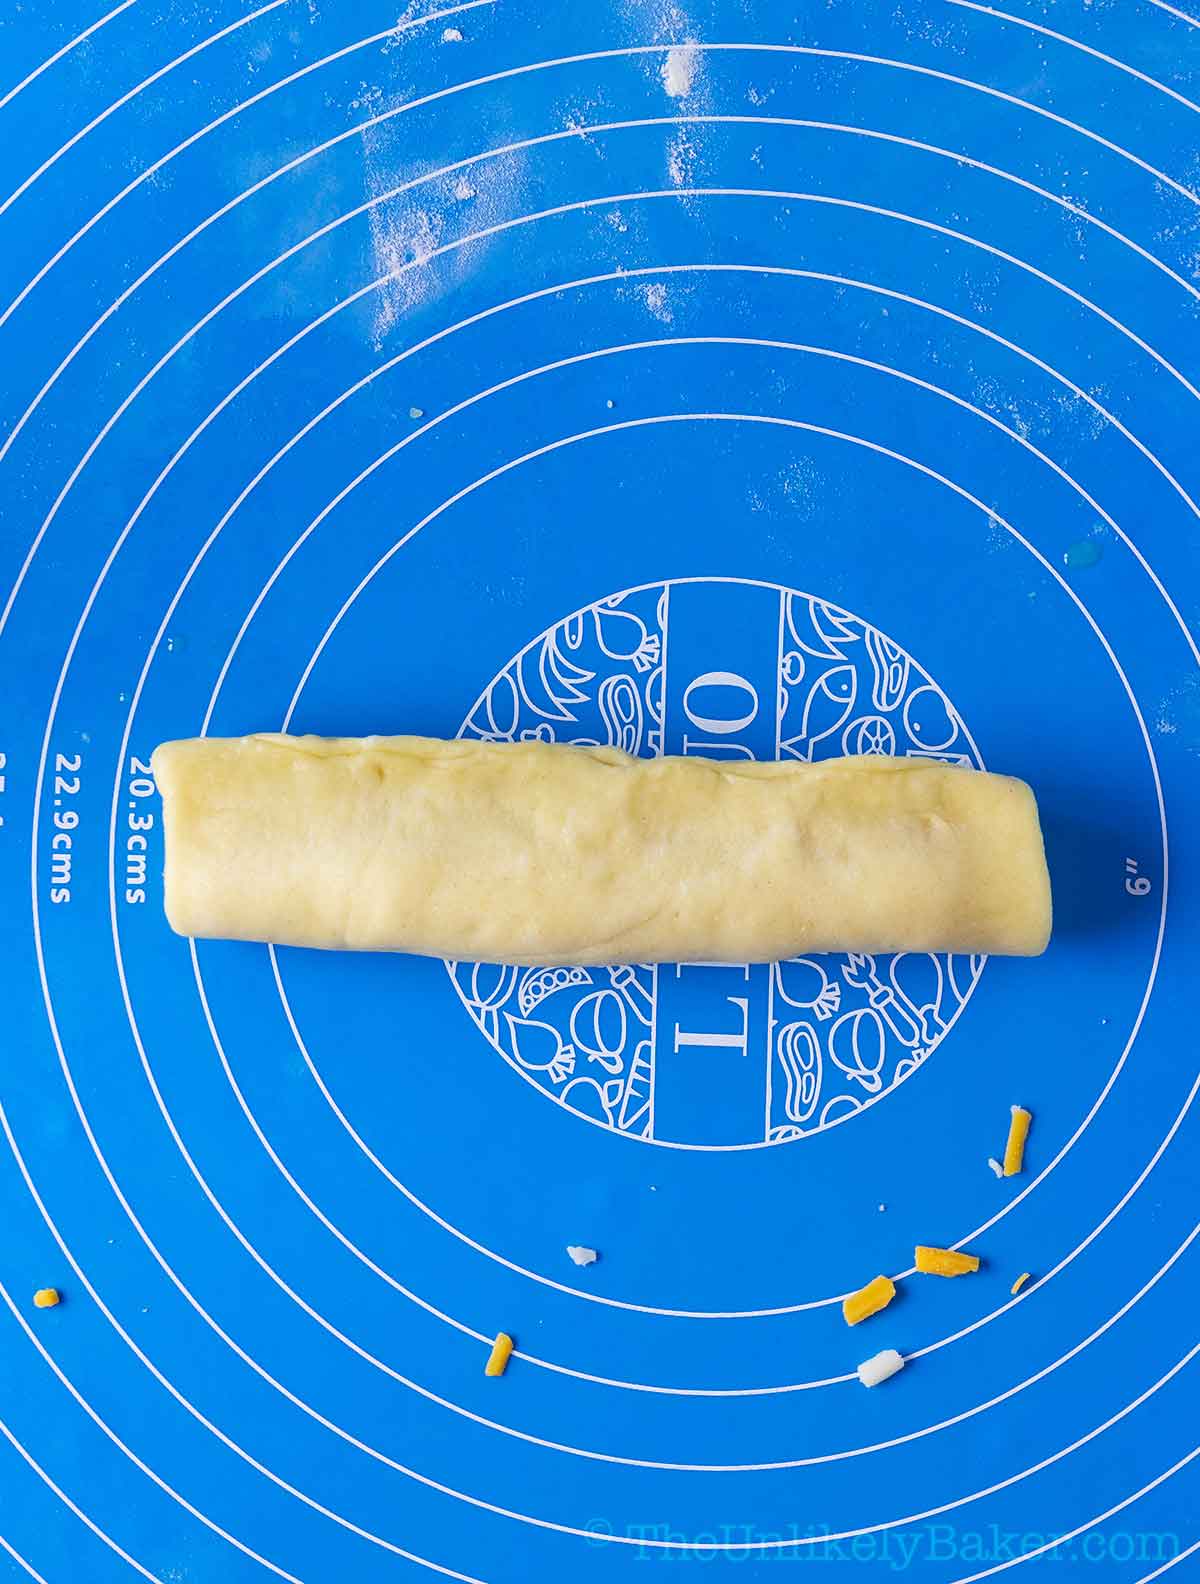
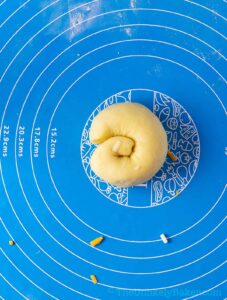
(6) Roll the dough tightly up and pinch the edges to seal.

(7) Roll each one unto itself, like a spiral.

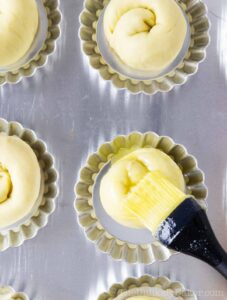
(8) Place on your moulds and brush the tops with butter. Cover with a damp cloth and allow to rise for another 30 minutes.
Preheat your oven to 375F and bake for 20 minutes or until golden brown. Be careful not to over bake your bread.
Bring out of the oven, allow to cool in the mould and when they’re cool enough to handle, you can proceed to phase 5 and put your toppings.
PHASE 5: Brush the still warm ensaymada with melted butter then dip in a bowl filled with granulated sugar. Sprinkle with cheddar cheese. Enjoy!
Baking tips and recipe FAQs
For the fluffiest ensaymada, allow your dough to rise in a warm, dry place.
I use my oven for this. I preheat it to 100F then turn it off just when I’m about to knead my dough. This way, the temperature would have gone down to 90F when I put my dough in.
If your oven has a keep warm feature, you can also use that.
For evenly sized ensaymada that won’t only look pretty but bake evenly as well, use a kitchen scale to make sure the dough is evenly divided.
It’s simple: I weigh all the dough and divide by 12. Whatever that number is, I make sure each individual dough is exactly that weight.
This recipe makes 12 fairly big ensaymada but you can make smaller and even mini ones if you like. The procedure is the same. You’ll just need to watch your baking time.
To make ensaymada bread, I use ensaymada moulds which my sister brought for me in Manila. They’re similar to brioche moulds![]() and you can find them at your local baking supplies store and Amazon.
and you can find them at your local baking supplies store and Amazon.
You don’t need to buy them though. If you have a muffin pan, you’re good to go. You can also use a cake pan. Your cheese ensaymada would just be the pull-apart kind, like cinnamon rolls.
I prefer the original ensaymada with butter, sugar and cheese but you can absolutely customize this recipe to add your favourite ingredients. For example:
– You can top your ensaymada with salted eggs or cream cheese
– You can use a triple cheese mixture in your filling and topping
– If it’s Christmastime, you can even use queso de bola
– Ham and cheese would also make for delicious fillings
– And I remember eating a grilled ensaymada in the Philippines once; it was fantastic
Experiment and make the best version of ensaymada you can!
You’re all set! Enjoy your freshly baked cheesy, buttery creations for breakfast or, like most Pinoys, as merienda or afternoon snack. Dunk it in tsokolate while you’re at it. Enjoy!
If you’re looking for other Filipino food recipes, these are TUB reader favourites:
And if you want to try baking cheesy sourdough bread, try this delicious sourdough cheese bread recipe.
Happy baking!
I’d love to hear all about it! Leave a comment or a star rating below. You can also tag me on Instagram or Facebook. I’d love to see your creations!
You can also find me on Pinterest, Twitter and YouTube.

Easy Ensaymada Recipe
Equipment
Ingredients
Phase 1:
- ½ cup warm water approx 110F
- 1 package active dry yeast 0.25 ounces
- 1 tsp granulated sugar
Phase 2:
- ½ cup milk
- ¼ cup granulated sugar
- 1 tsp salt
- ¼ cup unsalted butter room temperature
Phase 3:
- 2 pcs large eggs room temperature, lightly beaten
- 4 cups all purpose flour
- 1 tbsp canola oil or vegetable oil
Phase 4:
- ½ cup unsalted butter melted and allowed to cool slightly
- 1 cup shredded sharp cheddar cheese
Phase 5:
- Melted butter
- Granulated sugar
- Shredded sharp cheddar cheese
Instructions
Phase 1:
- In a measuring cup, stir ½ cup warm water, 1 package active dry yeast and 1 teaspoon sugar until dissolved. Set aside and let stand until bubbly (about 10 minutes).

Phase 2:
- In a medium saucepan on medium heat, warm ½ cup milk until you see bubbles forming at the edges (about 180F). Remove from heat and stir ¼ cup sugar, 1 teaspoon salt, and ¼ cup butter until the butter has melted.
- Set aside and let cool until lukewarm.
Phase 3:
- In a large bowl, combine your yeast mixture, your milk mixture, eggs and 1 ½ cups flour. Stir until combined. Proceed to add the rest of your flour ½ cup at a time combining well after each addition.
- Once the dough starts pulling and sticking together in a ball, transfer it into a lightly floured surface.
- Knead until smooth and elastic (8-10 minutes). When in doubt, knead some more. You want the dough still slightly sticky but elastic. Careful not to over flour your surface or dough.
- Oil a large bowl with 1 tablespoon canola oil. Place your dough in the bowl and turn to ensure the whole dough is coated.
- Cover with a damp cloth and allow to rise in a dry warm place (about 90F – see post for tips) until it doubles in size (about 1 hour).

Phase 4:
- When your dough is ready, transfer it into a lightly floured surface and roll out slightly.
- Evenly divide the dough into 12 pieces (see notes).
- Flatten each one into a 4×6 inch rectangle.
- Brush each piece with melted butter and sprinkle with cheddar cheese.
- Roll the dough tightly up and pinch the edges to seal.
- Then roll each one into itself (like a spiral) and place onto your ensaymada moulds (see notes).
- Brush the tops of each ensaymada with butter, cover with damp cloth and let rise for another 30 minutes. I usually just leave it on the counter.
- Preheat your oven to 375F and bake for 20 minutes or until golden brown. Do not over bake. Let cool in the mould and when it’s cool enough to handle, put your toppings.


Phase 5:
- Brush the still warm ensaymada with melted butter then dip in a bowl filled with granulated sugar. Sprinkle with cheddar cheese. Serve warm.
Video
Notes
- I keep my dough in my oven for the 1st rise. I usually preheat it to about 100F then turn it off just when I’m about to knead my dough. This way, the temperature would have gone down to 90F when I put my dough in. You can use the stay warm feature if you have it.
- I use a kitchen scale to make sure my dough is evenly divided.
- If you don’t have ensaymada moulds, you can use a muffin pan instead.
- See post for the complete step-by-step photos and tips for making perfect ensaymada every time.
Nutrition
Nutritional information are estimates only.

Minette
Hi! Can I use instant yeast instead? If so, how much do I use? Thank you
Jolina
Hi Minette, I always use active dry but here’s an article I found about substitutions. Hope it helps!
Zsaleh SANTOS Rahimi
I MADE THESE AND THEY WERE SO SO GOOD! sooo soft! I don’t have the molds, so I baked them in a tray, cinnamon bun style. I was so cautious not to over-bake so they could retain that nice moisture so in my oven I did 18 min and they came out perfect! my mommy was so proud 🙂 My family has been requesting I make another batch (which I will be doing today 🙂 )
I love your steps, makes it so easy to stay on track! Organizing is key so you don’t miss any steps/ingredients. just genius!
Jolina
I’m so glad you and your family liked them Zsaleh! Hope you’re having a wonderful holiday season.
Katrin
These look totally sinful and rather irresistible!
Donella
Can you do this recipe in a bread machine to prepare the dough (dough setting only) and than take out and put in to molds?
Bobbi
I totally understand being dough challenged. It has been a hit or miss with me int he past. This sounds absolutely delicious though so I may have to give it a try 🙂
Jolina
It’s so frustrating isn’t it?? But when I get it right, well it’s hard to beat the smell of freshly baked bread 🙂 Thanks Bobbi! Hope you like this!
Liz
I love learning about these new recipes from your blog! Sweet rolls and cheese are two of my favorite things, so I’m positive they’re even better together. The hot chocolate sounds perfect with it as well!
Jolina
Hi Liz! I’m glad 🙂 Sugar and cheese, hard to say no to! And hot chocolate of course. Hope you’re having a great week!
Sharon
Yum! This bread looks heavenly! It reminds me of mallorca sweet bread from Puerto Rico, except it doesn’t have cheese. I think I’d love the addition of the cheese. I mean, cheese + carbs?! How could you go wrong with that?! And if you can make this, you can definitely make any other yeasty treat!
Jolina
Aw thanks Sharon! Coming from you that means a lot 🙂 I really want to get better this year.
Marlynn
Yes!! Ensaymada! Ahh I haven’t had one in forever and have never thought about making them at home but now I will. So simple, and so delicious!
Jolina
It’s a childhood favourite! 🙂 Perfect with tsokolate!
Ali Rost
I thought I’d hard of most everything .. but ensaymadas were new! Thank-you so much for sharing .. can’t wait to give them a try
Jennifer Shull
I had never heard of these before but I want one NOW!!! The photos look so yummy. I can’t wait to try them out. Thanks for sharing and Happy New Year!
Jolina
Thanks Jennifer! Happy new year to you too!
Kimberly
I’ve never heard of ensaymada, but it looks wonderful. Who wouldn’t like buttery, sweet, bread topped with cheese? Yum!!
Jolina
I must admit, buttery, sweet and cheesy is pretty hard to resist 🙂 Thanks Kimberly!
Britney Barlow
All of the food on your blog looks lovely! 🙂
I really want those scones!
Jolina
Thanks Britney! 🙂 Those scones are actually one of the most popular recipes on here, hope you get to make them one day soon! They’re quick and easy and delicious 🙂
Imaobong
Never heard of this yummy goodness before now but it sounds and looks too good, taking down the recipe right now 😀
Jolina
Awesome! Hope you like them 🙂